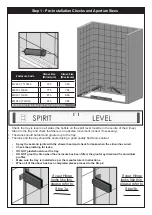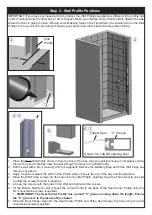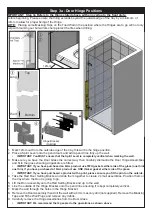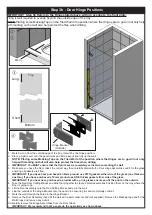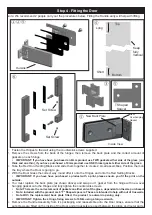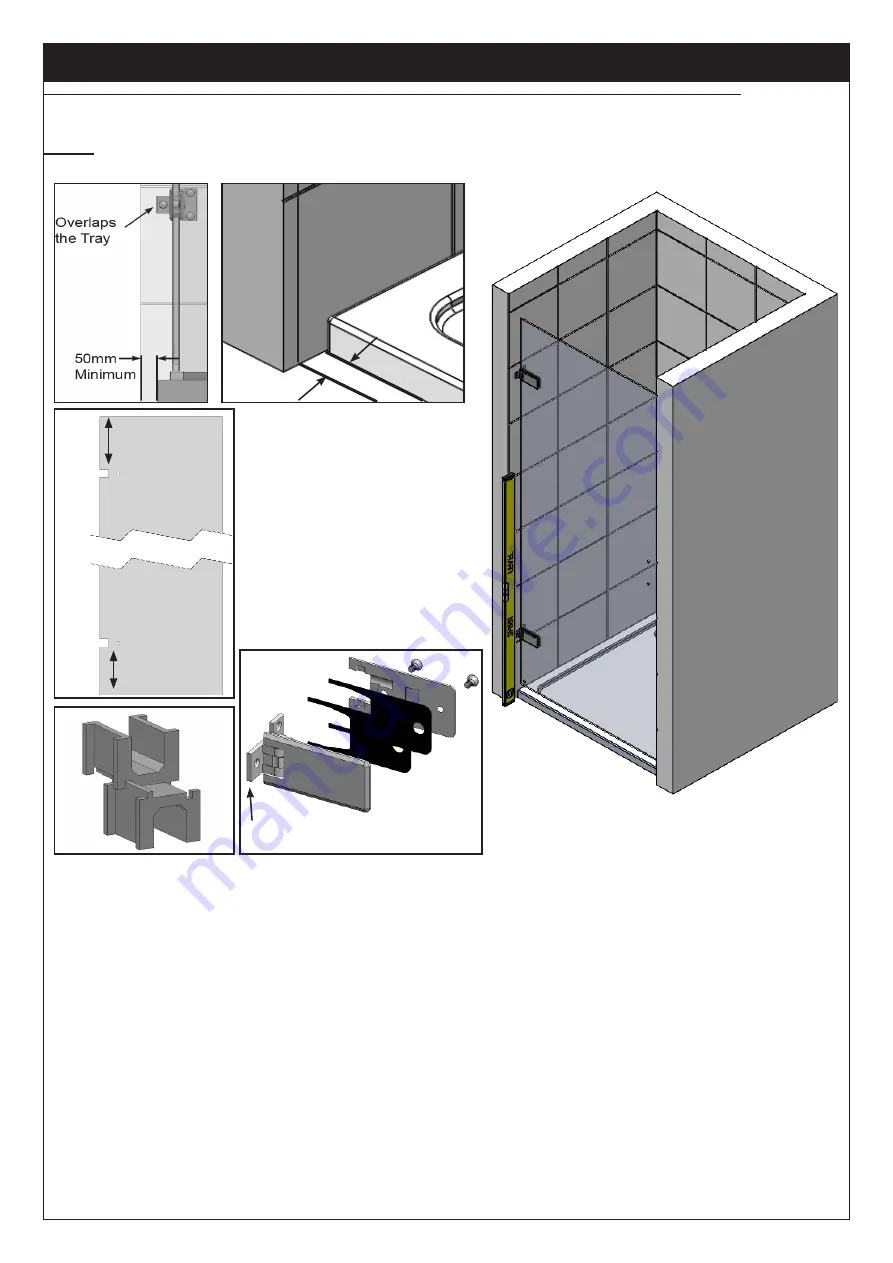
Step 3a - Door Hinge Positions
IMPORTANT: Step 3a Refers to the Hinge stated above, with an overlap to the front plate.
Before beginning, Please ensure that tiling extends beyond the outside edge of the tray by a minimum of
50mm to allow for proper fixing of the Hinge.
NOTE:
Placing some Masking Tape on the Tiled Wall in the position where the Hinges are to go will not only
help with marking out but will also help protect the tiles when drilling.
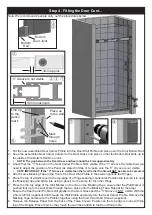
1. Mark 12mm out from the outside edge of the tray, this will be the hinge position.
2. Place a Spirit Level onto the pencil mark and add a pencil line fully up the wall.
• IMPORTANT: You MUST ensure that the Spirit Level is completely vertical when marking the wall.
3. Make sure you have the Door Glass the correct way then carefully dismantle the Door Hinge Assemblies
and fit to the glass ensuring all gaskets are fitted.
• IMPORTANT: If you have purchased an 8mm product use TWO gaskets either side of the glass (one thick
one thin), if you have purchased a 10mm product use ONE thicker gasket either side of the glass.
•
IMPORTANT: If you have purchased a product with a print, please ensure you fit the print on the outside.
4. Take the Red Door Setting Blocks and slide them together to create 2 small assemblies. Position them on
the tray where the Door is going to go.
5. Lift the Door assembly onto the Red Setting Blocks and up to the wall.
6. Line the outside of the Hinge Bracket onto the pencil line ensuring it is kept completely vertical.
7. Mark the wall through the holes in the Hinge Bracket.
8. Remove the Door Assembly then drill the wall with a 6mm masonry drill (not supplied). Remove the Masking
Tape and fit the Wall Plugs and remove any debris.
9.
Carefully remove the Hinge Assemblies from the Door Glass.
• IMPORTANT: We recommend that 2 people do the operations as shown above.
Top
Bottom
Long
Short
③
④
②
Hinge Bracket
(Outside)
12mm
②
①


