23
Video Operations
Fading-In/Out the Final Output Video
Here’s how to perform a fade-out from the final output video to a
black/white screen, or a fade-in from a black/white screen to the final
output video.
A scene that you don’t want to output as video can be changed to a
black/white screen.
* The final output video and audio fades in/out together when using
the factory default settings.
* The fade-in/out effect is applied only to the final output.
1
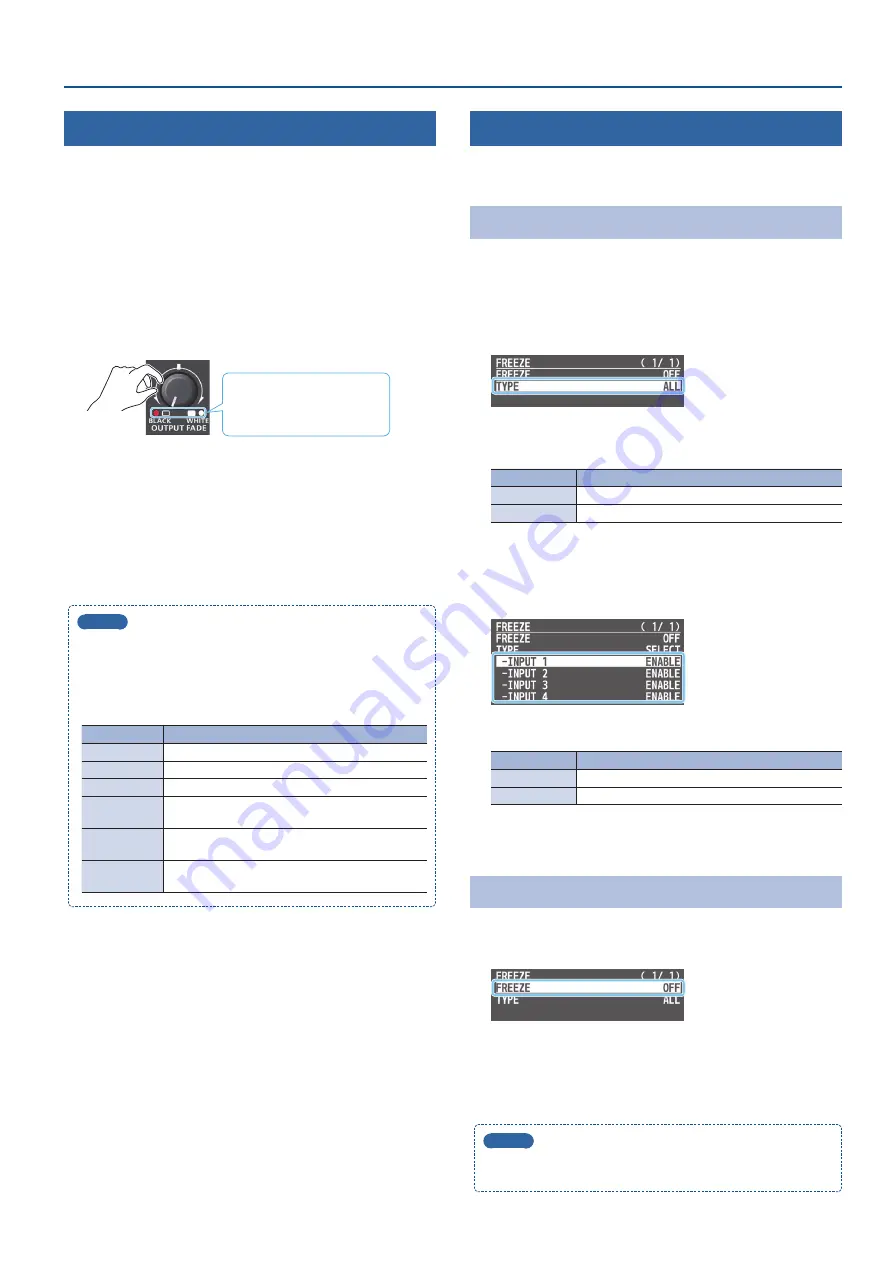
Turn the [OUTPUT FADE] knob all the way clockwise or
counterclockwise.
Lit:
Faded out
Blinking: Now fading-in/out
Unlit:
Normal output
Turning the [OUTPUT FADE] knob clockwise performs a fade-out
to white, and turning the knob counterclockwise performs a
fadeout to black.
2
To fade-in, return the [OUTPUT FADE] knob to the center.
MEMO
[OUTPUT FADE] knob functions
You can assign a different function to control with the [OUTPUT
FADE] knob.
To make this setting, use the [MENU] button
0
“SYSTEM”
0
and
set OUTPUT FADE ASSIGN “TURN LEFT” or “TURN RIGHT.”
Value
Explanation
BLACK
The final output video is faded-in/out to a black screen.
WHITE
The final output video is faded-in/out to a white screen.
AUDIO
Adjusts the output volume.
BLACK&AUDIO
Fades-in/out the final output video and audio
simultaneously. The video fades to a black screen.
WHITE&AUDIO
Fades-in/out the final output video and audio
simultaneously. The video fades to a white screen.
STILL 1–4
OUTPUT
The specified still image is output as a cut to final/
preview output.
Freezing the Input Video (Freeze)
Here’s how to temporarily freeze the input video (freeze function).
You can apply transition effects during a video freeze.
Setting the Operation mode
There are two freeze modes: the “ALL mode” for freezing all input
video, and the “SELECT mode” that freezes only the input video you
specify. Set the mode that matches your needs.
1
[MENU] button
0
“FREEZE”
0
select “TYPE,” and press the
[VALUE] knob.
2
Turn the [VALUE] knob to select “ALL” or “SELECT,” and
press the [VALUE] knob.
Value
Explanation
ALL
Freezes all video that is being input.
SELECT
Freezes only the specified input video.
If “SELECT” is selected
3
Use the [VALUE] knob to select “INPUT 1”–“INPUT 4,” and
press the [VALUE] knob.
4
Use the [VALUE] knob to select “ENABLE” or“DISABLE.”
Value
Explanation
ENABLE
The input video freezes.
DISABLE
The input video does not freeze.
5
Press the [MENU] button several times to close the menu.
Freezing the Input Video
1
[MENU] button
0
“FREEZE”
0
select “FREEZE,” and press
the [VALUE] knob.
2
User the [VALUE] knob to select “ON.”
The freeze function turns on, and the input video freezes.
3
Press the [MENU] button several times to close the menu.
MEMO
You can assign the freeze function to the [DSK PVW] or [DSK ON]
button and turn it on/off (p. 41).


