background image

35

Creating and playing a loop

Playback

1

Press one of the following buttons to select how you want 
playback to occur. Then select the pattern or effect pattern that 
you want to play.

2

To begin loop playback, press the [

](PLAY) button.

* When you press the [

](PLAY) button, playback will always start from the 

beginning of the loop. It is not possible to play back from the middle.

3

To stop loop playback, press the [

](STOP) button.

The loop will continue playing back repeatedly until you press the 
[

](STOP) button.

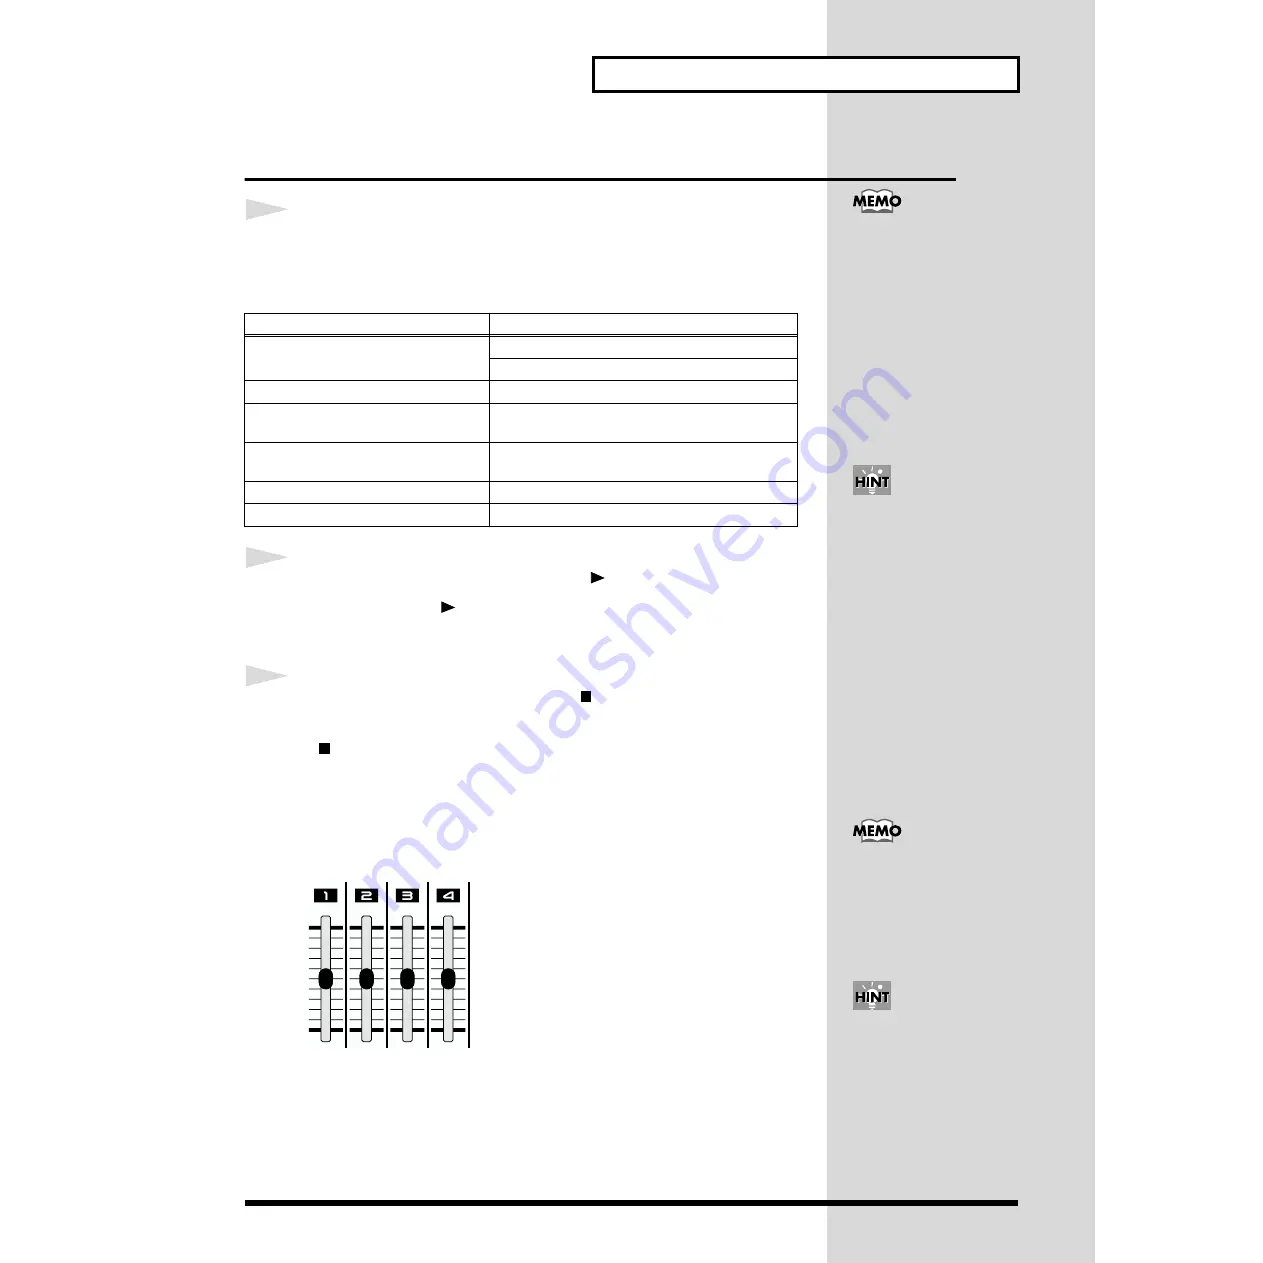
Adjusting the volume balance of the parts

Use the part level sliders to adjust the volume balance.

fig.3-2

Button

Playback method

[LINE IN]

Play back a loop by itself

Play back a loop together with an external device

[LEAD], [BASS], [RHYTHM]

Play back a pattern and loop together

[SHIFT] +
 [LEAD], [BASS], [RHYTHM]

Play the keyboard pads together with the loop 
playback (don’t play the pattern phrase)

Select [LEAD], [BASS], [RHYTHM], 
then [SHIFT] + [LINE IN]

Play back a pattern and loop together with an ex-
ternal device

[EFFECT]

Play back a loop while applying an effect (p. 41)

[LOOP CTRL]

Modify the way in which a loop plays back (p. 53)

If you’ve selected a pattern, 
effect pattern, or loop 
control pattern, it will 
play/stop in 
synchronization with the 
loop.

To check the number of 
measures in the loop, press 
the [DISPLAY] button so 
the TONE/TYPE indicator 
lights, and then press the 
[SHIFT] button and 
[STATUS] button. 
In this state, you can use 
the [INC] or [DEC] buttons 
to change the number of 
measures in the loop.

If you are playing the loop 
together with a pattern, use 
the [LEVEL] knob to adjust 
the volume of the pattern. 
Use the [OUTPUT] knob to 
adjust the overall volume.

The position of the sliders 
may differ from the actual 
setting. In this case, slide 
the sliders slightly, and 
then make the setting 
again.

Summary of Contents for PhraseLab MC-09

Page 1: ...Rue Paul Henri SPAAK Parc de l Esplanade F 77 462 St Thibault Lagny Cedex FRANCE TEL 01 600 73 500 FINLAND Roland Scandinavia As Filial Finland Lauttasaarentie 54 B Fin 00201 Helsinki FINLAND TEL 9 6...

Page 2: ...ces that are Subject to temperature extremes e g direct sunlight in an enclosed vehicle near a heating duct on top of heat generating equipment or are Damp e g baths washrooms on wet floors or are Hum...

Page 3: ...only the plug or the body of the AC adaptor when plugging into or unplugging from an outlet or this unit 103b Whenever the unit is to remain unused for an extended period of time disconnect the AC ad...

Page 4: ...the improper operation of the unit To protect yourself against the risk of loosing important data we recommend that you periodically save a backup copy of important data you have stored in the unit s...

Page 5: ...ings your unit originally had when it left the factory If internal memory contains important data that you want to keep you must save it on a memory card p 59 or to an external MIDI sequencer via bulk...

Page 6: ...1 37 Combining several parts into one Loop Merge 38 Erasing the contents of a part 39 Saving the steps by which you created a loop Process Patch 39 Applying an effect 41 Specifying the effect routing...

Page 7: ...Loading MC 09 settings 60 Deleting saved MC 09 settings from a memory card 60 Connecting external MIDI devices 61 Setting the MIDI channel 61 Using the MC 09 as the master 61 Using the MC 09 as the sl...

Page 8: ...ed on 6 SCALE Button p 24 This button selects the note value unit step time when recording 16th notes indicator dark 8th note triplets indicator lit 7 KEYBOARD Button p 18 Press this button so the ind...

Page 9: ...e capture volume 19 CAPTURE Button p 33 This button records captures an audio signal Audio Looper Section 20 Part Volume Sliders p 35 These sliders adjust the volume for each part of the audio looper...

Page 10: ...wdriver to remove both screws that are at either side of the memory card slot 2 Insert the memory card into the memory card slot 3 Use the screws to fasten the card protector as shown below 9 Security...

Page 11: ...MC 09 provides INPUT jacks you can combine the MC 09 s sounds with performances audio signals from another device such as a CD MD or keyboard Capture record a performance from an external device and...

Page 12: ...connections When connecting other equipment to the INPUT or OUTPUT jacks be sure to use cables that do not have a built in resistor e g the Roland PCS series MIDI IN MIDI OUT OUTPUT R OUTPUT L INPUT L...

Page 13: ...urn on the power of the device connected to the INPUT jacks 3 Turn on the power of the MC 09 4 Turn on the power of the device connected to the OUTPUT jacks 5 Adjust the volume of all devices On the M...

Page 14: ...card p 30 LEAD Patterns suitable for playing melodies BASS Patterns suitable for playing bass RHYTHM Patterns suitable for playing drums or percussion A sound used by a pattern in the LEAD or BASS gro...

Page 15: ...PLAY button after you ve stopped playback midway through the pattern playback will begin again from the beginning of the pattern It is not possible to play back from the middle of a pattern 5 To stop...

Page 16: ...at the selected pattern includes Loop Control settings p 53 4 When selecting a pattern from a card or when switching to another pattern while the current pattern plays press the ENTER button to finali...

Page 17: ...low Distortion 1 Distortion 2 without filter envelope keyfollow Phaser 1 A light phaser effect is obtained Phaser 2 A light phaser effect is obtained tempo sync Phaser 3 A deep phaser effect is obtain...

Page 18: ...n from the LEAD or BASS group is selected fig 2 3a_80 The Octave Shift setting will change the range of notes that you can play from the keyboard pads as follows C4 middle C When a pattern from the RH...

Page 19: ...09 s patterns and output from the OUTPUT jacks 1 Select a pattern 2 Hold down the SHIFT button and press the LINE IN button Either the LEAD BASS or RHYTHM button indicator and the LINE IN indicator w...

Page 20: ...ttern 2 Press the DISPLAY button enough times to get the TONE TYPE indicator to light The display will show the number of the tone or rhythm set that is assigned to the pattern Group C1 C2 C3 CUTOFF R...

Page 21: ...one of the step 1 16 buttons to select the parameter whose value you want to adjust The display will show the value of the parameter you selected fig 2 4 3 Use the INC and DEC buttons to adjust the v...

Page 22: ...power the pattern will revert to its original pan setting If you want to keep your new setting you must carry out the Save procedure p 30 Adjusting the pitch Here s how to adjust the pitch of a patte...

Page 23: ...e recorded Step recording In this method you successively input the note for each step fig 2 5_80 TR recording In this method you first specify the note that you want to input and then place that note...

Page 24: ...p 20 3 Adjust the tempo as desired p 57 4 Press the SEQ REC button The MC 09 enters Step Edit mode allowing you to edit the phrase 5 Press the SETUP button The MC 09 enters Setup mode allowing you to...

Page 25: ...t which you want to begin step recording If you are creating a new phrase start step recording from step 1 If you are step recording from the middle of an existing phrase select the desired step It is...

Page 26: ...step 16 Repeat steps 13 15 to create your phrase If you want to redo the settings of the previous step press the DEC button to move backward to that step and make the desired settings 17 When you are...

Page 27: ...for a BASS group pattern fig 2 8_80 Rhythm tone Display Bass drum Snare drum Closed hi hat Opened hi hat These pages use the example of creating a drum phrase to explain TR Recording but you can also...

Page 28: ...ening to the repeated playback repeat steps 12 15 to create your phrase While you are recording the phrase will play back repeatedly Whenever you input notes they will be reflected in the playback 17...

Page 29: ...urned on for a BASS group pattern 6 When you ve finished editing press the STOP or EXIT button You will exit Step Edit mode C1 knob C2 knob C3 knob Note Rhythm tone Velocity Gate time Velocity Note Ga...

Page 30: ...ink 2 Use the INC and DEC buttons to select the save destination pattern number Select U01 U20 if you want to save to internal memory or C01 C50 if you want to save to a memory card Since the data you...

Page 31: ...ll four loops simultaneously or play just a specific part For part 1 you can use a variety of editing and control functions Loop Control to create even more sophisticated loops You can combine your fa...

Page 32: ...external device or a loop 1 Press EFFECTS to turn effects on p 42 2 Specify what the effect is to be applied to p 41 3 Select an effect pattern p 42 4 Make effect settings p 43 5 Set the tempo p 57 6...

Page 33: ...button 5 Press the CAPTURE button to start capture If other parts have already been captured those parts will also begin playing If you do not want other already captured parts to play press their ST...

Page 34: ...oop Capture Quantize The timing at which you stop capture is an important factor in creating a precise loop If you stop capturing at the wrong time the loop length and the timing of the measures in th...

Page 35: ...BASS RHYTHM Play the keyboard pads together with the loop playback don t play the pattern phrase Select LEAD BASS RHYTHM then SHIFT LINE IN Play back a pattern and loop together with an ex ternal devi...

Page 36: ...the pan in a range of L64 left cnt center R63 right 4 When you are finished adjusting the pan press the PAN or EXIT button Applying effects Refer to p 41 Changing the tempo Refer to p 57 When you chan...

Page 37: ...de 5 To stop loop playback press the STOP button C1 knob C2 knob C3 knob Playback pitch Location at which the sound will begin Position Length at which the sound will begin Length The position of the...

Page 38: ...merge but will not be reflected by the part after loop merge 1 Press the LOOP MERGE button The FROM indicator will light and the indicators of SEL buttons for which a capture has been carried out wil...

Page 39: ...he steps by which you created a loop or made pattern settings This is called a process patch When you play back a process patch the operations you performed when creating the loop will be performed on...

Page 40: ...ess the WRITE button to save the settings While the settings are being saved the display will indicate bsy When saving has been completed you will return to the screen in which you were before beginni...

Page 41: ...he SHIFT button and press the SEL button of a part to specify whether the effect will be applied to that part SEL button indicator lit Apply the effect to the part SEL button indicator blinking Don t...

Page 42: ...elease the SHIFT button and then release the EFFECT button the effect will remain on Selecting an effect pattern When using an effect you can have the effect settings change along with the performance...

Page 43: ...icer The adjustments you make here are temporary If you want to keep the new settings you must Store them p 48 For some settings you can synchronize the rate of the filter phaser or slicer to the stan...

Page 44: ...he note value for synchronization 16th note 8th note quarter note half note whole note whole note x2 whole note x4 Effect type Parameters that can be controlled Smoothing Synchroni zation Filter Cutof...

Page 45: ...steps and you can input a value for each step to specify how the effect will change For example you can use effect control to vary the cutoff frequency of the filter so that the filter will open and...

Page 46: ...rnal input start playing the external input as well If a loop has been recorded in the looper the loop will begin playing at the same time 4 To stop playback press the STOP button Making effect contro...

Page 47: ...one of the step buttons and then press the button s for the other step s 9 Turn the C3 knob to input the value 10 Repeat steps 8 and 9 to make effect control settings 11 When you are finished making e...

Page 48: ...destination effect pattern number Select U01 U20 if you want to save the settings in internal memory Select C01 C50 if you want to save the settings on a memory card Since the data you save will over...

Page 49: ...lets you play the loop at specific pitches Pitch can be used only for part 1 fig 5 1_80 When you change the pitch the playback speed of the loop itself will change correspondingly similarly to how the...

Page 50: ...of a drum performance so that the performance is approximately divided into individual rhythm instruments such as bass drum snare drum and hi hat Then you can use this to create a new performance in...

Page 51: ...e turned on 3 Press the DISPLAY button so the TONE TYPE indicator lights 4 Press the INC or DEC button to get the display 5 Perform the sound by pressing the step 1 16 button corresponding to the desi...

Page 52: ...will sound However it will not play back repeatedly 6 When you are finished with trigger performance press the LOOP CTRL button so the indicator goes out Realtime performance using Divide times 16 You...

Page 53: ...If a loop has not been loaded into the Audio Looper there will be no sound even if you press the PLAY button 2 Select a pattern or effect pattern that uses Loop Control When you select a pattern or ef...

Page 54: ...ttons to select the loop control type Pitch Trigger Divide times 16 5 Press the SEQ REC button You will enter a mode in which you can make loop control settings Step Edit 6 Press the SETUP button This...

Page 55: ...r button The settings you make are temporary If you want to keep your new settings you must save them p 56 Type Value Explanation Pitch 12 12 TIE REST Raise or lower the pitch by up to 1 octave in sem...

Page 56: ...lect U01 U20 to save your data in internal memory or C01 C50 to save your data on a memory card Since the data you save will overwrite any previous data at that location the previous data will be lost...

Page 57: ...Checking the standard tempo 1 Press the DISPLAY button so the BPM indicator lights The value shown in the display is the current standard tempo If the MC 09 is set to synchronize to an external MIDI...

Page 58: ...turn on the power when a memory card is inserted part way into the slot Doing so will damage the data in internal memory Never turn off the power while appears in the display Doing so will damage the...

Page 59: ...emory card into the audio looper 1 Press the SETUP button 2 Press the INC or DEC button until the display indicates 3 Press the ENTER button The display will show one of the file numbers L01 L50 that...

Page 60: ...MC 09 settings saved on a memory card can be loaded back into the MC 09 1 Press the SETUP button 2 Press the INC or DEC button until the display indicates 3 Press the ENTER button The display will sho...

Page 61: ...he SETUP button 2 Press the INC or DEC button until the display indicates MIDI Channel This lets you set the MIDI channel 3 Press the ENTER button The display will show the MIDI channel 4 Use the INC...

Page 62: ...ronizing an external MIDI sequencer Here s how you can make an external MIDI sequencer play back in synchronization with the tempo of the MC 09 For details on setting the tempo of the MC 09 refer to A...

Page 63: ...C 09 s pattern effect pattern or loop control pattern You can also transmit control change messages to modify the MC 09 s sound settings 1 Set the MC 09 and your MIDI device to the same MIDI channel p...

Page 64: ...cer Pattern effect control or loop control playback will also begin on the MC 09 9 When playback ends stop your external MIDI sequencer Using the MC 09 with your computer By using the MC 09 in conjunc...

Page 65: ...ng you to confirm the operation If you decide to cancel press the EXIT button 7 Begin recording on your external MIDI sequencer 8 Press the ENTER button to initiate the bulk dump While the data is bei...

Page 66: ...nthesizer performance or an external audio source By repeatedly playing back the recorded sounds you can play loop phrases for up to four parts In addition this playback can be played simultaneously w...

Page 67: ...frequency BASS OSC tune Filter envelope depth Accent Cutoff fre quency Resonance Filter envelope decay time Tone RHYTHM Bass drum level Snare drum level Hi hat level Rhythm set EFFECT Filter Rate Cuto...

Page 68: ...depth 0 127 SHIFT STEP 9 Applies a wah effect Amp envelope depth 0 127 SHIFT STEP 10 Adjusts the depth of the amp envelope Amp envelope attack time 0 127 SHIFT STEP 11 Specifies the time from when th...

Page 69: ...he cutoff frequency Filter envelope decay time 0 127 DECAY knob Decay time over which the cutoff frequency changes from the maxi mum value to a stable level Tone Refer to Sound List p 76 INC DEC butto...

Page 70: ...INC DEC DISPLAY TONE TYPE Selects the effect type Parameter Range Controller Parameter function Low gain 0 127 C1 knob Specifies the volume of the lower range Middle gain 0 127 C2 knob Specifies the v...

Page 71: ...FF ON Specifies whether control change messages will be received Receive pitch bend OFF ON Specifies whether pitch bend messages will be received Receive system ex clusive OFF ON Specifies whether sys...

Page 72: ...won t synchronize to the tempo You have selected an effect type that can not be synchronized Select an effect type that allows synchroniza tion 44 If synchronizing to the tempo of an exter nal MIDI de...

Page 73: ...nce again Also check whether a MIDI cable is disconnected or broken E05 It is possible that the contents of internal memory have been damaged Try performing the Factory Reset operation If this does no...

Page 74: ...Off Reset All Controllers Local On Off All Notes Off Active Sensing System Reset X X X O X O O O O O O O O O O O O 1 O 1 O 1 O 1 X O 1 O 1 O 1 O 1 O 1 O 1 O O X X X O O X X X X O X 1 16 1 16 Mode 3 M...

Page 75: ...t Impedance INPUT 42 k Nominal Output Level OUTPUT 10 dBu Output Impedance OUTPUT 600 PHONES 100 Residual Noise Level LINE IN OFF input terminated with 150 IHF A typ 88 dBu Connectors INPUT L R Jacks...

Page 76: ...ntage Vintage Mode Preset Pattern BASS Group No Pattern Name T L S T No Effect L Ctrl P01 TB Techno 1 140 1 16 1 On P02 TB Trance 1 140 1 16 1 On P03 Techno 1 140 1 16 66 Off P04 TB Techno 2 140 1 16...

Page 77: ...Percussion 13 140 1 16 10 P53 Percussion 14 140 2 16 1 P54 Percussion 15 140 2 16 8 P55 BreakBeats 8beat 1 130 2 16 8 P56 BreakBeats 8beat 2 130 2 16 3 P57 BreakBeats 8beat 3 130 2 16 3 P58 BreakBeat...

Page 78: ...S Tone No Tone Name Cross RingEffect Vintage Mod Mode 1 SAW 1 Distortion 1 Off 2 SAW Detune SAW 1 Distortion 1 Off 3 SAW Detune SAW 2 Distortion 1 Off 4 SAW Detune SAW 3 Distortion 1 Off 5 SAW Detune...

Page 79: ...Off 97 PLS Detune PLS XMod 1 Distortion 1 Off 98 SAW Detune SAW 30 Distortion 1 Off 99 SAW Detune SAW 31 Distortion 1 Off 100 SAW Detune TRI XMod Ring Distortion 1 Off 101 SAW Detune SAW 32 Distortion...

Page 80: ...80 Memo...

Page 81: ...81 Memo...

Page 82: ...6 performace 52 Edit 54 Pitch 49 pitch performance 51 Trigger 50 Trigger performace 52 Loop control pattern Play 53 Save 56 Loop merge 38 M Master 61 Memory card 58 Delete a saved loop 59 Delete saved...

Page 83: ...24 Slave 63 Slide on 26 SmartMedia 58 Standard tempo 31 57 Step edit 24 Step recording 23 25 Step sequencer 11 66 T Tempo Standard tempo 31 57 Tempo of a pattern 17 Tone 14 TR recording 23 27 Transpo...

Page 84: ...t the part Make capture quantize settings Select the pattern Select the step from which recording is to begin Set the number of measures in the phrase Set the note value and the number of steps Begin...

Page 85: ...ue Stop editting Select the effect pattern Begin making settings Specify the effect control length Set the step unit and number of steps Select the step Input the value Settings complete Repeat Begin...

Page 86: ...86 Blank Chart LEAD BASS RHYTHM EFFECTS...

Page 87: ...ces that are Subject to temperature extremes e g direct sunlight in an enclosed vehicle near a heating duct on top of heat generating equipment or are Damp e g baths washrooms on wet floors or are Hum...

Page 88: ...ou Street Nicosia CYPRUS TEL 02 66 9426 DENMARK Roland Scandinavia A S Nordhavnsvej 7 Postbox 880 DK 2100 Copenhagen DENMARK TEL 039 16 6200 FRANCE Roland France SA 4 Rue Paul Henri SPAAK Parc de l Es...

Reviews: