background image

8

Click Continue, and then click Install, or Upgrade if you’ve previously 

installed an earlier version of the M-16DX driver.
If  the  computer  asks  you  to  enter  your  computer’s  administrator 

password, type it in and click OK.
When  the  computer  tells  you  you’ll  need  to  restart  the  computer 

after the installation, click Continue Installation.

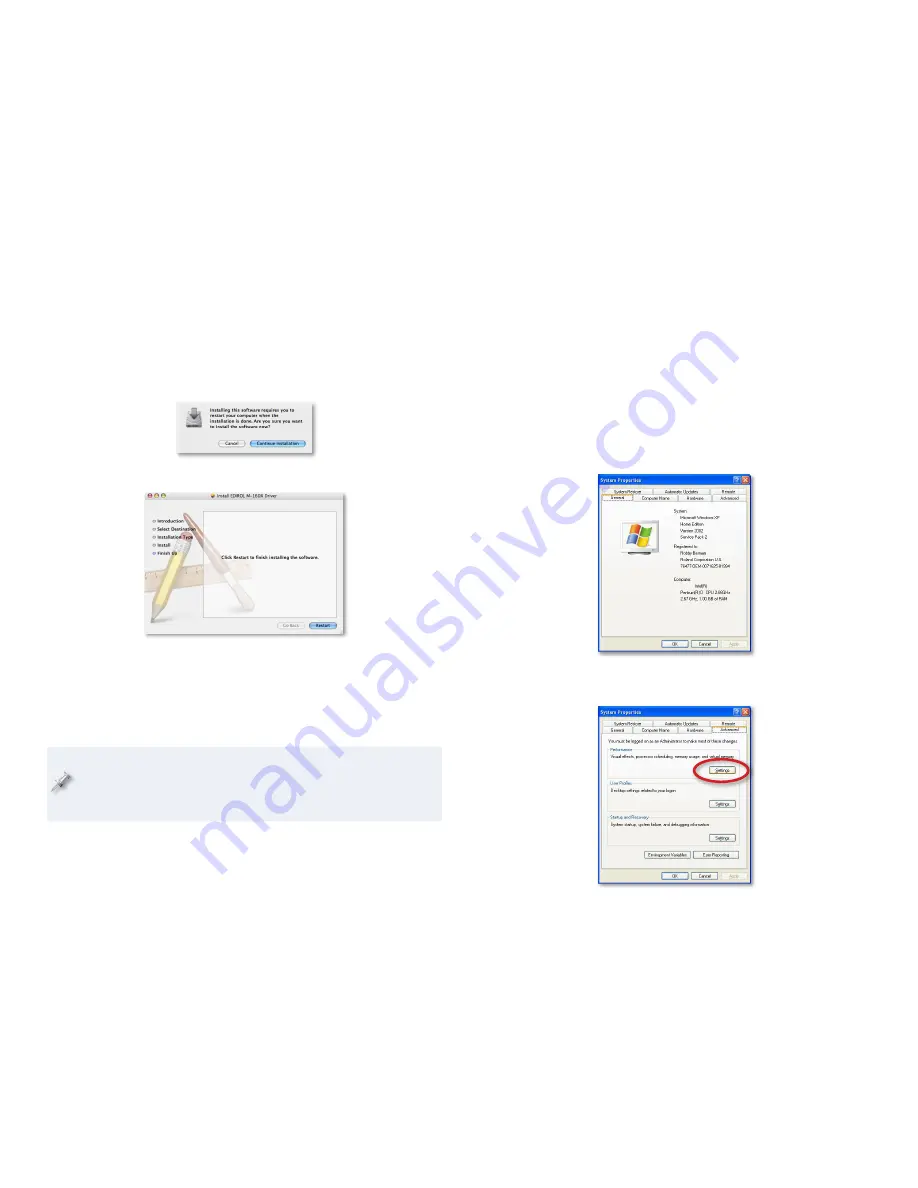
After the driver’s been installed, you’ll see this screen.

Click Restart.

After  the  computer  restarts,  with  the  M-16DX  turned  off,  plug  one 

10 

end of the included USB cable into its USB jack, the other end into a 
USB jack on your computer, and then turn on the M-16DX.
Read “System Settings on Your Computer” in the next column.

11 

Should you ever need to remove the M-16DX driver from your system, 
the  driver  installer  folder  also  contains  an  uninstaller.  You  can  hold 
onto  this  file,  or  re-download  the  driver  folder  later  on  should  you 
need the uninstaller at some point in the future.

System Settings for Your Computer

Optimizing Your Windows PC for Audio

To optimize Windows XP for DAW audio operations

In the Start menu, select Control Panel.

If you’re in

Category View—

• 

click  Performance  and  Maintenance,  and  then 

click System.

Classic View—

• 

double-click System.

Click  the  Advanced  tab,  and  then  click  the  Performance  Settings 

button.

Summary of Contents for M-16DX

Page 1: ...ssion of Roland Corporation U S Windows XP Windows XP 64 bit Edition WindowsVista andWindowsVista 64 bit Edition are trademarks of Microsoft Corporation Microsoft Corporation is not associated or affiliated with Roland in any manner Mac OS X is a trademark of Apple Inc Apple Inc is not associated or affiliated with Roland in any manner M16DXWS05 Using the M 16DX with a DAW ...

Page 2: ... discusses the universal issues and possibilities you ll find with any DAW when you re working with the M 16DX Other Workshop booklets detail using the M 16DX with specific DAWs you should read this booklet first though to make sure you re clear about the overall process Understanding the Symbols in This Booklet Throughout this booklet you ll come across information that deserves special attention...

Page 3: ...ce or instrument to an audio interface then through a cable to a computer s hardware through that hardware to the computer s system software from that software to a DAW s track and then from the track to your ears The musical ear is very sensitive to even tiny timing issues which of course amount to rhythmic issues in music The lag in time that occurs as audio travels from a mic or instrument into...

Page 4: ...ou listen to the DAW in the M 16DX s main mix while you re recording that same mix into the DAW the DAW s output gets sent back to itself in a feedback loop When you play back the recording you turn on Channel 13 14 s USB button and listen to the DAW or Channel 13 14 s USB button is lit during playback in a two track session Setting Up Installing M 16DX Drivers The M 16DX works with the following ...

Page 5: ...downloaded file is automatically uncompressed Locate the folder called M 16DX_win_xp Mac locate and double click the M16DXUSBDriver tar file to create a folder called M16DXUSBDriver Inside your driver folder you ll find the driver installer 6 Windows XP Driver Installation Power up your PC with all USB cables disconnected except for your 1 keyboard and mouse If any applications are running quit th...

Page 6: ...Recommended and then click Next When the driver s installed the wizard announces the completion of the installation process If the Software installation window appears click Continue Anyway If you can t continue see About Driver Signing Options later in this booklet If the System Settings Change window appears click Yes to restart Windows and jump ahead to System Settings on Your Computer after re...

Page 7: ... OK to close the Driver Signing window 5 Click OK to close the System Properties window 6 Return to the driver installation instructions earlier in this booklet 7 Mac OS X Driver Installation Start up your computer with all USB cables disconnected except for 1 your keyboard and mouse Open up the M16DXUSBDriver folder and double click the 2 M16DXUSBDriver pkg file inside to display the following wi...

Page 8: ... other end into a USB jack on your computer and then turn on the M 16DX Read System Settings on Your Computer in the next column 11 Should you ever need to remove the M 16DX driver from your system the driver installer folder also contains an uninstaller You can hold onto this file or re download the driver folder later on should you need the uninstaller at some point in the future System Settings...

Page 9: ... explain how to set this up It s a good idea to turn off your system sounds while you re actually working with your DAW for a couple of reasons First they may provide an extra burden for your computer s processor when it s busy recording and playing tracks in your DAW Second if you re recording the M 16DX s main mix bus into your DAW in a two track session the system sounds will be included in the...

Page 10: ...et Device usage to Do not use this device in any hardware profile disable Click OK 6 In the list double click 7 EDIROL M 16DX Set Device usage to 8 Use this device enable and then click OK Sending Mac OS X System Sounds to the M 16DX Open your System Preferences window 1 Click Sound circled above to open the Sound control panel 2 Click the Output tab and select EDIROL M 16DX 3 In the Sound control...

Page 11: ...8kHz for slightly better audio quality than 44 1 kHz if your destination media isn t a CD If it is you can still use 48 kHz but the sample rate conversion process you ll need to get the recording onto a CD will probably take away any benefits the higher sample rate s gotten you 96 kHz for very high quality audio Again this is mostly for recordings not destined for CD for the same reasons as 48 kHz...

Page 12: ...S CTRL ROOM knob If you re recording a group of musicians together they should listen to playbacks through headphones connected to a splitting adaptor that s connected to the PHONES jack or to a multi output headphone amp connected to the CONTROL ROOM L and R jacks Session Monitoring Procedures Listening in a Multitrack Session On the LEVEL When you select an M 16DX mono channel or pair of channel...

Page 13: ...eters or overloading the DAW track s input You may want to use the M 16DX s Finalize feature to tighten up your mix before recording see the M 16DX Owner s Manual for details Your DAW may also offer similar functionality you can apply after recording if you prefer The Role of the USB Button in Two Track Recording Since the USB button switches the feed of the DAW into the main mix on or off its set...

Page 14: ...rough Channel 13 14 Make sure the channel s USB button is lit Overdubbing If you re doing a multitrack session you can add more tracks to your DAW project by assigning the desired M 16DX input channels to them and then recording the channels audio while listening to the live audio side by side with your already recorded tracks as we discussed in Zero Latency Monitoring on Page 3 The End We hope yo...

Reviews: