background image


171

Saving/Loading a song (SAVE/LOAD)


Saving/Loading a song (SAVE/LOAD)


Loading a Song with Samples 

(Load Song+Samples)


Here’s how you can load a song into internal memory and all 
samples into sample memory.


1.


From the Save /Load Menu screen, press [5 (Load S+S)].


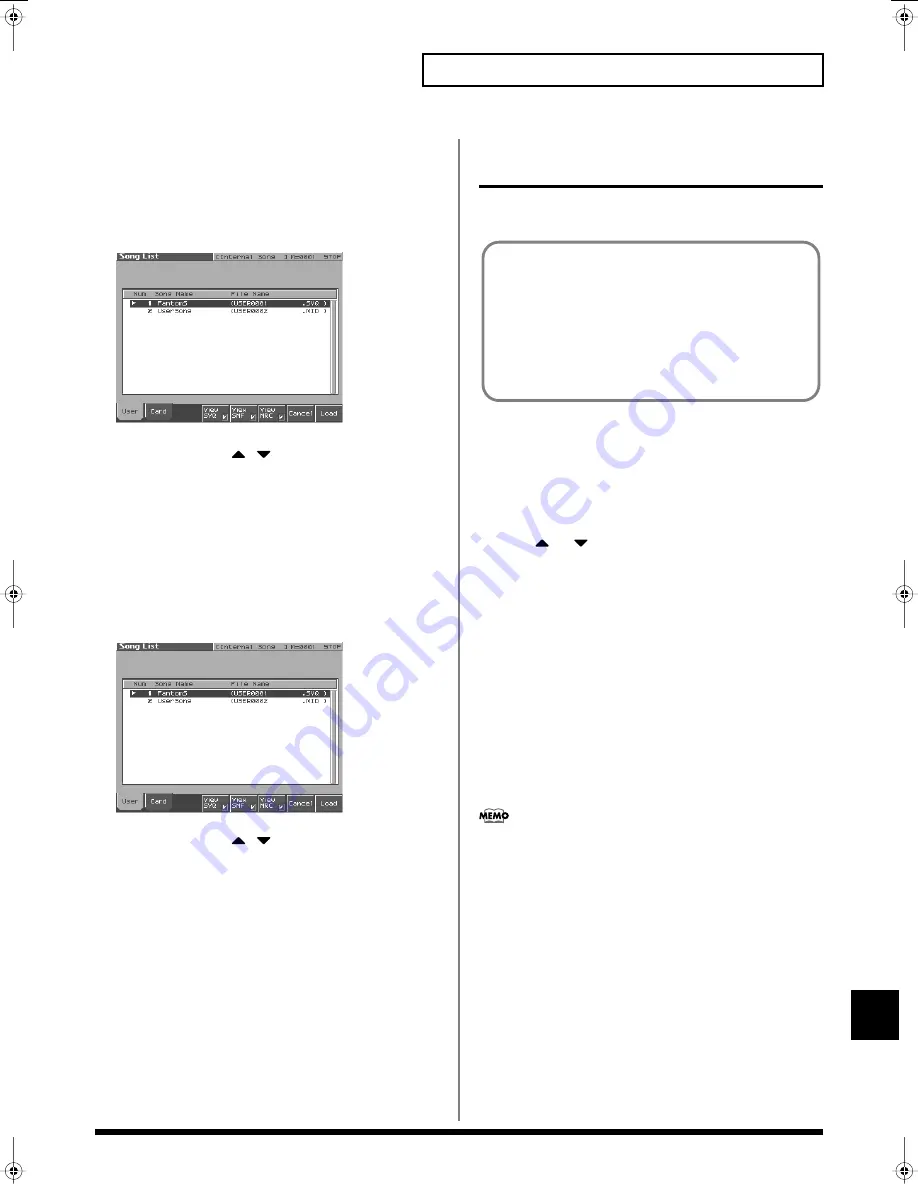
fig.SL06_50


2.


Press either [1 (User)] or [2 (Card)] to select the load-

destination, and use 


 to select a song.


If you decide to cancel, press [7 (Cancel)].


3.


Press [8 (Load)].


A screen will ask you for confirmation.


4.


Press [8 (Exec)] to execute.


Loading a song (Load Song)


Here’s how you can load a song into internal memory.


1.


From the Save/Load Menu screen, press [6 (Load Song)].


fig.SL07_50


2.


Press either [1(User)] or [2(Card)] to select the load-

destination, and use 


 to select a song.


If you decide to cancel, press [7 (Cancel)].


3.


Press [8 (Load)].


A screen will ask you for confirmation.


4.


Press [8 (Exec)] to execute.


Loading Samples (Load All 

Samples)


Here’s how you can load all samples from user memory or memory 
card into sample memory.


1.


From the Save/Load Menu screen, press [7 (Load AllSmpl)].


A screen will ask you for confirmation.

If you decide to cancel, press [7 (Cancel)].


2.


Press [8 (Exec)] to execute.


Importing a WAV/AIFF File 


(Import Audio)


Here’s how you can load an audio file (WAV/AIFF) into sample 
memory as a sample.


1.


Press [Save/Load].


2.


Press [8 (Import Audio)].


3.


Press [1 (User)] or [2 (Card)] to select the import-destination 

area.


[1 (User)]: Import from user memory.

[2 (CARD)]: Import from a memory card.


4.


Press 

 or 

, then select the file that you want to import.


If you want to select two or more samples, press [5 (Mark Set)] to 
add a check mark (


) to the files that you want to select. To 

remove the check mark, press [4 (Mark Clear)].

If you hold down [SHIFT] and press [5 (Mark Set All)], a check 
mark will be added to all files of the selected bank. If you hold 
down [SHIFT] and press [4 (Mark Clr All)], check marks will be 
removed from all selected files.


5.


Press [8 (Import)].


A message will ask you for confirmation.


* To cancel, press [7 (Cancel)].


6.


Press [8 (Exec)].


The file will be imported, and the Sample List screen will appear.


* To cancel, press [7 (Cancel)].


The imported file will be added to the sample list as a sample. 
This sample is temporary, and will be lost when you turn off the 
power. If you want to keep it, press [WRITE] to save the data.

In order to import a file, it must be located in the following 
folder on your computer.

Windows Me/2000/XP users

Removable disk/TMP/AUDIO_IMPORT folder

Macintosh users

FANS USER/TMP/AUDIO_IMPORT folder

* “/” indicates a directory level.

Reference_e.book 171 ページ 2003年7月14日 月曜日 午後3時25分

Summary of Contents for Fantom-S

Page 1: ...ssion of ROLAND CORPORATION Before using this unit carefully read the sections entitled IMPORTANT SAFETY INSTRUCTIONS Owner s manual p 2 USING THE UNIT SAFELY Owner s manual p 3 and IMPORTANT NOTES Owner s manual p 4 These sections provide important information concerning the proper operation of the unit Additionally in order to feel assured that you have gained a good grasp of every feature provi...

Page 2: ... prong are provided for your safety When the provided plug does not fit into your outlet consult an electrician for replacement of the obsolete outlet WARNING IMPORTANT As the colours of the wires in the mains lead of this apparatus may not correspond with the coloured markings identifying the terminals in your plug proceed as follows The wire which is coloured GREEN AND YELLOW must be connected t...

Page 3: ...nd shock hazards 010 This unit either alone or in combination with an amplifier and headphones or speakers may be capable of producing sound levels that could cause permanent hearing loss Do not operate for a long period of time at a high volume level or at a level that is uncomfortable If you experience any hearing loss or ringing in the ears you should immediately stop using the unit and consult...

Page 4: ...r stands is capable of resulting in instability causing possible injury 102b Always grasp only the plug on the power supply cord when plugging into or unplugging from an outlet or this unit 104 Try to prevent cords and cables from becoming entangled Also all cords and cables should be placed so they are out of the reach of children 106 Never climb on top of nor place heavy objects on the unit 107b...

Page 5: ...f against the risk of loosing important data we recommend that you periodically save a backup copy of important data you have stored in the memory card 552 Unfortunately it may be impossible to restore the contents of data that was stored in the unit s memory once it has been lost Roland Corporation assumes no liability concerning such loss of data 554 Never strike or apply strong pressure to the ...

Page 6: ...nto 33 Selecting the Parameter Controlled by the Realtime Controllers or D Beam Controller Control Setting 33 Specifying the Part that Will be Affected by the Controller 33 Assigning a Parameter to a Controller 34 Playing Percussion Instruments 37 Selecting a Rhythm Set 37 Playing a Rhythm Set 38 Creating a Patch 39 How to Make the Patch Settings 39 Editing in a Graphic Display Zoom Edit 40 Initia...

Page 7: ...Sound 79 Selecting the Sound for a Part 79 Combining and Playing Sounds Together Layer 80 Playing Different Sounds in Different Areas of the Keyboard Split 80 Using the Mixer Screen 81 Selecting a Part 81 Selecting the Sound for a Part 81 Editing the Part Settings 82 Selecting a Part to Play Individually Solo 82 Silencing the Playback of a Specific Part Mute 82 Viewing the Part Settings as a List ...

Page 8: ... Memory Function CHORD MEMORY 110 About the Chord Memory Function 110 Performing with the Chord Memory Function 110 Turning Chord Memory Function On and Off 110 Selecting Chord Forms 110 Creating Your Own Chord Forms 111 Saving the Chord Forms You Have Created 111 Playing Rhythms 112 About Rhythm Patterns 112 Using Rhythm Groups 112 Playing Rhythm 112 Turning Rhythm On and Off 112 Determining the ...

Page 9: ...ch 131 Dividing a Sample into Notes Chop 132 Procedure for Dividing a Sample 132 Automatically Dividing a Sample Auto Chop 132 Auditioning the Divided Samples 133 Joining Two or More Samples Combine 133 Saving a Sample 134 Using the Pads 135 Using the Hold Function to Sustain a Sound 135 Using the Roll Function to Play Sounds 135 Using the Clipboard to Copy Pad Settings 136 Copying one Pad Setting...

Page 10: ...r Data Over the Specified Range Track Edit 151 Basic Operation for Track Editing 151 Aligning a Song s Timing Quantize 152 Erasing Unwanted Performance Data Erase 154 Deleting Unwanted Measures Delete 155 Copying Phrases Copy 155 Inserting a Blank Measure Insert 156 Transpose the Key Transpose 156 Changing the Velocity Volume Change Velocity 157 Changing the MIDI Channel Change Channel 158 Modifyi...

Page 11: ...ing How the Sound Will Be Output Routing 178 Signal Flow Diagram and Parameters 178 Making Multi Effects Settings MFX1 3 180 Making Multi Effects Settings MFX Control 181 Specifying the multi effect structure MFX Structure 182 Making Chorus Settings Chorus 182 Making Reverb Settings Reverb 182 Mastering Effect 183 Transferring Data to from Your Computer via USB 184 Before You Use USB Connection 18...

Page 12: ...8 Adjusting the Depth of Resonance Resonance 198 Saving a Sound Patch 198 Using Fantom S Editor 199 Installing Fantom S Editor into Your Computer 199 Making Connections 199 Using Fantom S Librarian 199 Fantom S Editor System Requirements 199 System Requirements Windows 199 System Requirements Mac OS 200 About V LINK 201 Installing the Wave Expansion Board 203 Installation de la carte d expansion W...

Page 13: ... be used as trigger pads to play favorite sounds like hits or bass sounds to recall RPS sequence phrases or assigned to play skip back sampled phrases In another idea rhythm sounds that were chopped from a loop phrase can be assigned to the pads and played for realtime input into the sequencer Mastering functionality 78 Fantom S 77 different multi effects chorus and reverb are provided Since the m...

Page 14: ...You can assign a variety of parameters and functions to the tow buttons and use them to modify the sound in realtime p 33 The operation will depend on the parameter or function that is assigned OCT OCT Transposes the pitch of the keyboard in 1 octave units 3 3 octaves RPS Switches RPS on off Perform functions related to the arpeggio rhythm pattern chord memory function p 104 p 110 p 112 ON OFF Swi...

Page 15: ...rates If you press one of these buttons while holding down SHIFT the value will change in bigger increments CURSOR Moves the cursor location up down left right SHIFT JUMP This button is used in conjunction with other buttons to execute various functions ENTER Use this button to execute an operation EXIT Return to the previous screen or close the currently open window In some screens this causes th...

Page 16: ...s can be connected to other MIDI devices to receive and transmit MIDI messages fig 00 06 DIGITAL OUT Connectors S P DIF OPTICAL S P DIF COAXIAL The Fantom S features both optical and coaxial digital out connectors conforming to S P DIF These connectors output a digital audio signal stereo The output signal is identical to the signal that is output from the OUTPUT A MIX jacks S P DIF is a digital i...

Page 17: ...lt into the internal sound generator p 119 The Fantom S can load WAV or AIFF format wave files as samples via a USB connection Loaded sample can be used in patches or rhythm sets Classification of Fantom S Sound Types When using the Fantom S you will notice that a variety of different categories come into play when working with sounds What follows is a simple explanation of each sound category Ton...

Page 18: ...ossible be available to you at the same time Therefore each key note number of a rhythm set will produce a different percussion instrument fig 01 04 e Each percussion instrument consists of the following four elements For details refer to the explanations for Tones WG Wave Generator TVF Time Variant Filter TVA Time Variant Amplifier Envelope Performances A performance has a patch or rhythm set ass...

Page 19: ...UDEST When LAST is selected a newly requested note that exceeds the 64 voice limit will cause the first played of the currently sounding notes to be turned off When LOUDEST is selected the quietest of the currently sounding notes will be turned off Usually LAST is selected Note Priority in Performance Mode Since Performance mode is usually used to play an ensemble consisting of several patches it ...

Page 20: ...contain Wave data as well as patches and rhythm sets that use this Wave data which can be called directly into the temporary area and played About the Onboard Effects Effect Types The Fantom S has built in effect units and you can independently edit each unit s settings Multi Effects The multi effects are multi purpose effects that completely change the sound type by changing the sound itself Cont...

Page 21: ...nd generator which will produce the required sounds The sequencer actually plays instruments instead of the musician and since it can record a musical performance it is a tape recorder as well But in reality a sequencer doesn t record sound but actually the steps that cause the sound generator to produce sound so it offers several advantages Sound quality is always excellent the equivalent of firs...

Page 22: ...s of the mode of the sound generator Patch Performance In Performance mode you can use up to sixteen sounds with each part playing a different sound This means that Performance mode is ideal for recording or playing an ensemble that uses multiple instruments such as drums bass and piano In Patch mode you can play using the sounds that are assigned to the Keyboard part and the Pad part Positions fo...

Page 23: ...contain the actual sample data itself The Fantom S has 128 internal samples preset samples and in addition can store up to 128 user samples in a separately sold memory card fig 01 05a e Where Samples are Stored Samples that you record or import are stored in sample memory This sample memory is temporary and its data will be lost when you turn off the power If you want to keep these samples you mus...

Page 24: ...r You can play patches together Layer or divide the keyboard into two regions and play different patches in each region Split MIXER display Use this screen when you want to mix the sounds by adjusting the level and pan for each of the 16 parts To select the Layer screen 1 Press LAYER SPLIT fig LAYER_50 To select the Mixer screen 1 Press MIXER fig MIXER_50 About the 1 8 Buttons In the PLAY screen t...

Page 25: ...DEC For decreasing value faster keep DEC pressed down and press INC If you press INC or DEC while holding down SHIFT the value increments will get bigger Assigning a Name On the Fantom S you can assign names to each patch rhythm set performance Song Sample and Pattern The procedure is the same for any type of data 1 Press CURSOR to move the cursor to the location where you wish to input a characte...

Page 26: ...parts a Keyboard part and a Pad part 2 Press 1 Kbd Part to select the Keyboard part fig 02 00a e 3 Press 2 Pad Part to select the Pad part fig 02 00b e 4 Press 7 to switch the Patch Play screen This screen simultaneously displays the settings of the Keyboard part and the Pad part fig PATCH_50 Press 8 Part Level to adjust the volume of the keyboard part and pad part Pressing 8 Part Level will open ...

Page 27: ...annot be rewritten However you may modify the settings of the currently selected patch and then store the modified patch in User memory and Memory card The number of onboard patches depends on the specific Wave Expansion Boards installed XP A D patches can be selected only if a Wave Expansion Board SRX series sold separately is installed in the corresponding slot If SRX RAM Mode p 195 is set to 2 ...

Page 28: ... favorite and most frequently used patches in one place by registering them in the Favorite sound By using this function you can rapidly select favorite patches from internal memory or a Wave Expansion Board If a patch stored in a Wave Expansion Board has been registered as a Favorite Sound it cannot be selected unless the corresponding wave expansion board is installed For instructions on how to ...

Page 29: ...ecting Patches by Category Patch Finder The Fantom S provides a Patch Search function Patch Finder which allows you to specify a type category of patch so that you can quickly find the desired patch There are a total of 38 categories 1 Press PATCH RHYTHM to access the Patch Play screen fig 02 00a e 2 Make sure that the patch type is set to PATCH If this is set to Rhythm use CURSOR to move the curs...

Page 30: ...he button you pressed 7 When you have finished registering favorite sounds press EXIT to close the Favorite List screen By pressing 7 Preview you can audition the sound of the registered patch Phrase Preview Canceling a patch registration By pressing 4 Remove you can cancel the patch registration that is selected in the Favorite List screen Category Contents No Assign No assign PNO AC Piano Acoust...

Page 31: ...select favorite number 6 Press 5 Regist to execute the registration The rhythm set will be registered to the button you pressed 7 When you have finished registering favorite sounds press EXIT to close the Favorite List screen By pressing 7 Preview you can audition the sound of the registered rhythm set Phrase Preview Canceling a patch registration By pressing 4 Remove you can cancel the patch regi...

Page 32: ...tch unwanted tones out of the four off and get just the sound of a specific tone 1 Press PATCH RHYTHM to access the Patch Play screen 2 Press 1 Kbd Part or 2 Pad Part to move the cursor to the pad part or the keyboard part 3 Press 6 Tone Sw Sel fig 02 09 4 Press 1 Tone Sw 4 Tone Sw to turn each tone on off The setting will switch on off each time you press the button 5 Press EXIT to close the wind...

Page 33: ...by the assignable switches you can use a button to easily turn portamento on off p 101 Selecting the Parameter Controlled by the Realtime Controllers or D Beam Controller Control Setting The Fantom S lets you assign the parameters that will be affected when you operate the realtime control knobs assignable switches D Beam pitch bend or modulation lever This lets you modify the sound in a variety o...

Page 34: ...the performance settings This lets you create performances that make effective use of controller settings fig 02 21_50 For details on the setting refer to Assigning a Parameter to a Controller p 34 Pad Number Specifies the pad number affected by the D Beam Value 0 16 Pad Velocity Specifies the strength of the pad sound played by the D Beam controller Value 1 127 Pad Control Mode This specifies how...

Page 35: ...e rest This can be useful when creating distinctive sounds HPF High Pass Filter This cuts the frequencies in the region below the cutoff frequency Cutoff Frequency This is suitable for creating percussive sounds emphasizing their higher ones PKG Peaking Filter This emphasizes the frequencies in the region of the cutoff frequency Cutoff Frequency You can use this to create wah wah effects by employ...

Page 36: ... will rise in steps of an octave maximum 3 octaves Arp Oct Down The range in which the arpeggio is sounded will lower in steps of an octave maximum 3 octaves Range Min D Beam Range Lower Specify the lower limit of the range of the D Beam controller Value 0 127 Range Max D Beam Range Upper Specify the upper limit of the range of the D Beam controller By setting Range Max below Range Min you can inv...

Page 37: ...stalling up to three optional Wave Expansion Boards four SRX series enabling you to select from a large selection of rhythm sets USER This is the group inside the Fantom S which can be rewritten rhythm sets you yourself create can be stored in this group The Fantom S includes 32 preset rhythm sets PRST Preset This is the group inside the Fantom S which cannot be rewritten However you can modify th...

Page 38: ...ursor to the rhythm set number 6 Turn the VALUE dial or press INC DEC to select the rhythm set number 7 If you selected a rhythm set for the pad part play the pads to hear the sound If you selected a rhythm set for the keyboard part play the keyboard to hear the sound You can select favorite rhythm sets in the same way as when selecting patches For details on the procedure refer to Selecting Favor...

Page 39: ...5 Tone Select 8 Tone Select buttons to select the tones that you want to edit at the same time When a tone is on a check mark will be displayed To switch a tone on off Press a 1 Tone Sw 4 Tone Sw button to switch the corresponding tone on off Press or you can select the tone 6 When you have made your selection press EXIT 7 Turn the VALUE dial or press INC DEC to get the value you want If you ve se...

Page 40: ...ished editing press EXIT Initializing Patch Settings Init Initialize means to return the settings of the currently selected sound to a standard set of values The Initialize operation will affect only the currently selected sound the sounds that are stored in user memory will not be affected If you wish to restore all of the Fantom S s settings to their factory values perform a Factory Reset p 196 ...

Page 41: ...e to modify a one shot waveform to create a decay that is longer than the original waveform or to turn it into a sustaining sound If you were to program such an envelope you would be attempting to shape a portion of the sound that simply doesn t exist and the envelope would have no effect Cautions When Using a Loop Waveform With many acoustic instruments such as piano and sax extreme timbral chang...

Page 42: ...g the name press 8 Write A screen will appear allowing you to select the write destination patch 6 Turn the VALUE dial or use INC DEC and 2 3 to select the write destination and patch number The write destination can be either the Fantom S s internal user area User or a memory card Card By pressing 6 Compare you can check the save destination patch Compare function 7 Press 8 Write A message will a...

Page 43: ... category names refer to p 30 Patch Level Specifies the volume of the patch Value 0 127 Patch Pan Specifies the pan of the patch L64 is far left 0 is center and 63R is far right Value L64 0 63R Patch Priority This determines how notes will be managed when the maximum polyphony is exceeded 64 voices Value LAST The last played voices will be given priority and currently sounding notes will be turned...

Page 44: ...ces between the attack time values set for each tone in the A Env Time 1 parameters p 54 F Env Time 1 parameters p 52 Range 63 63 Attack Time The time it takes for a sound to reach maximum volume after the key is pressed and sound begun This value is added to the attack time value of a tone so if the attack time value of any tone is already set to 127 maximum positive settings here will not produc...

Page 45: ...es a tempo BPM is selected as the sample for a tone Value OFF ON If a waveform from a wave expansion board is selected for the tone turning the Wave Tempo Sync parameter ON will cause pitch related settings p 49 and FXM related settings p 45 to be ignored If a sample is selected for a tone you must first set the BPM tempo parameter of the sample If a sample is selected for a tone Wave Tempo Sync w...

Page 46: ...dulator to create new overtones and combines the two filters The tone 1 3 TVA will control the volume balance of the two tones adjusting the depth of ring modulator fig Struct 06 This type uses a ring modulator to create new overtones and in addition mixes in the sound of tone 2 4 and stacks the two filters Since the ring modulated sound can be mixed with tone 2 4 tone 1 3 TVA can adjust the amoun...

Page 47: ...lected you can adjust the depth of the booster The booster increases the input signal in order to distort the sound This creates the distortion effect frequently used with electric guitars Higher settings will produce more distortion Value 0 6 12 18 TONE 1 3 TONE 2 4 TVA TVF WG WG TVF TVA R TYPE 10 Booster The Booster is used to distort the incoming signal fig Booster 1 e In addition to using this...

Page 48: ...ameter to OFF Velo Fade Lower Velocity Fade Width Lower This Determines what will happen to the tone s level when the tone is played at a velocity lower than its specified velocity range Higher settings produce a more gradual change in volume If you want notes played outside the specified key velocity range to not be sounded at all set this to 0 Value 0 127 Velo Range Lower Velocity Range Lower Th...

Page 49: ...et to 12 the pitch will rise one octave when the pitch bend lever is moved to the right most position Value 0 48 Bend Range Down Pitch Bend Range Down Specifies the degree of pitch change in semitones when the Pitch Bend lever is all the way left For example if this is set to 48 and you move the pitch bend lever all the way to the left the pitch will fall 4 octaves Value 48 0 P Env V Sens Pitch En...

Page 50: ...lities Value OFF No filter is used LPF Low Pass Filter This reduces the volume of all frequencies above the cutoff frequency Cutoff Freq in order to round off or un brighten the sound This is the most common filter used in synthesizers BPF Band Pass Filter This leaves only the frequencies in the region of the cutoff frequency Cutoff Freq and cuts the rest This can be useful when creating distincti...

Page 51: ...er if you want the cutoff frequency to change according to the key that is pressed Relative to the cutoff frequency at the C4 key center C positive settings will cause the cutoff frequency to rise for notes higher than C4 and negative settings will cause the cutoff frequency to fall for notes higher than C4 Larger settings will produce greater change Value 200 190 180 170 160 150 140 130 120 110 1...

Page 52: ...f the TVF envelope If you want Time 4 to be speeded up for quickly released notes set this parameter to a positive value If you want it to be slowed down set this to a negative value Value 63 63 TVF ENV F Env Depth TVF Envelope Depth Specifies the depth of the TVF envelope Higher settings will cause the TVF envelope to produce greater change Negative settings will invert the shape of the envelope ...

Page 53: ...nging volume through keyboard position pitch when playing acoustic instruments fig Bias e Bias Level Adjusts the angle of the volume change that will occur in the selected Bias Direction Larger settings will produce greater change Negative values will invert the change direction Value 100 90 80 70 60 50 40 30 20 10 0 10 20 30 40 50 60 70 80 90 100 Bias Position Specifies the key relative to which ...

Page 54: ... Env T4 V Sens TVA Envelope Time 4 Velocity Sensitivity The parameter to use when you want key release speed to control the Time 4 value of the TVA envelope If you want Time 4 to be speeded up for quickly released notes set this parameter to a positive value If you want it to be slowed down set this to a negative value Value 63 63 A Env Time KF TVA Envelope Time Key Follow Use this setting if you ...

Page 55: ...nes 3 and 4 will be combined with tone 4 For this reason tone 1 will follow the settings of tone 2 and tone 3 will follow the settings of tone 4 p 46 When the settings are such that signals are split and output from the INDIVIDUAL 1 jack and INDIVIDUAL 2 jack and no plug is inserted in the INDIVIDUAL 2 jack the sounds from INDIVIDUAL 1 and INDIVIDUAL 2 are mixed together then output from the INDIV...

Page 56: ... 120 quarter notes occur in 1 minute 60 seconds This setting will be ignored if the Waveform parameter is set to CHAOS Rate Detune LFO1 LFO2 Rate Detune LFO Rate Detune makes subtle changes in the LFO cycle rate 1 2 Rate parameter each time a key is pressed Higher settings will cause greater change This parameter is invalid when Rate is set to note Value 0 127 Offset LFO1 LFO2 Offset Raises or low...

Page 57: ... Depth LFO1 LFO2 Pan Depth Specifies how deeply the LFO will affect the pan Value 63 63 Positive and negative settings for the Depth parameter result in differing kinds of change in pitch and volume For example if you set the Depth parameter to a positive value for one tone and set another tone to the same numerical value but make it negative the modulation phase for the two tones will be the reve...

Page 58: ... Only the last played note will sound POLY Two or more notes can be played simultaneously Legato Switch Legato Switch Legato Switch is valid when the Mono Poly parameter is set to MONO This setting specifies whether the Legato Switch will be used ON or not OFF With the Legato Switch parameter ON pressing a key while continuing to press a previous key causes the note to change pitch to the pitch of...

Page 59: ...nt change would end fig Potra 2 e Portamento Time When portamento is used this specifies the time over which the pitch will change Higher settings will cause the pitch change to the next note to take more time Value 0 127 Let s say you have the Legato Switch set to ON and the Legato Retrigger set to OFF When you try to sound a legato by pressing a higher key while a lower key is held down the pitc...

Page 60: ...meter is set to OFF N or OFF D the time from when the key is released until when the tone will sound Value 0 127 Note Tone Delay Time specifies the beat length for the synchronized tempo when the tempo that specifies the elapsed time until the tone is sounded Patch Tempo is synchronized with the tempo set in a sequencer Example For a tempo of 120 120 quarter notes occur in 1 minute 60 seconds Note...

Page 61: ...is whether or not the sound will be held when a Hold 1 message is received after a key is released but before the sound has decayed to silence If you want to sustain the sound set this ON When using this function also set the Rx Hold 1 parameter ON This function is effective for piano sounds Value OFF ON Matrix Control Settings Ctrl1 4 fig 03 13_50 For details on the setting refer to How to Make t...

Page 62: ...MIDI messages used for the Matrix Control will be received If the Fantom S is set up such that reception of MIDI messages is disabled then the Matrix Control will not function CTRL Destination 1 4 Matrix Control Destination 1 4 Matrix Control Destination selects the tone parameter that is to be controlled when using the Matrix Control The following parameters can be controlled When not controlling...

Page 63: ...come longer Changing Specific Multi Effects Parameters MFX CTRL1 4 Change the parameter that was specified by MFX Control 1 4 Assign parameter No effects are available even with the Matrix Control when the settings are such that no multi effects are applied CTRL Sens 1 4 Matrix Control Sens 1 4 Sets the amount of the Matrix Control s effect that is applied If you wish to modify the selected parame...

Page 64: ...ameter you wish to modify 5 Press 8 Wave Sw Sel to select the wave that you want to edit The Wave Sw Select window will appears fig 04 10b_50 Press any one of the 5 Wave Select1 8 Wave Select4 buttons to select the wave that you want to edit Simultaneously editing the same parameter of multiple waves Simultaneously press two or more of the 5 Wave Select1 8 Wave Select4 buttons to select the tones ...

Page 65: ...ed When KEY is selected you need to specify the key A0 C8 that is to be initialized 4 Press 8 Exec A message will ask for confirmation 5 Press 8 Exec The initialization will be carried out and you ll be returned to the Rhythm Edit screen To cancel press 7 Cancel Copying Rhythm Tone Settings Copy This operation copies the settings of any desired rhythm set to the currently selected rhythm set You c...

Page 66: ...is what defines much of the instrument s character For such waveforms it is best to use the complex tonal changes of the attack portion of the waveform just as they are and to use the envelope only to modify the decay portion If you attempt to use the envelope to modify the attack portion as well the characteristics of the original waveform may prevent you from getting the sound that you intend fi...

Page 67: ...nge the save destination re specify the save destination rhythm set by using or 5 Press 7 Write 6 Press 8 Exec once again to execute the Save operation Functions of Rhythm Set Parameters This section explains the functions the different rhythm set parameters have as well as the composition of these parameters If a number is displayed for the parameter name you can use the realtime controller knob ...

Page 68: ...Pitch Bend Lever is moved The amount of change when the lever is tilted is set to the same value for both left and right sides Value 0 48 Tone Receive Expression Rhythm Tone Receive Expression Switch For each rhythm tone specify whether MIDI Expression messages will be received ON or not OFF Value OFF ON Tone Receive Hold 1 Rhythm Tone Receive Hold 1 Switch For each rhythm tone specify whether MID...

Page 69: ... the sample If a sample is selected for a tone Wave Tempo Sync will require twice the normal number of voices Wave Gain Sets the gain amplification of the waveform The value changes in 6 dB decibel steps an increase of 6 dB doubles the waveform s gain Value 6 0 6 12 FXM Switch This sets whether FXM will be used ON or not OFF Value OFF ON FXM Color Specifies how FXM will perform frequency modulatio...

Page 70: ... Use this setting to cause the waveform s panning to change randomly each time a key is pressed ON or not OFF Value OFF ON The range of the panning change is set by the Rnd Pan Depth parameter p 74 Wave Alter Pan Sw Wave Alternate Pan Switch This setting causes panning of the waveform to be alternated between left and right each time a key is pressed Set Alternate Pan Switch to ON to pan the Wave ...

Page 71: ...h Env P Env Depth Envelope Depth Adjusts the effect of the Pitch Envelope Higher settings will cause the pitch envelope to produce greater change Negative settings will invert the shape of the envelope Value 12 12 P Env V Sens Pitch Envelope Velocity Sensitivity Keyboard playing dynamics can be used to control the depth of the pitch envelope If you want the pitch envelope to have more effect for s...

Page 72: ...ncy components above the Cutoff frequency Cutoff Frequency are cut the sensitivity of this filter is half that of the LPF This makes it a comparatively warmer low pass filter This filter is good for use with simulated instrument sounds such as the acoustic piano LPF3 Low Pass Filter 3 Although frequency components above the Cutoff frequency Cutoff Frequency are cut the sensitivity of this filter c...

Page 73: ...ressed Value FIX 1 7 fig Curve 7 F Env V Sens TVF Envelope Velocity Sensitivity Specifies how keyboard playing dynamics will affect the depth of the TVF envelope Positive settings will cause the TVF envelope to have a greater effect for strongly played notes and negative settings will cause the effect to be less Value 63 63 F Env T1 V Sens TVF Envelope Time 1 Velocity Sensitivity This allows keybo...

Page 74: ... left and right each time a key is pressed Higher settings will produce a greater amount of change L or R settings will reverse the order in which the pan will alternate between left and right For example if two rhythm tones are set to L and R respectively the panning of the two rhythm tones will alternate each time they are played Value L63 0 63R This will affect only waves whose Wave Alter Pan S...

Page 75: ...is inserted in the INDIVIDUAL 2 jack the sounds from INDIVIDUAL 1 and INDIVIDUAL 2 are mixed together then output from the INDIVIDUAL 1 jack This sound comprises the sounds from the INDIVIDUAL 1 and 2 jacks If the Mix Parallel parameter is set to MIX all sounds are output from the OUTPUT A MIX jacks in stereo p 193 When setting the MFX set the output destination with the MFX Output Assign p 179 fo...

Page 76: ...en you play the keyboard you will hear the current part and the parts that have a check mark In addition to the settings of each part the following settings can also be stored for each performance Controller settings such as the D Beam realtime control knobs assignable switches and pads Arpeggio and chord memory settings Rhythm group number Displaying Performance Layer Screen To access the Perform...

Page 77: ...R screen will be displayed 11 6 7 12 12 13 Switches the setting screen 14 Selects the part whose settings will be modified by the realtime control knobs The four knobs correspond to the four selected parts Turn the knobs to adjust the values 15 Scrolls the settings through parts 1 16 16 17 18 Indicates the current sound generating mode Indicates the name of the currently selected song the measure ...

Page 78: ...PRST Preset CARD Memory Card 4 Press CURSOR to move the cursor to the performance number 5 Turn the VALUE dial or press INC DEC to select the performance number Selecting Performances from the List You can display a list of performances and select a performance from that list 1 Press LAYER SPLIT or MIXER 2 Press 5 Perf List The Performance List screen appears fig 05 06_50 3 To switch the performan...

Page 79: ... Using the Layer Screen Selecting a Part The currently selected part is called the current part 1 From the Layer screen Use or to select the part The selected part is indicated by fig 05 20 Selecting the Part that You want to Sound Here s how to select the part that you want to sound the assigned patch or rhythm set 1 From the Layer screen Use CURSOR to move the cursor to KBD and press INC to add ...

Page 80: ...r instance you can play strings in the lower range piano in the upper range and both sounds in the middle range fig 05 09 e A split performance is one application of a layer Changing the key range of each part in the layer results in a split 1 Press LAYER SPLIT to access the Layer screen 2 Press or to select the part you want to play 3 Press 3 Key Range 4 Press 3 KBD move the cursor to the keyboar...

Page 81: ...ct the part whose sound you want to switch 2 Press 1 Patch List The Patch List screen will appear fig 02 06_50 To cancel press EXIT 3 Use or to select a patch If 6 Categ has a check mark the list will show the categories If you press 6 Categ to remove the check mark the list will show the patch groups fig 01 18_50 To switch groups press 1 2 By Pressing 7 Preview you can audition the sound of the p...

Page 82: ...e only the performance of a specific part be played when playing back a song 1 Press MIXER to access the Mixer screen 2 Press 3 Mute Solo The Mute Solo window appears fig 07 07 3 Use CURSOR to move the cursor to the SOLO area of the part that you want to play by itself 4 Turn the VALUE dial or press INC DEC to assign a check mark When a song is played back only the parts with a check mark will pla...

Page 83: ...erforming with the Realtime Controllers and D Beam Controller For detail on the setting refer to Make Settings for the Realtime Controllers and D Beam Controller Ctrl p 92 Confirming MIDI Information for Each Part Part Information In Performance mode the reception status of MIDI messages that control various things can be viewed for each part This is useful when you want to check whether the sound...

Page 84: ...reen When the cursor is at a patch group or patch number you can press ENTER to open the Patch List screen and choose a patch from the list p 28 Adjusting the Parameters of Each Part 1 Access the Part View screen p 95 2 Press 1 Level Pan 8 MIDI Filter to select the parameter fig 07 10 3 Use CURSOR to move the cursor to the parameter you want to change 4 Turn the VALUE dial or press INC DEC set the...

Page 85: ... inserted in the INDIVIDUAL 2 jack the sounds from INDIVIDUAL 1 and INDIVIDUAL 2 are mixed together then output from the INDIVIDUAL 1 jack This sound comprises the sounds from the INDIVIDUAL 1 and 2 jacks If the Mix Parallel parameter is set to MIX all sounds are output from the OUTPUT A MIX jacks in stereo p 193 When setting the MFX set the output destination with the MFX Output Assign for the so...

Page 86: ... Specifies the amount of pitch change in semitones 2 octaves that will occur when the Pitch Bend Lever is moved The amount of change when the lever is tilted is set to the same value for both left and right sides When using the setting of the patch assigned to each part p 49 set this to PAT Value 0 24 PAT Part Portamento Switch Specify whether portamento will be applied Turn this parameter ON when...

Page 87: ...the part s Attack Time Offset If the tone s Time 1 parameter is already set to 127 maximum there will be no change produced by setting the Attack Time Offset to a positive value The same applies to the TVF envelope Part Release Time Offset Adjusts the TVA TVF Envelope Release Time for the patch or rhythm set assigned to a part Value 64 63 Patches also contain a Release Time Offset setting p 44 The...

Page 88: ...tings Value 64 63 Part Vibrato Depth For each part this adjusts the depth of the vibrato effect the depth at which the pitch is modulated The pitch will be modulated more greatly for higher settings and less with lower settings Value 64 63 Part Vibrato Delay For each part this adjusts the time delay until the vibrato pitch modulation effect begins Higher settings will produce a longer delay time b...

Page 89: ...erformances specify the value that you want to transmit 0 128 for each part If you do not want this message to be transmitted set this to OFF Value 1 128 OFF The data of the part for which the Keyboard Switch is turned off will not be transmitted Ext Level External Level If you want Volume messages to also be transmitted when you select a Performance specify the desired value 0 127 for the part If...

Page 90: ...k mark will turn it off Modulation Receive Modulation Switch For each MIDI channel specify whether MIDI Modulation messages will be received ON or not OFF Assigning a check mark will turn it on and removing the check mark will turn it off Volume Receive Volume Switch For each MIDI channel specify whether MIDI Volume messages will be received ON or not OFF Assigning a check mark will turn it on and...

Page 91: ... 9 Setting for the Control Settings are saved independently for each performance setting If you wish to save the changes you ve made press WRITE to perform the Save operation p 96 If you do not wish to save changes press EXIT to return to the Performance Layer or Mixer screen If you return to the Performance PLAY screen without saving the display will indicate reminding you that the Performance se...

Page 92: ...ly be switched on off each time you obstruct the D Beam Value MOMENTARY LATCH D Beam Solo Synth You can use the D Beam controller to perform in a way similar to on a mono synth fig 06 12_50 For details on the setting refer to Selecting the Parameter Controlled by the Realtime Controllers or D Beam Controller Control Setting p 91 When you press 7 Panel View the Panel View screen will appear which d...

Page 93: ...he sound to distort Value 0 127 Level Sets the volume Value 0 127 Chorus Send Level Sets the level of the signal sent to chorus Value 0 127 Reverb Send Level Sets the level of the signal sent to reverb Value 0 127 LFO Rate Adjusts the modulation rate or speed of the LFO Value 0 127 LFO Osc 1 Pitch Depth Specifies the depth to which the LFO will modulate the OSC1 pitch Value 63 63 LFO Osc 2 Pitch D...

Page 94: ...or D Beam Controller Control Setting p 91 Knob parameters are valid only when the REALTIME CONTROL button is set to ASSIGNABLE Knob Assign 1 4 Realtime Control Knob Assign 1 4 Specify the functions that will be controlled by the knobs Value CC01 31 33 95 Controller numbers 1 31 33 95 For more information about Control Change messages please refer to MIDI Implementation Parameter List Pitch Bend Pi...

Page 95: ... OFF when the Multi effects Control is not being used Value 1 16 OFF Setting Effects for a Performance Effects MFX MFX Control Chorus Reverb For details regarding effect settings refer to the pages shown below Applying Effects in Performance Mode p 178 Making Multi Effects Settings MFX1 3 p 180 Making Chorus Settings Chorus p 182 Making Reverb Settings Reverb p 182 Changing the Settings of the Pat...

Page 96: ...Saving Performance You ve Created Write Changes you make to sound settings are temporary and will be lost if you turn off the power or select another sound If you want to keep the modified sound you must save it in the internal User memory When you modify the settings of a Performance the Performance Layer screen will indicate Once you save the Performance into internal memory user memory the indi...

Page 97: ...s 8 Write A message will ask you for confirmation Never switch off the Fantom S while data is being saved 8 Press 8 Exec to execute the save operation To cancel the operation press 7 Cancel When Changing the Settings for the Patch or Rhythm Set Assigned to a Part in a Performance After changing the settings for the patch or rhythm set assigned to a part in a Performance if you then try to save the...

Page 98: ...up and down An effect will be applied to the sound depending on the function that is assigned to the D Beam controller 4 To turn off the D Beam controller once again press the button you pressed in step 2 so the indicator goes out If Performance mode is selected the D Beam controller on off setting is saved for each performance as part of the performance settings The sensitivity of the D Beam cont...

Page 99: ...settings This lets you create performances that make effective use of controller settings If Patch mode is selected this is saved as part of the system settings If you want to save the settings press 8 System Write PAD Trigger settings Pad related settings You can use the D Beam controller to control the pads as an alternative to striking the pads themselves 1 Hold down JUMP and press D BEAM PAD T...

Page 100: ...he OSC2 level Value 0 127 OSC1 Sync Switch Turning this switch on produces a complex sound with many harmonics This is effective when the OSC1 pitch is higher than the OSC2 pitch Value OFF ON Filter Type Selects the type of filter OFF No filter is used LPF Low Pass Filter This reduces the volume of all frequencies above the cutoff frequency in order to round off or un brighten the sound This is th...

Page 101: ...sing the pads to produce sound operate the REALTIME CONTROL knobs and ASSIGNABLE SW buttons The sound will change according to the function assigned to each knob or button Making Realtime Controller Settings Realtime Controller Knob Settings You can select the function of the realtime control knobs by pressing the button located at the right of the knobs 1 Hold down JUMP and press the button locat...

Page 102: ...3 SW Multi effect 1 3 switch CHORUS SW Chorus switch REVERB SW Reverb switch MASTERING SW Mastering switch LOOP Loop play On Off RHY START STOP Rhythm pattern playback On Off If Patch mode is selected assignable switches are available when the keyboard part is selected Using a Pedal to Modify the Sound Control Pedal You can modify the sound by pressing a pedal that is connected to the rear panel P...

Page 103: ...ious number or bank will be selected ARP RHY SW Switches the Arpeggio Rhythm function on off RHY START STOP Switch Rhythm pattern playback on off CHORD SW Chord function On Off Control Pedal Polarity Selects the polarity of the pedal On some pedals the electrical signal output by the pedal when it is pressed or released is the opposite of other pedals If your pedal has an effect opposite of what y...

Page 104: ...arly important The playback pattern of the arpeggio is determined mainly by this selection For details regarding each parameter refer to Arpeggio Settings p 105 Determining the Tempo for Arpeggio Performances This sets the arpeggio tempo You can save the arpeggio tempo settings individually in each Patch Rhythm Set or Performance 1 Press TEMPO The current tempo value appears in the display fig tem...

Page 105: ...SOR to move the cursor to each parameter and either turn the VALUE dial or press INC or DEC to make the setting 4 When you have made the setting press EXIT Selecting Styles for Arpeggio Performances Arpeggio Style This selects the arpeggio s basic performance Style The arpeggio styles are kept in preset memory and user memory Value U001 128 User P001 128 Preset For details on the settings refer to...

Page 106: ...lay in order from the lowest of the pressed keys UP L H Notes from both the lowest and highest pressed keys are sounded each time and the notes play in order from the lowest of the pressed keys UP _ The notes play in order from the lowest of the pressed keys No one note is played every time DOWN L Only the lowest of the keys pressed is sounded each time and the notes play in order from the highest...

Page 107: ... this Using the Realtime Control Knobs to Edit the Arpeggio Settings You can use the realtime control knobs to change the arpeggio settings by editing the parameters in real time 1 Play arpeggios 2 Press the REALTIME CONTROL button to select ARP RHY The ARP RHY indicator will light fig Arp knob 3 Turn the REALTIME CONTROL knobs While arpeggios are playing you can use the knobs to control the follo...

Page 108: ...ress 8 Exec the data will be erased If you decide to cancel the operation press 7 Cancel Inputting the Data from the Keyboards or Pads 1 From the Arpeggio Edit screen press 6 Step Rec to add a check mark 2 Press or to move the step 3 Press the key o pad When all the keys or pads are released the song advances by the selected step time interval 4 When you have finished making settings press 6 Step ...

Page 109: ...ess 8 Write A screen in which you can select the destination for the write will appear fig Arp04_50 5 Turn the VALUE dial or use INC DEC to select the write destination 6 Press 8 Write A message will ask you for confirmation 7 To write the data press 8 Exec Never switch off the Fantom S while data is being saved To cancel press 7 Cancel Arpeggio style settings are saved as independent data not as ...

Page 110: ...Poly the Mono Poly Parameters p 58 Selecting Chord Forms This selects the Chord Form to which the sounds making up the chord being played are registered when the Chord Memory function is used It can be saved to individual in Performance mode 1 Press ARPEGGIO RHYTHM SELECT EDIT 2 Press 4 Chord Memory The following screen appears If Performance mode is selected Performance will appear at the right o...

Page 111: ...ated If you don t want to save it press 7 Exit Saving the Chord Forms You Have Created The Chord Form you create are temporary they are deleted as soon as you turn off the power or select some other Style If you want to keep a Chord Form you have made save it to the Fantom S s user memory 1 Press ARPEGGIO RHYTHM SELECT EDIT 2 Press 4 Chord Memory Confirm that the chord form the one you want to sav...

Page 112: ...ps In Performance mode a number by which a rhythm group is recalled can be stored as one of the performance parameters This number cannot be stored in Patch mode Playing Rhythm Turning Rhythm On and Off 1 Press ARPEGGIO RHYTHM ON OFF causing the indicator to light fig Arp button The button will light 2 Play a pad 9 16 According to the pad you pressed the assigned rhythm pattern will begin playing ...

Page 113: ...nded Selecting Rhythm Patterns Select the basic playing style of the rhythm This selects the rhythm s basic performance Style Value P001 256 Preset U001 256 User For details on the settings refer to Rhythm Pattern Settings p 113 For more on the prepared Rhythm Patterns already programmed in the Fantom S refer to Sound List Changing the Beat and Shuffle Grid This sets the particular note division a...

Page 114: ... keys specify the desired value 1 127 For details on the settings refer to Rhythm Pattern Settings p 113 Value REAL 1 127 Changing the Accent Strength Accent Rate When you play rhythm patterns the velocity of each note is determined by the velocity of the notes programmed within the arpeggio style You can adjust the amount spread of this dynamic variation With a setting of 100 the notes will have ...

Page 115: ...en at a lower magnification Step Rec Step Recording 6 Step Rec By pressing 6 Step Rec to add a check mark you can input data from the keyboard or pads Preview 7 Preview By pressing 7 Preview to add a check mark you can audition the rhythm pattern that you are inputting When you press it once again to clear the check mark the playback will stop Clear Step 8 Clear Step Clear all data at the step whe...

Page 116: ...ur own original rhythm group 1 Press ARPEGGIO RHYTHM SELECT EDIT 2 Press 1 Rhythm Group 3 Press EDIT The Rhythm Group edit screen will appear fig RPTN06 4 Use CURSOR to select a parameter and turn the VALUE dial or use INC DEC to set the value You can also choose the pad that you want to set by pressing that pad Recommended Rhy Recommended Rhythm Set Specifies which rhythm set will be used Pad Mod...

Page 117: ...name press WRITE A screen in which you can select the destination for the write will appear fig RPTN07_50 5 Turn the VALUE dial or use INC DEC to select the write destination 6 Press 8 Write A message will ask you for confirmation 7 To write the data press 8 Exec Never switch off the Fantom S while data is being saved To cancel press CANCEL Rhythm group settings are saved as independent data not a...

Page 118: ...0 127 External Chorus Send Level Adjusts the depth of chorus that will be applied to the external input source Set this to 0 if you do not want to apply chorus Value 0 127 External Reverb Send Level Depth of reverb applied to the external input sound Set this to 0 if you don t want to apply reverb Value 0 127 Input Effect SW Specifies whether the external input sound will be sent through the effec...

Page 119: ...eed to set things up so that the sound you want to sample is output from the OUTPUT A MIX jacks Sampling mode Sampling 1 Sampling Sample a sound from an external input source Operating the keyboards pads sequencer will not play the internal sound generator Re Sampling 2 Re Sampl Resample the sound of the internal sound generator The sound of the external input will not be heard The volume of a phr...

Page 120: ... on the amount of memory Auto Trigger Level Specifies the volume at which sampling will begin if you have pressed 2 Auto Trig to turn Auto Trig ON Value 0 7 A setting of 0 is the minimum Gap Time Specifies the length of the silences at which the sample will be divided if the Sampling Mode is set to Auto Divide Whenever there is a silent region longer than the specified time the sample will be divi...

Page 121: ...ack Sampling Sometimes you may want to preserve a nice phrase that you happened to play a bit earlier In such cases you can use the Skip Back Sampling function to sample sounds that were played earlier in time When you execute skip back sampling several beats of your prior performance are saved as a sample You can assign this sample to a pad and play it from the pad fig SMPL08 Button lit Skip back...

Page 122: ...he Sample Edit Screen appears The sample list shows the current state of the samples fig SMPL13 NEW This is a sample that you sampled It has not been saved and will be lost when you turn off the power The same is true for samples imported as WAV AIFF UNLOAD The sample has been saved but not loaded into sample memory EDIT This is a sample that you loaded or sampled and are editing Your edits will b...

Page 123: ...ad a sample from sample memory The saved sample file itself will not be deleted 1 With the Sample List screen shown choose 1 Preset 3 Card to select the group that contains the sample you want to erase 2 Use VALUE dial INC DEC or to select a sample If you want to erase two or more samples press 5 Mark Set to add a check mark to the samples that you want to select To remove the check mark press 4 M...

Page 124: ...c The file will be imported and the Sample List screen will appear To cancel press 7 Cancel The imported file will be added to the sample list as a sample This sample is temporary and will be lost when you turn off the power If you want to keep it press WRITE to save the data Displaying Sample Edit Screen 1 When you press SAMPLE EDIT in the sampling section The Sample Edit screen will appear fig S...

Page 125: ...unwanted portions at the beginning and end of the sample Sample modify operations Chop Normalize etc apply to the entire sample Even if you specify a start point or end point they will be ignored If you want to apply the operation only to the region between the start point and end point use Truncate to delete unwanted portions of the sample and then perform the sample modifying operation Making Se...

Page 126: ...art point Value 0 255 Loop End Fine Fine adjustment of the End point Value 0 255 5 Press EXIT when you are finished Assigning Samples to a Pad Assign To Pad Here s how to assign samples as the rhythm tones of a rhythm set For example you can create an original rhythm set by replacing certain tones of a preset rhythm set with different samples From the Sample List screen you can also press 7 Load U...

Page 127: ...From the Sample List screen you can also press 7 Load Utility 2 Assign to Pad to execute Assign To Pad You cannot execute this with more than one sample selected From Patch Mode 1 Press SAMPLE LIST to select a sample and then press SAMPLE EDIT to access the Sample Edit screen 2 Press 6 Assign KB Pad Assign to Kbd Pad window appears fig SMPL17_50 3 Press 6 Assign to Kbd The Assign to Keyboard windo...

Page 128: ...set Since the samples will be assigned consecutively from the C2 key we recommend that you set Pad Set to User and set the pad bass note to C2 when playing the part from the pads p 136 If you select another rhythm set the rhythm set you assigned will be replaced by that rhythm set If you want to keep the rhythm set press WRITE and save it The sounds will be assigned in order starting at the C2 key...

Page 129: ... inputting the name press 8 Write A screen will appear allowing you to select the destination for the write 5 Either turn the VALUE dial or use INC DEC to select the write destination Multisamples consisting of user samples will be written to User and multisamples consisting of card samples will be written to Card 6 Press 8 Write A message will ask you to confirm the operation 7 If you are sure yo...

Page 130: ... you want to replace the current sample with the emphasized sample press 6 Over Writer to display the symbol 6 Press 8 Exec A message will ask you for confirmation 7 To execute press 8 Exec To cancel press 7 Cancel Maximizing the Volume of a Sample Normalize This operation raises the level of the entire sample as much as possible without exceeding the maximum level In some cases the volume of a ph...

Page 131: ...rk 7 Press 8 Exec A message will ask you for confirmation 8 To execute press 8 Exec To cancel press 7 Cancel Stretching or Shrinking a Sample Time Stretch This operation stretches or shrinks the sample to modify the length or tempo You can stretch or shrink the sample by a factor of one half to double the original length You cannot execute this with more than one sample selected 1 Press SAMPLE EDI...

Page 132: ...Here s how you can automatically specify the points at which the sample is to be divided and then divide the sample 1 From step 3 of p 132 press 6 Auto Chop The Auto Chop sub window will appear 2 Either turn the VALUE dial or use INC DEC to select the method by which the sample is to be divided Chop Type Specify how the sample will be divided Value Level Divide according to volume Beat Divide at b...

Page 133: ...etween the samples 1 Press SAMPLE EDIT to access the Sample Edit screen 2 Press 3 Sample Modify to access the Sample Modify window 3 Press 7 Combine fig Combine_50 4 Either turn the VALUE dial or use INC DEC to set the value 1 16 The sample or silence to be combined TYPE Value Sample sample Time silent region specified as time Beat silent region specified as a note value BANK Bank that contains th...

Page 134: ...will alternately select the first character of the uppercase alphabet A lowercase alphabet a or numerals and symbols 0 2 Delete Deletes the character at the cursor location while shifting the following characters to the left closing the gap 3 Insert Inserts a space at the cursor location Moves the cursor the location at which to enter edit a character Switches letters between uppercase and lowerca...

Page 135: ...nding If you press another pad in this state its sample will also continue sounding in the same way 3 The sound will stop when you press a lit pad When you press HOLD all samples will stop pad sounding The Hold function will not work in the following cases When RPS is on p 172 When the Multi Velocity parameter p 137 is on When the Tone Env Mode parameter p 68 is set to NO SUS When the One Shot Mod...

Page 136: ...ETTING fig Pad01_50 2 Press or to move the cursor to the parameter 3 Turn the VALUE dial or use INC DEC to make pad settings Pad Part Specifies the part that will be used as the pad part When you specify this the word PAD will appear below the part number in the Performance Layer and Mixer screens You can set this parameter when in Performance mode Value 1 16 Patch Rhythm Set Type Specifies whethe...

Page 137: ...ftertouch to be applied more easily Normally you will leave this at 100 Value 0 100 4 If you want to save your settings perform the Write procedure The Write procedure varies depending on the selected mode or parameter 5 When you have finished making settings press EXIT Multi Velocity You can use the sixteen pads to play a specified note at sixteen velocity levels The same note number will be soun...

Page 138: ... Card setting is shown below the song name when you return to the Song Play screen 3 View Svq View SVQ files 4 View Smf View SMF files 5 View Mrc An S MRC format song file created on a device such as the MC 50 4 Press PLAY to start playback When the song finishes playing it will stop automatically If you want to stop playback midway through the song press STOP If you have interrupted song playback...

Page 139: ...o the beginning or end of the song while the song is playing Playing Back Correctly from the Middle of the Song MIDI Update When you play back from the middle of a song for example after fast forward or rewind the correct patch may not be selected or the pitch may be incorrect This is because the MIDI messages in the area that you skipped have not been transmitted to the sound generator In such ca...

Page 140: ...op window appears 3 Press 7 Loop to assign a check mark The Loop switch will turn on Now playback will loop according to the region and the number of times specified in the Loop window To turn off the Loop switch press 7 Loop once again For details on making settings in the Loop window refer to Specifying the Area of a Song that will Repeat Loop Points p 151 4 When you have finished making setting...

Page 141: ...Rhythm set Select a patch or rhythm set if you want to use a single patch or rhythm set to record your playing Erasing the Song Pattern from Internal Memory Song Clear When you record a song the sequencer data is temporarily recorded in internal memory If you want to record a new song you must erase any existing sequencer data from internal memory If internal memory contains an important song that...

Page 142: ... playing and controller operations are recorded just as you perform them Use this recording method when you want to capture the nuances of your own performance Basic Operation for Realtime Recording 1 Make sure that the preparations for recording have been completed as described in Before You Record a New Song p 141 If you want to record into an existing song load the desired song into internal me...

Page 143: ...n it once again press PLAY 5 When you are finished recording press STOP The REC indicator will go dark If you are not satisfied with the realtime recording you just made you can press MENU and from the Menu window that appears select Undo Redo to return to the state prior to recording Undo Redo After executing Undo you can use Redo to revert to the previous state After executing Undo you can execu...

Page 144: ...p 189 1 In the Recording Standby window set the Loop Punch parameter to MANUAL PUNCH 2 Press PLAY Song playback will begin and the Realtime Recording window will appear fig 10 08_50 3 At the point where you want to begin recording press 5 Punch In or step on the pedal Playback will switch to record mode 4 At the point where you want to stop recording once again press 5 PUNCH OUT or step on the ped...

Page 145: ...d parameters 4 Turn the VALUE dial or press INC DEC to add a check mark The message will be recorded if you assign a check mark and will not be recorded if you remove the check mark If you press 5 All Off no sequencer data will be recorded If you press 6 All On all of the sequencer data will be recorded 5 Press EXIT to close the Recording Select window Erasing Unwanted Data While You Record Realti...

Page 146: ...t erasing it REPLACE Replace recording will be carried out If a performance has already been recorded on the recording destination track it will be erased as you record your new performance Use this when you want to re record Start Point Specify the location measure beat clock at which recording will begin 4 Press 8 Note or PLAY The REC indicator will light and the Step Recording screen appears fi...

Page 147: ... recording you can press MENU and from the Menu window that appears select Undo Redo to return to the state prior to recording Undo Redo After executing Undo you can use Redo to revert to the previous state After executing Undo you can execute Redo by performing the above procedure the above procedure once again Inputting a Chord Press the chord The cursor will move to the next step when you relea...

Page 148: ...ll appear if you press 2 PTN Value AUTO TRK 1 TRK 16 PTN001 PTN100 when recording on a pattern Rec Mode Recording Mode Select how recording is to take place Value MIX Mix recording will be carried out Normally you will record using this method If a performance has already been recorded on the recording destination track your newly recorded performance will be added to the existing performance with...

Page 149: ... the screen will scroll in keeping with the song playback location Loading Individual Tracks Patterns of Song Data If you have selected a song file extension SVQ or Standard MIDI File extension MID you can load individual phrase tracks or patterns 1 After step 4 of Loading the Song You Want to Edit press 7 Load Track The Load Song File Track window appears 2 Move the cursor to the left of Source l...

Page 150: ... with a Phrase track muted in the Standard MIDI File format that Phrase track s data will not be saved If you save a song that has a muted Phrase track in the MRC Pro song format the mute status of the track will also be saved If you set the tempo track Tempo Status to MUTE the tempo track will be muted If tempo changes have been recorded in a song but you want to play the song at a fixed tempo yo...

Page 151: ...nd Point Specify the location at which repetition will end The location you specify here will not be included in the repeated area If you press 6 Set End the current location of the song will be set as the ending location 5 If you press 7 Loop to assign a check mark looping will be turned on Editing Sequencer Data Over the Specified Range Track Edit Track Edit lets you edit areas of sequencer data...

Page 152: ... chapter Recording Songs p 141 we explained Recording Quantize which lets you quantize during realtime recording Alternatively it is also possible to quantize a song that has already been recorded The Fantom S has a Preview function that allows playing back the results of a Quantize operation while you are still setting parameters before actual execution This helps to make optimal Quantize setting...

Page 153: ...ate 75 Original performance data Rate 25 Rate 50 Rate 75 Rate 100 Up beat Up beat Up beat Up beat 001 Dance small dynamics 002 Dance large dynamics 003 Dance light swing 004 Dance heavy swing 005 Dance dragging beats small dynamics 006 Dance dragging beats large dynamics 007 Dance dragging beats light swing 008 Dance dragging beats heavy swing 009 Dance pushing beats small dynamics 010 Dance pushi...

Page 154: ...k TRK 1 TRK 16 The specified phrase track TEMPO Tempo track PTN001 PTN100 The specified pattern Measure For Edit Range Specifies the range of measures that are to be erased If you set For to ALL all measures will be specified Status Selects the type of data to be erased Value ALL All types of sequencer data NOTE Note P AFT Polyphonic Aftertouch C C Controller numbers PROG Program numbers C AFT Cha...

Page 155: ...01 PTN100 The specified pattern Measure For Edit Range Specifies the range of measures that are to be deleted If you set For to ALL all measures will be specified Copying Phrases Copy This function copies a specified area of sequencer data It is convenient for repeating the same phrase several times You can copy patterns to a phrase track or copy data from a phrase track to a pattern fig 11 17_50 ...

Page 156: ...ed When you want to copy all the sequencer data set this parameter to ALL To copy only the sequencer data of a specific MIDI channel select the MIDI channel Value ALL 1 16 If you set the source track to TEMPO or if the Status parameter is set to EXC TUNE or PTN the Channel parameter will not be available Inserting a Blank Measure Insert This function inserts blank measures into a specified song po...

Page 157: ...t Range Specifies the range of measures whose velocity will be changed If you set For to ALL all measures will be specified Bias Use this parameter to add a fixed bias amount to all velocities If you want to increase the velocity values by 10 set this to 10 Value 99 99 Magnify Set this parameter if increases or decreases in velocity variations are desired For less velocity variation use settings o...

Page 158: ... Max to C4 To change the MIDI channel of all controller numbers set Range Min to 0 and Range Max to 127 To change the MIDI channel of all program numbers set Range Min to 1 and Range Max to 128 To change number 4 set Range Min and Range Max to 4 To change numbers 3 through 14 set Range Min to 3 and Range Max to 14 Src Channel Dst Channel MIDI Channel Set Src Channel to the MIDI channel that you wa...

Page 159: ...quencer data will be combined into this track Value TRK 1 TRK 16 The specified phrase track PTN001 PTN100 The specified pattern Extracting and Moving a Part of Sequencer Data Extract This function extracts a specified sequencer data area from a phrase track or pattern and moves it to the same Song position of another phrase track or pattern Additionally just as with Standard MIDI File Format 0 whe...

Page 160: ... of 1 clock Slight shifts of timing can speed up or drag performance When this function is executed data that would be moved to a point before the beginning of the song will automatically shift to the beginning of the song If data would be moved to a point past the end of the song additional new measures will be created automatically as needed The time signature of the newly created measures will ...

Page 161: ...res whose sequencer data will be thinned If you set For to ALL all measures will be specified Data Thin Value For thinning data which incorporates rapid changes use higher settings If you don t want to thin that much data even though it is subject to rapid change use lower settings Data Thin Time If you are thinning data that changes gradually over time use higher settings If you don t want to thi...

Page 162: ...ter is displayed the location of the beginning of the specified track and the position of the first note on Editing Individual Items of Sequencer Data Micro Edit Micro Edit lets you edit individual items of sequencer data recorded in a song such as MIDI messages and tempo data Editing Sequencer Data Basic Procedure in the Microscope Access the Microscope screen when you want to view the sequencer ...

Page 163: ... message you are editing will be transmitted from the MIDI OUT connector Sequencer Data Handled by a Phrase Track Pattern Phrase tracks or patterns can record the following nine types of sequencer data The recorded location measure beat clock is displayed at the far left of each data item and the MIDI channel number is displayed beside it Note These MIDI messages represent notes From the left the ...

Page 164: ...po Data Handled by the Beat Track The Beat track records time signature data Beat Change This specifies the time signature Beat Viewing Sequencer Data View Since a phrase track or pattern contains a large amount of sequencer data the display may be cluttered and difficult to read For this reason the Fantom S lets you specify the type s of sequencer data that will be displayed in the screen This is...

Page 165: ...rase a multiple consecutive data hold down SHIFT and press or to select the sequencer data 3 Press 2 Erase to erase the sequencer data If you are not satisfied with the results of executing this operation from the Song Play screen press MENU and from the Menu window that appears select Undo Redo to return to the state prior to execution Undo Redo After executing Undo you can use Redo to revert to ...

Page 166: ... the Song If you want to change the tempo midway through the song insert a new Tempo Change into the tempo track The song will play back at that tempo following the location at which the tempo change was inserted However if you want to create gradual tempo changes such as ritardando or accelerando it is more convenient to use Tempo Recording p 143 If you want to make the entire song faster or slow...

Page 167: ...he inserted beat change will have the default values so edit it as necessary If you are not satisfied with the results of executing this operation from the Song Play screen press MENU and from the Menu window that appears select Undo Redo to return to the state prior to execution Undo Redo After executing Undo you can use Redo to revert to the previous state After executing Undo you can execute Re...

Page 168: ...amples Here s how to save the internal song along with all samples in sample memory and the current sound generator settings 1 From the Save Load Menu screen press 1 Save S S The Song File Name screen will appear fig SL02_50 2 Assign a file name to the song up to 8 characters A file name extension of SVQ will automatically be added to the song 2 Delete Deletes the character at the cursor and shift...

Page 169: ...n a title Use the Song Name screen to assign a song name p 167 If you assign a file name that is identical to a file name already existing in the user area or memory card and attempt to save a message of File Already Exists Over Write OK will appear asking you for confirmation If it is OK to overwrite the existing file press 8 OK If you decide to cancel the Save operation press 7 Cancel If you att...

Page 170: ...cedure 1 Press SAVE LOAD The Save Load Menu screen will appear fig SL01_50 2 Press 5 Load S S 7 Load AllSmpl to select the format in which you want to load the song Load Song Samples Loads a song into internal memory All samples will be loaded into sample memory Load Song Loads a song into internal memory Load all Samples Loads all samples into sample memory Loading is possible A song saved on the...

Page 171: ...ing a WAV AIFF File Import Audio Here s how you can load an audio file WAV AIFF into sample memory as a sample 1 Press Save Load 2 Press 8 Import Audio 3 Press 1 User or 2 Card to select the import destination area 1 User Import from user memory 2 CARD Import from a memory card 4 Press or then select the file that you want to import If you want to select two or more samples press 5 Mark Set to add...

Page 172: ...y how the pattern will be played These settings are made independently for each song and will be saved when you save the song in MRC Pro song format In order to make RPS settings you must first load a song into internal memory 1 Press SEQUENCER The Song Play screen appears 2 Press 5 RPS The RPS Setup screen appears fig 12 02_50 In this screen you can set various parameters related to the RPS funct...

Page 173: ... same mute group number Thirty one mute groups can be specified Select OFF if you do not want to use a mute group for a pattern Value OFF 1 31 4 When you press 7 RPS SW to assign a check mark the RPS function will be turned on 5 When you are finished making settings press 8 Exit to return to the Song Edit screen Using the RPS Function While You Perform Normally when playing patterns individually t...

Page 174: ...ime Rec Standby window appears In this window you can make various settings for realtime recording fig 07 11_50 5 Specify how recording is to take place For details on these settings refer to Recording Your Performance as You Play It Realtime Recording p 142 6 Press PLAY The Recording Standby window will close the REC indicator will change from blinking to lit and recording will begin 7 Press a ke...

Page 175: ... Effect Settings 1 In the appropriate mode select the sound to which you want to apply effects 2 Press EFFECTS to access the Effects screen 3 Press one of the 1 Routing 7 Mastering tabs to select the effect that you want to edit You can also do this by pressing MENU from the Effect screen fig 14 01a In Performance mode each time you press the 3 MFX1 2 3 button it will alternate between 1 2 and 3 I...

Page 176: ...1 4 jacks in mono without passing through multi effects If the Patch Output Assign is set to anything other than TONE these settings will be ignored When the Structure Type parameter has a setting of Type 2 10 the outputs of tones 1 and 2 will be combined with tone 2 and the outputs of tones 3 and 4 will be combined with tone 4 For this reason tone 1 will follow the settings of tone 2 and tone 3 w...

Page 177: ...ts the pair of OUTPUT jacks to which the chorus sound is routed when Chorus Output Select is set to MAIN or M R Value A Output to the OUTPUT A MIX jacks in stereo B Output to the OUTPUT B jacks in stereo When Chorus Output Select is set to REV this setting will have no effect Reverb Type Selects the type of reverb Value 0 Off Reverb is not used 1 Reverb Normal reverb 2 SRV Room This reverb simulat...

Page 178: ...ings are such that signals are split and output from the INDIVIDUAL 1 jack and INDIVIDUAL 2 jack and no plug is inserted in the INDIVIDUAL 2 jack the sounds from INDIVIDUAL 1 and INDIVIDUAL 2 are mixed together then output from the INDIVIDUAL 1 jack This sound comprises the sounds from the INDIVIDUAL 1 and 2 jacks If the Mix Parallel parameter is set to MIX all sounds are output from the OUTPUT A ...

Page 179: ...OUTPUT jacks in stereo REV Output to reverb in mono M R Output to the OUTPUT jacks in stereo and to reverb in mono When set to MAIN or M R the OUTPUT jack from which the sound is output is set in Chorus Output Assign Chorus Level Adjusts the volume of the sound that has passed through chorus Value 0 127 Chorus Output Assign Selects the pair of OUTPUT jacks to which the chorus sound is routed when ...

Page 180: ...MFX 1 3 screen the indicator at the right of the Realtime Control knobs will go out and the Realtime Control knobs can be used to edit the MFX parameters If you once again press the button located at the right of the Realtime Control knobs so the indicator is lit the knobs will control their original functions When you exit the MFX 1 3 screen the indicator will automatically return to its previous...

Page 181: ...es move to the right increase rates and so on select a positive value to make a decrease in the currently selected value to get lower values move to the left decrease rates and so on select a negative value When both positive and negative are selected the changes are greater as the value increases To have no effect applied select 0 Value 63 63 MFX Control Channel Multi Effects Control Channel This...

Page 182: ...ut and the Realtime Control knobs can be used to edit the MFX parameters If you once again press the button located at the right of the Realtime Control knobs so the indicator is lit the knobs will control their original functions When you exit the MFX 1 3 screen the indicator will automatically return to its previous lit state Making Reverb Settings Reverb Here we will explain how to make reverb ...

Page 183: ...lied to the sound that is output from the OUTPUT A MIX jacks It will not be applied to the sound that is output from the OUTPUT B jacks fig 14 11_50 For details on the setting refer to Making Effect Settings p 175 ATTACK Time from when the volume goes up the threshold level until the compressor effect applies Value 0 100 ms RELEASE Time from when the volume falls below the threshold level until th...

Page 184: ... To cancel the connection press 7 Exit Windows Me 2000 XP users A drive named Removable disk will be displayed within My Computer Below that drive there will be folders named ROLAND and TMP Macintosh users A drive icon named FANS USER will appear on the desktop If a memory card is connected the volume name of the memory card will be displayed Below it will be folders named ROLAND and TMP Cautions ...

Page 185: ...o the Fantom S and use it as a background in the display screen The only files that can be transferred between the Fantom S and your computer are bitmaps 320 x 240 pixels Importing a Bitmap File Import BMP Here s how to import a copied file and use it as the background in the Fantom S s display 1 Press MENU 2 Press or to select System and then press ENTER 3 Press 1 or 2 to select Background fig US...

Page 186: ...ndows Me 2000 XP Users 1 Use the device eject button shown in the taskbar at the lower right of the screen to cancel the connection with the Fantom S 2 Then press 8 Exit on the Fantom S Macintosh Users 1 Drag the Fantom S drive icon into the trash 2 Then press 8 Exit on the Fantom S ...

Page 187: ...u to select the folder to which the file is to be copied 3 View the contents of the copy destination folder 1 User 2 Card Select the memory Select the folder Move between folder levels 4 To copy the file press 8 Exec To cancel press 7 Cancel Deleting a File DELETE Here s how you can delete an unwanted file from a folder 1 As described in the basic procedure select the file that you want to delete ...

Page 188: ...he value When all the parameters cannot be shown within a single settings screen a scroll bar will be displayed at the right side of the screen In such cases press to scroll the screen downward 6 Turn the VALUE dial or press INC DEC to get the value you want 7 Repeat steps 4 6 to make the settings for the System function 8 To save the settings you modified press 8 System Write and perform the Writ...

Page 189: ... Rhythm pattern playback on off CHORD SW Chord function on off Control Pedal Polarity Selects the polarity of the pedal On some pedals the electrical signal output by the pedal when it is pressed or released is the opposite of other pedals If your pedal has an effect opposite of what you expect set this parameter to REVERSE If you are using a Roland pedal that has no polarity switch set this param...

Page 190: ...ncer tempo will change ON or will not change OFF when you switch performance Value ON OFF System Control This function which departs from previously used methods and instead allows you to use MIDI messages to change tone settings in realtime is called the Matrix Control p 61 Similarly the function allowing you to use MIDI messages to change multi effects settings in realtime is called the Multi ef...

Page 191: ...atches that of the Fantom S However when synchronizing operation with video devices such as video decks the video device s frame rate is fixed so the Fantom S s setting must correspond to that frame rate MTC Offset Time Hour Coordinates the playback timing of the Fantom S and the external device in an hour units Value 00 23 hours MTC Offset Time Minute Coordinates the playback timing of the Fantom...

Page 192: ... MIDI device Value 17 32 Performance Control Channel Performance Ctrl Ch selects the MIDI receive channel used during switching of performances when MIDI messages Program Change Bank Select are sent from an external MIDI device Set this to OFF if performances are not to be switched from an external MIDI device Value 1 16 OFF If only a program change is received and if the Performance Ctrl Ch param...

Page 193: ...enter A Value 415 3 466 2 Hz Master Level Adjusts the volume of the entire Fantom S Value 0 127 You can also perform this operation by pressing MENU Press MENU to select Digital Level Output Gain This adjusts the output gain from the Fantom S s Analog Out and Digital Out When for example there are relatively few voices being sounded boosting the output gain can let you attain the most suitable out...

Page 194: ... other than equal temperament The pitch is specified in one cent units relative to the equal tempered pitch One cent is 1 100th of a semitone The selected scale applies to MIDI messages received from an external MIDI device Patch Scale Tune for C B Make scale tune settings for Patch mode Value 64 63 For details on the setting refer to How to Make the System Function Settings p 188 Equal Temperamen...

Page 195: ...preset samples will be loaded into memory at power on ON or not OFF Value OFF ON Sample Default Load Specifies whether the samples of the user area and memory card will be loaded into memory at power on ON or not OFF Value OFF ON Power Up Mode This setting allows you to choose the mode that you want the Fantom S to be in when it is powered up Value PATCH The Fantom S will be in Patch mode when you...

Page 196: ...ere s how user data saved on a memory card by the User Backup operation can be reloaded back into the user memory of the Fantom s When you execute User Restore the current contents of the user area will be completely erased 1 Into the slot insert the memory card on which user data has been saved 2 In the Utility screen press 2 User Restre A message will ask you for confirmation 3 To proceed with t...

Page 197: ... List fig PM03_50 2 Press or to select the patch 3 Press 1 or 2 to select the desired category 4 Turn the VALUE dial or press INC DEC and then press 8 Select to select the patch By Pressing 7 Preview you can audition the sound of the patch by means of a phrase preselected as being suitable for that particular type category of patch Phrase Preview By pressing 5 System Write you can register the cur...

Page 198: ...he keyboard more forcefully than usual in order to play fortissimo ff so the keyboard touch feels heavier This setting allows you to add more expression when playing dynamically Adjusting the Depth of Resonance Resonance When you hold down the damper pedal on an acoustic piano the strings notes you play will cause the other strings to resonate sympathetically creating a rich and spacious resonance...

Page 199: ...eed to put the Fantom S in Librarian mode The same is true when you want to use a separately sold librarian 1 Press MENU 2 Use or to select Librarian and then press ENTER fig Editor02_50 Librarian mode will be selected In Librarian mode system exclusive messages sent from an external MIDI device can overwrite the settings in user memory You will be unable to operate the panel of the Fantom S 3 Pre...

Page 200: ... or more 256 M bytes or more recommended Display Colors 800 x 600 or higher 32 000 colors or more 1024 x 768 or higher recommended Hard Disk 80 M bytes or more Others OMS 2 0 or more 207 Apple and Macintosh are registered trademark of Apple Computer Inc 209 MacOS is a trademark of Apple Computer Inc OMS is a registered trademark of Opcode Systems Inc ...

Page 201: ...kers or other devices Use a UM 1 to connect the Fantom S s MIDI OUT connector to the DV 7PR s remote jack fig V LINK Connect e Turning the V LINK ON OFF 1 In the left of the panel press V LINK so the indicator is lighted The V LINK button will light and the V LINK setting will be on In this state you can operate the velocity pads and turntable emulation slider to manipulate images in sync with the...

Page 202: ...the Cr color of the image Brightness Ctrl Control change number that controls the brightness of the image VFX Ctrl Control change number that controls the video effect Value OFF CC1 CC5 CC7 CC10 CC11 CC71 74 CC91 93 Channel Aftertouch PAD MODE Selects whether the pads will switch clips or palettes Value CLIP PALETT Press 1 Clip switch clips Press 2 Palett switch palettes Local Sw Specifies whether...

Page 203: ... hand on the opening for installing the board Do not touch any of the printed circuit pathways or connection terminals Never use excessive force when installing a circuit board If it doesn t fit properly on the first attempt remove the board and try again When circuit board installation is complete double check your work Always turn the unit off and unplug the power cord before attempting installa...

Page 204: ...he power as described in Turning On the Power Quick Start p 4 2 Press MENU to open the Menu window 3 Press or to select System and then press ENTER 4 Press 4 System Info 5 Press 1 or 2 to select SRX Info The System screen appears Verify that the name of the installed Wave Expansion Board is displayed fig 18 06 If appears next to the installed slot name it s possible that the installed Wave Expansi...

Page 205: ...nstallation de la carte Ne pas toucher aux circuits imprimés ou aux connecteurs Ne jamais forcer lors de l installation de la carte de circuits imprimés Si la carte s ajuste mal au premier essai enlevez la carte et recommencez l installation Quand l installation de la carte de circuits imprimés est terminée revérifiez si tout est bien installé Toujours éteindre et débrancher l appareil avant de co...

Page 206: ...es d extension audio est terminée procéder à une vérification pour s assurer que l ordinateur les identifie correctement 1 Mettre sous tension de la façon décrite sous Turning On the Power Quick Start p 4 2 Appuyez sur la touche MENU pour ouvrir la fenêtre Menu 3 Press or to select System and then press ENTER 4 Appuyer sur ENTER 5 Appuyer sur 4 System Info 6 Press 1 or 2 to select SRX Info L écran...

Page 207: ...over 911 Do not touch any of the printed circuit pathways or connection terminals 912 Never use excessive force when installing a circuit board If it doesn t fit properly on the first attempt remove the board and try again 913 When circuit board installation is complete double check your work 914 Modified Always turn the unit off and unplug the power cord before attempting installation of the memo...

Page 208: ...t SRX Info Verify that the screen correctly shows the amount of memory you installed fig 18 06b_50 7 Press EXIT to exit the System screen If the correct amount of memory is not shown it is possible that the memory is not being recognized properly Turn off the power as described in Turning On Off the Power Quick Start and re install the memory correctly Specifications of the expansion memory DIMM t...

Page 209: ...tion de la carte de circuits imprimés est terminée revérifiez si tout est bien installé 914 F Modified Avant de procéder à l installation d un module DIMM il faut toujours mettre l unité hors tension et débrancher le câble d alimentation 915 F Modified Installez uniquement le module DIMM spécifié Retirez uniquement les vis spécifiées p 209 928 F Lorsque vous déposez le Fantom S Fantom S88 face ver...

Page 210: ...ire de la prise Vérifier que la mémoire est installée correctement 1 Mettre sous tension de la façon décrite sous Turning On the Power Quick Start p 4 2 Appuyez sur la touche MENU pour ouvrir la fenêtre Menu 3 Press or to select System and then press ENTER 4 Appuyer sur ENTER 5 Appuyer sur 4 System Info 6 Press 1 or 2 to select SRX Info S assurer de lire dans la fenêtre la taille de la mémoire que...

Page 211: ...ed properly in the specified slot p 203 Has the volume been lowered by pedal operations or by MIDI messages volume messages or expression messages received from an external MIDI device Have the samples been loaded correctly p 170 In the case of Performance mode the value of volume messages Volume and expression messages Expression can be viewed in the Part Information window p 83 A specific Part d...

Page 212: ...rnal effects are in stereo so if you have effects applied to a Patch even if the Pan is set all the way to one side you will still be able to hear sounds of the effect component from the other channel Sometimes when playing legato the pitch won t rise Why is this When the Legato Switch parameter p 58 is ON and the Legato Retrigger parameter p 58 is OFF and you hold down keys in the high register t...

Page 213: ...h being used there will be no effect In addition different Patch Chorus and Reverb Send level settings can be used according to whether or not the multi effects are used Using the Matrix Control or other such means to control the LFO results in noise when the Pan is changed suddenly Lower the change in speed LFO Rate Due to the specialized processing used for the Pan which alters the volume level ...

Page 214: ...ta that is not specified by the Fantom S was encountered in the song No sound is played if the tone group is not one designated by the Fantom S with Bank Select MSB LSB Note that if you omit the Bank Select and send only the Program Change the tone in the currently selected group that has the specified Program Change number will play Try reselecting the tone using the panel controls Furthermore wh...

Page 215: ...e Rx Exclusive parameter to ON p 193 Does the Device ID number of the transmitting device match the Device ID number of the Fantom S Check the Device ID parameter p 192 Are you attempting to write to the User area Data can be written to the User area only in Librarian mode I connected an external sequencer or MIDI keyboard to the MIDI IN connector and attempted to play a Fantom S rhythm set but th...

Page 216: ... Standby screen p 120 to adjust the level while watching the level meter displayed in the upper part of the display Adjust the level so that the CLIP indication in the upper right of the display does not appear Are the effect settings appropriate Some types of effect may increase the level louder than the original sample or may intentionally distort the sound Some effects will also cause noise to ...

Page 217: ...ion waveforms Patch expansion SRX expansion boards 4 slots 1 Sampling memory expansion DIMM 1 slot 128 MB or 256 MB 3 3 V recommended Memory card expansion SmartMedia card 1 slot supports 8 M bytes 16M bytes 32M bytes 64M bytes 128M bytes 3 3V Others Arpeggio Preset 128 User 128 Rhythm Pattern Preset 256 32 groups User 256 32 groups Chord Memory Preset 64 User 64 Display 320 x 240 dots four shade ...

Page 218: ...Booster 47 Booster 1 2 47 Booster 3 4 47 Booster Gain 1 2 47 Booster Gain 3 4 47 BPM sample 126 BWD 139 C C B patch 194 C B performance part 88 Chain play 138 Change Channel 158 Change Duration 158 Change Velocity 157 Channel Pressure performance 90 Chop 132 Chord Memory Function 110 Chorus Level patch 177 Chorus Level performance 179 Chorus Level rhythm set 177 Chorus Output Assign patch 177 Chor...

Page 219: ...Performance 178 Rhythm 175 Turning effects on and off 175 Emphasis 130 End Point 125 End Step Arpeggio Edit 108 Rhythm Pattern Edit 115 Env T4 V Sens tone 52 Envelope depth rhythm tone 71 Envelope Mode rhythm tone 68 Envelope mode tone 61 Equal temperament 89 194 Erase 154 165 Micro edit 165 Realtime erase 145 Track edit 154 Exchange 161 Expression performance 90 Ext Bank Select LSB 89 Ext Bank Se...

Page 220: ...sensitivity 189 Keyboard Sw performance part 87 Keyboard Switch 84 Keyboard Velocity 189 Knob 101 Knob Assign 1 4 36 Knob Assign 1 4 Performance 94 101 Knob Part Select Patch 33 L LAYER screen 76 Legato Retrigger 58 Legato retrigger switch 58 Legato switch 58 Legato Switch patch 58 Level 35 100 LEVEL Mastering Efect 183 Level performance part 85 Level Solo Synth 93 Level V Curve tone 53 Level velo...

Page 221: ...ffset time second 191 MTC Sync Output 191 MTC sync output switch 191 Multi Effects 20 Multi effects 1 3 source 179 Multi effects chorus send level patch 177 Multi effects chorus send level performance 179 Multi effects chorus send level rhythm set 177 Multi effects control channel 181 Multi Effects Control Destination 1 4 181 Multi Effects Control Sensitivity 1 4 181 Multi Effects Control Source 1...

Page 222: ...rato Depth 88 Part Vibrato Rate 88 Patch 42 Category 30 Patch group 27 Patch parameters 43 Patch settings 39 Selecting a patch 27 Patch Bank performance part 84 Patch Category 43 Patch Coarse Tune 43 Patch Compare 42 Patch Copy 40 Patch Edit 39 Chorus 182 Effects 175 General 43 LFO 56 Matrix Ctrl 61 MFX 180 181 MFX Control 180 181 Pitch 49 Reverb 182 TMT 46 TVA 53 TVF 50 Wave 45 Patch finder 29 Pa...

Page 223: ... Effect 183 Realtime control button assign 1 2 patch 37 Realtime Control Knob Assign 1 4 36 Realtime Control Knob Assign 1 4 Performance 94 101 Realtime controller 101 Realtime erase 145 Realtime phrase sequence 172 Realtime recording 142 REC 142 Receive bank select switch 193 Receive bank select switch performance 90 Receive Channel performance part 89 Receive channel pressure switch performance ...

Page 224: ... beat 125 chop 132 combine 133 create multisample 128 create rhythm 128 delete 123 emphasis 130 import audio 124 Load 123 normalize 130 sample edit screen 124 sample list 122 sample parameter 125 time stretch 131 truncate 129 unload 123 129 Zoom In Out 124 Sample assign to pad 126 Sample Default Load system 195 Sample Edit screen 124 SAMPLE LIST 122 Sample List 122 Sample Parameter 125 Sampling 19...

Page 225: ...5 75 Tone dry send level tone 55 75 Tone Env Mode rhythm tone 68 Tone Env Mode tone 61 Tone Fine Tune 49 71 Tone Fine tune rhythm tone 71 Tone Level rhythm tone 74 Tone Level tone 53 Tone Name 68 Tone Out Assign 55 75 Tone Out Level 55 75 Tone Output Assign 176 Tone output assign rhythm tone 75 Tone output assign tone 55 Tone Output Level 176 Tone Output level rhythm tone 75 Tone output level tone...

Page 226: ...ocity Pad Velocity 137 Velocity control switch 70 Velocity Curve performance 90 Velocity fade width lower rhythm wave 70 Velocity fade width lower tone 48 Velocity fade width upper rhythm wave 71 Velocity fade width upper tone 48 Velocity range lower rhythm wave 70 Velocity range lower tone 48 Velocity range upper rhythm wave 70 Velocity range upper tone 48 Velocity Sens Offset patch 44 Velocity s...

Page 227: ...o communications However there is no guarantee that interference will not occur in a particular installation If this equipment does cause harmful interference to radio or television reception which can be determined by turning the equipment off and on the user is encouraged to try to correct the interference by one or more of the following measures Reorient or relocate the receiving antenna Increa...

Page 228: ...RUS TEL 022 66 9426 DENMARK Roland Scandinavia A S Nordhavnsvej 7 Postbox 880 DK 2100 Copenhagen DENMARK TEL 3916 6200 FRANCE Roland France SA 4 Rue Paul Henri SPAAK Parc de l Esplanade F 77 462 St Thibault Lagny Cedex FRANCE TEL 01 600 73 500 FINLAND Roland Scandinavia As Filial Finland Elannontie 5 FIN 01510 Vantaa FINLAND TEL 0 9 68 24 020 GERMANY Roland Elektronische Musikinstrumente HmbH Osts...

Reviews: