background image

3

USING THE UNIT SAFELY

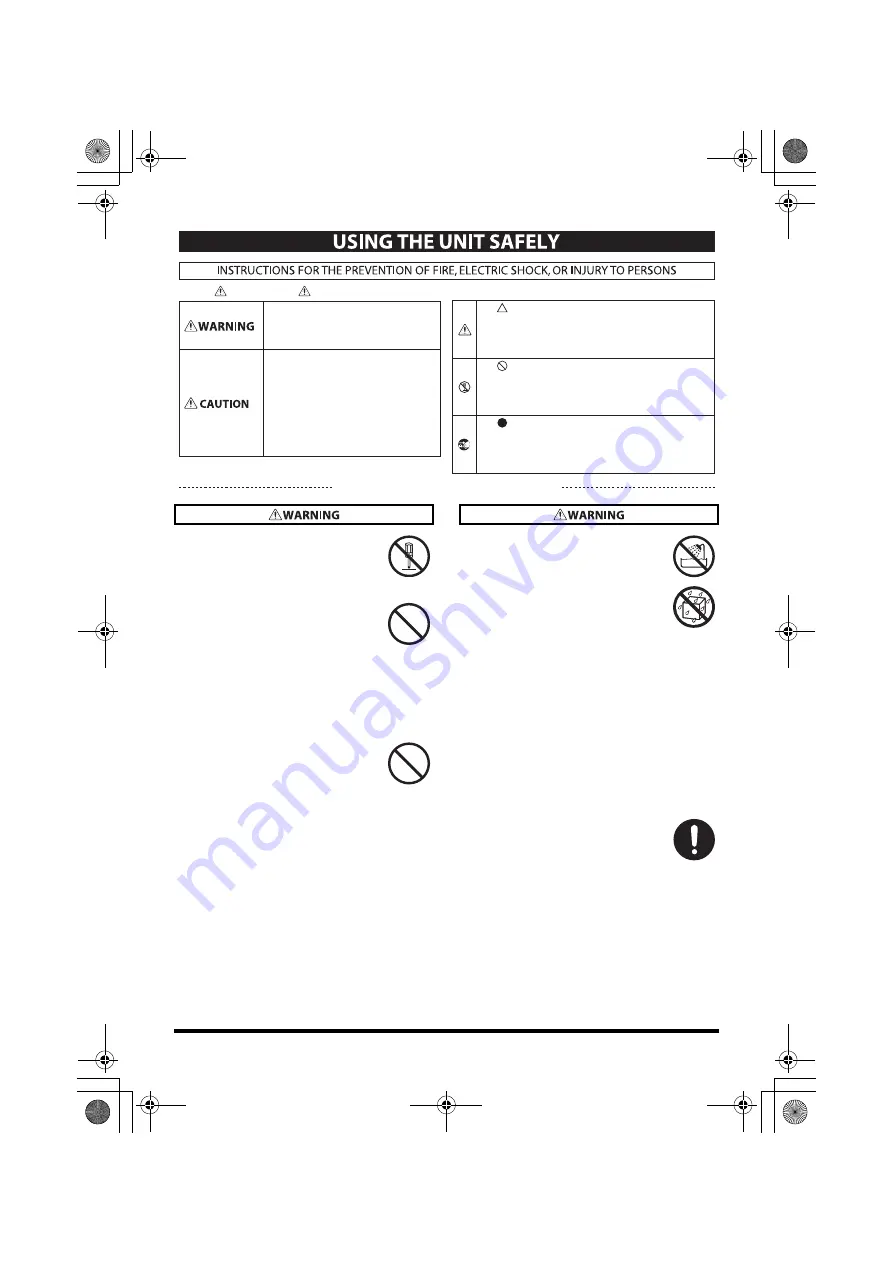
• Do not open or perform any internal 

modifications on the unit.

.......................................................................................................................

• Do not attempt to repair the unit, or 

replace parts within it (except when 
this manual provides specific instruc-
tions directing you to do so). Refer all 
servicing to your retailer, the nearest 
Roland Service Center, or an autho-
rized Roland distributor, as listed on 
the “Information” page.

.......................................................................................................................

• This unit, either alone or in combi-

nation with an amplifier and 
headphones or speakers, may be 
capable of producing sound levels 
that could cause permanent hearing 
loss. Do not operate for a long period 
of time at a high volume level, or at a 
level that is uncomfortable. If you 
experience any hearing loss or 
ringing in the ears, you should 
immediately stop using the unit, and 
consult an audiologist.

.......................................................................................................................

• Never install the unit in any of the 

following locations.

• Subject to temperature extremes 

(e.g., direct sunlight in an enclosed 
vehicle, near a heating duct, on top 
of heat-generating equipment); or 
are

• Damp (e.g., baths, washrooms, on 

wet floors); or are

• Exposed to steam or smoke; or are

• Subject to salt exposure; or are

• Humid;  or  are

• Exposed to rain; or are

• Dusty or sandy; or are

• Subject to high levels of vibration 

and shakiness.

.......................................................................................................................

• Make sure you always have the unit 

placed so it is level and sure to remain 
stable. Never place it on stands that 
could wobble, or on inclined surfaces.

.......................................................................................................................

Used for instructions intended to alert the 
user to the risk of injury or material 
damage should the unit be used 
improperly. 

* Material damage refers to damage or 

other adverse effects caused with 
respect to the home and all its 
furnishings, as well to domestic animals 
or pets. 

Used for instructions intended to alert the 
user to the risk of death or severe injury 
should the unit be used improperly. 

The       symbol alerts the user to things that must be 
carried out. The specific thing that must be done is 
indicated by the design contained within the circle. In the 
case of the symbol at left, it means that the power-cord 
plug must be unplugged from the outlet. 

The       symbol alerts the user to important instructions or 
warnings.The specific meaning of the symbol is 
determined by the design contained within the triangle. In 
the case of the symbol at left, it is used for general 
cautions, warnings, or alerts to danger. 

The       symbol alerts the user to items that must never be 
carried out (are forbidden). The specific thing that must 
not be done is indicated by the design contained within 
the circle. In the case of the symbol at left, it means that 
the unit must never be disassembled. 

About       WARNING and       CAUTION Notices

About the Symbols

ALWAYS OBSERVE THE FOLLOWING

UA-25EXCW_e.book  3 ページ  2009年4月13日 月曜日 午後12時33分

Summary of Contents for Cakewalk UA-25 EX

Page 1: ...7 0 2 UA 25EXCW_e book 1...

Page 2: ...sections entitled USING THE UNIT SAFELY and IMPORTANT NOTES p 3 p 5 These sections provide important information concerning the proper operation of the unit Additionally in order to feel assured that...

Page 3: ...s have the unit placed so it is level and sure to remain stable Never place it on stands that could wobble or on inclined surfaces Used for instructions intended to alert the user to the risk of injur...

Page 4: ...unit from strong impact Do not drop it DO NOT play a CD ROM disc on a conventional audio CD player The resulting sound may be of a level that could cause permanent hearing loss Damage to speakers or o...

Page 5: ...ppening If you do so please make sure that the unit will not slip or move accidentally Maintenance For everyday cleaning wipe the unit with a soft dry cloth or one that has been slightly dampened with...

Page 6: ...resistors Do not use cables that incorporate resistors for connecting to this unit The use of such cables can cause the sound level to be extremely low or impossible to hear For information on cable...

Page 7: ...ng a microphone and applying the compressor 34 Recording a digital signal into your computer 36 Recording to an MD or other digital device 37 Appendices 38 Driver settings 38 Driver signing option set...

Page 8: ...hat s ready for immediate use For details on using these software refer to the installation guides and the software help provided on the CD ROM Use of the demo song supplied with this product for any...

Page 9: ...e opening the CD ROMs You ll need to provide the following items External amplifier speakers headphones and microphone are not included The external amplifier speakers or headphones that you ll need i...

Page 10: ...level of the signals that are input from the front panel combo input jacks 1 3 Input impedance select switch This lets you select either high impedance Hi Z or low impedance Lo Z as appropriate for th...

Page 11: ...ator does not light If the rear panel compressor limiter type switch 22 is set to OFF BYPASS position the peak indicator will light red The compressor limiter type switch is set to compressor 1 2 or L...

Page 12: ...rect monitor switch operation 10 Direct monitor volume direct monitor section knob This adjusts the volume at which the input signal from the combo input jacks 1 is output from the headphone jack 13 a...

Page 13: ...e to make connections 17 Digital input connector optical This is a input connector for digital audio signals Use this to digitally input audio signals from a digital audio device such as a CD MD or DA...

Page 14: ...etails on the requirements of your microphone refer to its owner s manual The UA 25EX s phantom power supply DC 48 V 8 mA maximum Switch Explanation ON Advanced mode In this mode you can use the dedic...

Page 15: ...EX and the application software on your computer when the UA 25EX is connected to your computer The driver sends data from your application software to the UA 25EX and routes data from the UA 25EX to...

Page 16: ...ars click Open folder to see files 4 On the CD ROM navigate to the Driver Vista folder and double click the Setup icon If a message saying Driver installation must be performed by an administrator app...

Page 17: ...ection circuit A brief interval a few seconds after connecting the USB cable is required before the unit will operate normally 10 The message Installing device driver software will appear in the lower...

Page 18: ...yer Some software such as Windows Media Player will use the system default playback recording device for its audio input output device Here s how to specify the UA 25EX as the system default playback...

Page 19: ...ying back with your software Check the following points before you use the UA 25EX to record or play back Connect the UA 25EX to your computer before you start up the software you re using Do not disc...

Page 20: ...minate the installation log on to Windows using an administrator account and perform the installation once again 5 The screen will indicate UA 25EX Driver will be installed on your computer Click Next...

Page 21: ...e asked whether you want to connect to Windows Update choose No and click Next fig XP 8e eps 2 Choose Install the software automatically Recommended and click Next 3 If the Hardware Installation dialo...

Page 22: ...and MIDI input output device Here s how to specify the UA 25EX as the system default playback device so that it can be used with Windows Media Player In a later step you ll use Windows Media Player t...

Page 23: ...ying back with your software Check the following points before you use the UA 25EX to record or play back Connect the UA 25EX to your computer before you start up the software you re using Do not disc...

Page 24: ...ck the UA25EXUSBDriver pkg A message such as This package contains a program that or This installer package needs to may appear If so click Continue 5 The screen will indicate Welcome to the UA 25EX D...

Page 25: ...audio input output device in your software it may be that a problem has occurred Refer to Problems with settings p 49 in the Troubleshooting section Using the UA 25EX with iTunes Some software such as...

Page 26: ...w external device that was added and then click Show Info 2 In the Device Name field type UA 25EX 6 Using the mouse drag the up down arrows that indicate the input output ports so that they are connec...

Page 27: ...ou use the UA 25EX to record or play back Connect the UA 25EX to your Macintosh before you start up the software you re using Do not disconnect the UA 25EX s USB cable from your Macintosh while your s...

Page 28: ...ill play back sample data using the standard functionality provided by your operating system The sample data TTears mp3 is in the included CD ROM Copyright law prohibits you from using the song data i...

Page 29: ...nected your audio playback system to the OUTPUT jacks use the controls of your audio playback system to adjust the volume You should hear the sample data played from the headphones or speakers connect...

Page 30: ...w If this happens use connection cables that do not contain resistors Don t connect anything to input jacks you are not using Howling could be produced depending on the location of microphones relativ...

Page 31: ...h directions via the USB cable By connecting headphones or monitor speakers as shown in the illustration you can monitor the playback from your software or the sound from an instrument or audio device...

Page 32: ...ut impedance select switch If you ve connected a guitar bass to INPUT 2 Select Hi Z pressed inward If you ve connected a microphone to INPUT 2 Select Lo Z outward position Phantom power switch If you...

Page 33: ...the UA 25EX to your computer and then reconnect the USB cable in order for the new setting to take effect STEREO MONO select switch Direct Monitor section This selects whether the input signal is to...

Page 34: ...mpressor limiter threshold knob Turning this knob toward the right will apply stronger compression This will also increase the gain makeup gain so you should use the input sensitivity knob and thresho...

Page 35: ...s selects whether the input signal is to be monitored in stereo or in monaural p 12 If you ve connected a microphone as shown in this example choose the monaural MONO setting Direct Monitor switch If...

Page 36: ...ur computer and then reconnect the USB cable in order for the new setting to take effect If you want to record at 96 kHz you must set this switch to 96R record Digital input switch Turn this on so tha...

Page 37: ...onnects the UA 25EX to your computer and then reconnect the USB cable in order for the new setting to take effect If you recorded at 96 kHz you must set this switch to 96P playback Other notes The sig...

Page 38: ...ending on the software you re using its audio settings may also have a buffer size adjustment Use Smaller ASIO Buffer Size By selecting this check box you can decrease the buffer size when using ASIO...

Page 39: ...rrectly aligned If audio software is running these settings will not be applied immediately even if you click Apply Close all audio software the settings will be applied the next time you start up the...

Page 40: ...ng on your system 1 Start up Windows with the UA 25EX disconnected Make sure that all USB cables other than those for a USB keyboard and USB mouse if used are disconnected Log on using a user name who...

Page 41: ...uble click UA25EX_Uninstaller 4 The screen will indicate This uninstalls UA 25EX driver from this Macintosh Click Uninstall If any other message appears proceed as directed by the message 5 The screen...

Page 42: ...bol for Turn off hard disk after to open it 6 Click Setting Minutes and click the down arrow to change the setting to Never 7 Click OK to close the Power Options window 8 Close the Edit Plan Settings...

Page 43: ...ssword log on to Windows as a user whose account type is administrator and make the setting again 4 Click Performance Settings and click the Advanced tab 5 Choose Background services and click OK 6 Cl...

Page 44: ...the Control Panel and double click Sounds and Audio Devices If you don t see the Sounds and Audio Devices icon click Sounds Speech and Audio Devices and then click Sounds and Audio Devices 2 Click th...

Page 45: ...audio input output device For details on how to make this setting refer to the documentation of your software Windows Vista users For details on settings for using the UA 25EX with Windows Media Play...

Page 46: ...rive on the network Could you have connected the UA 25EX to your computer before installing the driver If you connect the UA 25EX to your computer before installing the driver an error message may app...

Page 47: ...computer This is not a malfunction Please wait until the Found New Hardware Wizard appears Is the UA 25EX connected Make sure that the UA 25EX is correctly connected to your computer Could your comput...

Page 48: ...ven though the driver has already been installed This behavior does not indicate a malfunction Install the driver as described in step 8 of Installing the driver p 21 Could you have connected the UA 2...

Page 49: ...t If this does not solve the problem restart your computer Could you have disconnected and reconnected the USB cable while using the UA 25EX Close all software that uses the UA 25EX disconnect the UA...

Page 50: ...turned on digital input mode If the UA 25EX is set to digital input mode p 11 the audio signal being received at the digital input jack will be output The audio signal from your computer will not be o...

Page 51: ...f your software allows you to adjust the audio buffer size try changing the setting Normally clicks and pops can be eliminated by increasing the buffer size Try adjusting the audio buffer size of the...

Page 52: ...evice Manager try disabling LAN wired wireless If this eliminates the clicks and pops it may be that updating your LAN driver or BIOS may solve the problem Check whether updated software is available...

Page 53: ...s input sensitivity knob to adjust the input level If your software is able to adjust the input level check its input level setting Was the driver installed correctly Driver installation may have fail...

Page 54: ...o data Is your software set correctly Make sure that your software is set to play and record 24 bit audio data Is the digital input switch turned on If you want to digitally capture audio data from a...

Page 55: ...Hz to 40 kHz 0 dB 2 dB 48 0 kHz 20 Hz to 22 kHz 0 dB 1 dB 44 1 kHz 20 Hz to 20 kHz 0 dB 1 dB Nominal Input Level Input Jack L R XLR type 60 to 20 dBu Input Jack L R 1 4 inch TRS phone type 36 to 4 dB...

Page 56: ...ctor Optical type Digital Output Connector Optical type Output Jack L R 1 4 inch TRS phone type balanced RCA phono type MIDI Connectors IN OUT USB Connector B type Power Supply USB Bus Power Current D...

Page 57: ...edance 10 Hi Z 10 I Impedance 10 Input Analog audio 10 Combo input jack 10 Digital audio 11 13 36 Impedance 10 32 Level 10 Sensitivity 10 Installing the driver Macintosh 24 Windows Vista 16 Windows XP...

Page 58: ...type 10 U Unbalance 10 Uninstall the driver Macintosh 41 Windows 40 USB cable 9 USB connector 14 USB indicator 12 V Vocal 32 W Windows Media Player Windows Vista 18 Windows XP 22 Windows Vista 16 Win...

Page 59: ...MEMO UA 25EXCW_e book 59...

Page 60: ...MEMO UA 25EXCW_e book 60...

Page 61: ...MEMO UA 25EXCW_e book 61...

Page 62: ...For EU Countries For China UA 25EXCW_e book 62...

Page 63: ...e determined by turning the equipment off and on the user is encouraged to try to correct the interference by one or more of the following measures Reorient or relocate the receiving antenna Increase...

Page 64: ...5 1 0 0 0 0 7 0 0 7 0 2 UA 25EXCW_e book 64...

Reviews: