


4.
How to Use
User Guide
3.2 RAID System installation
Follow the instructions in this section to hook up all your hardware components of the
Accustor PR3600
system. Do not turn the power on until all components are properly installed.
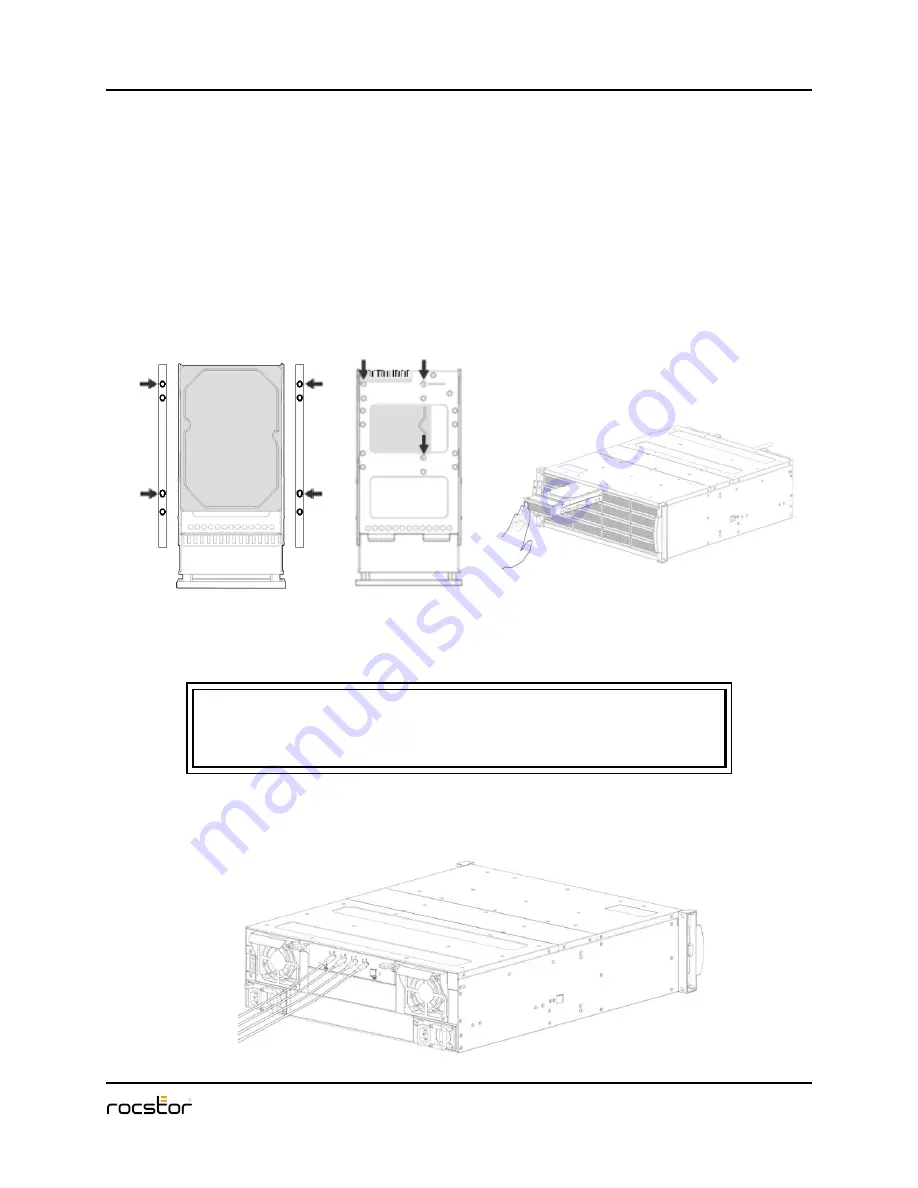
3.2.1
Installing Disk Drives
Follow the steps below to install your HDDs.
1. Place the HDD with connector align with the edge of the disk tray.
2. Secure HDD with screws as below figures.
3. Slide the disk tray into the disk bays of the chassis.
Four screws for 3.5
”
Three screws for 2.5
”
Insert tray into
Accustor PR3600
4.
Push the tray inward until the tray firmly connects and you hear the tray click into
place.
5.
Repeat for all drives to be installed into the
Accustor PR3600
.
Note
The hard drives in a RAID system should match in size and speed. All
drives in an array should be identical models with the same firmware
version.
3.2.2
Connecting cable to
Accustor PR3600
Supports Thunderbolt cables that are certified by Intel, refer to below picture on where to
connect Thunderbolt cable.
Summary of Contents for accustor PR3600
Page 1: ...Accustor PR3600 Storage User Guide Rocstor Version V1 1 TM...
Page 7: ...1 Introduction User Guide 1 Introducing Accustor shareable Thunderbolt Storage System...
Page 15: ...2 Preparation User Guide 2 Preparing to Install Accustor PR3600...
Page 18: ...3 Installation User Guide Page 3 1 3 Installing the Accustor PR3600...
Page 24: ...4 How to Use User Guide 4 Configure Accustor PR3600 on RAIDGuardX...
Page 51: ...5 RAID User Guide 5 RAID Overview...
Page 55: ...Appendices User Guide Page 6 1 6 Appendices...


