


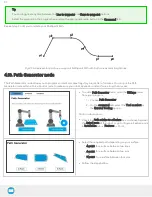


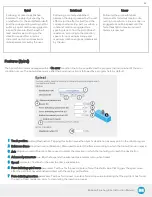

4.9.1. How to set up a Multipoint Path
Step 1
l
Select the MoveJ To waypoint child node in the program tree.
l
A menu will display in the Command tab.
l
Using the Freedrive mode or the UR Move menu, move the robot arm to the position you want to be the starting point of your
Multipoint Path.
l
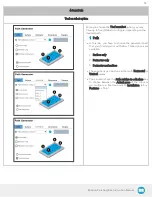
Tap the Set waypoint button. The UR waypoint interface will pop up and ask you to define the waypoint.
l
Adjust the position if needed, then press OK.
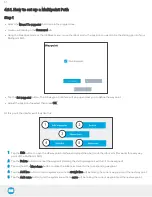
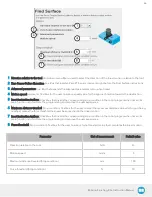
At this point, the interface will look like this:
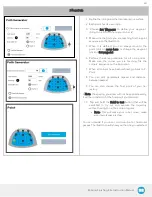
1
Tap the Edit button to open the UR waypoint interface and adjust the position of the robot arm (this works for every way-
point of the Multipoint Path)
2
Tap the Delete button to cancel the waypoint (deleting the starting waypoint will turn it to unassigned)
3
Tap and hold the Move here button to make the robot arm travel to the corresponding waypoint
4
Tap the Add line button to let the system know that a straight line will be linking the current waypoint and the next waypoint
5
Tap the Add curve button to let the system know that a curve will be linking the current waypoint and the next waypoint
51


