background image

If you need any further advice, please call our Technical Helpline on :-
020 8758 0338 (Mon-Fri)

24

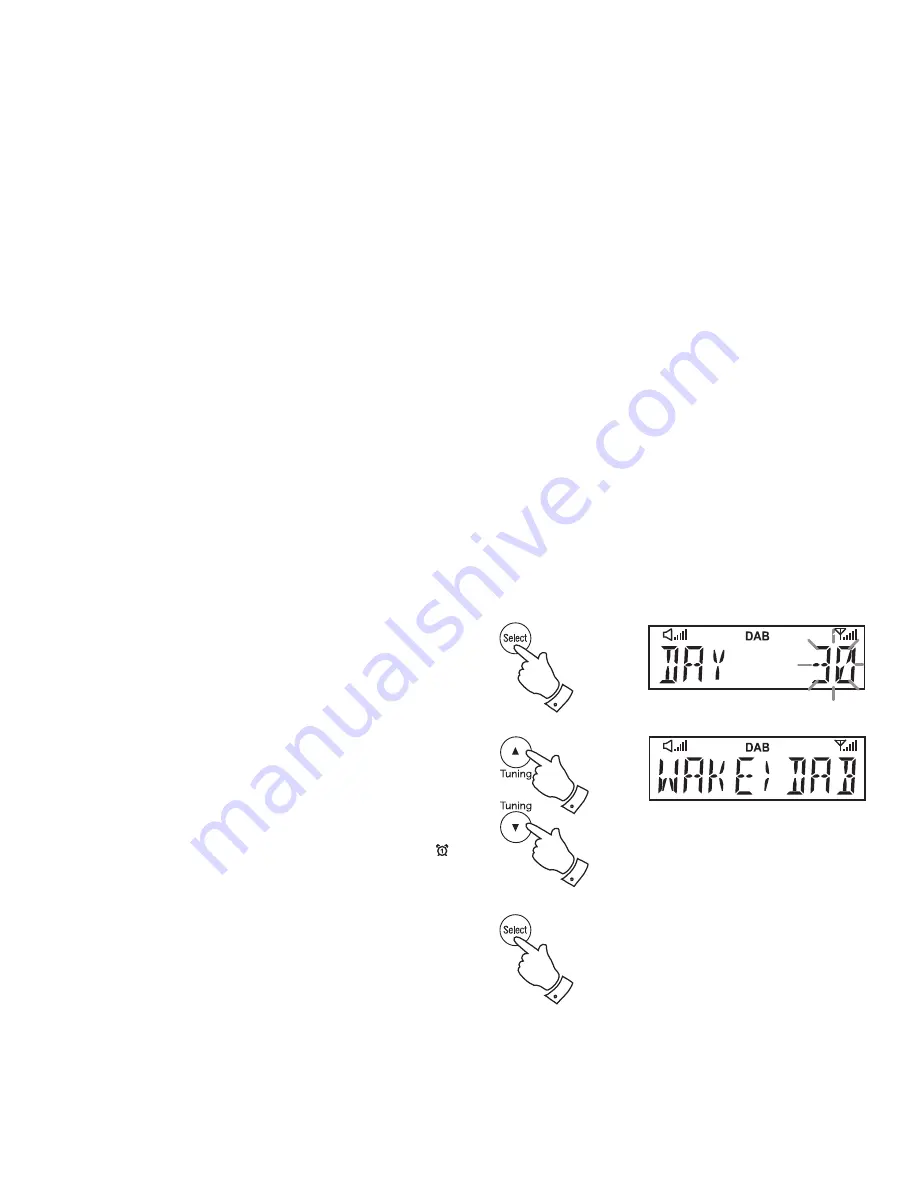
16. Press the 

Select button

 to enter the alarm month setting. The alarm 

day will 

fl

 ash on the display.

17. Press the 

Tuning Up

 or 

Down buttons

 to choose the alarm day.

18. Press the 

Select button

 to enter the setting. The alarm source option 

will 

fl

 ash on the display.

19. Repeatedly press the 

Tuning Up

 or 

Down buttons

 to choose the 

desired alarm source (DAB, FM, iPod, BUZ).

20. Press the 

Select button

 to con

fi

 rm the alarm settings and return to 

normal radio mode.

Radio, Buzzer and iPod alarms are indicated in the display by the 


symbol and the corresponding alarm number. 
When your sound system is set to wake by the radio alarm, your sound 
system will switch to the last used DAB or FM radio station.
When the alarm activates the alarm will start softly and gradually increase 
in level.
For DAB, FM or iPod alarm you may adjust the volume while the alarm 
is active. Without intervention the volume will gradually increase up to a 
mid level.

Important:

 If using your iPod as the source for the alarm, then be sure to 

dock your iPod. After docking, brie

fl

 y switch on the sound system using the 

On / Standby button

 and then select iPod mode using the 

iPod button

Next, press the 

Play / Pause button 

two or three times to ensure that 

the sound system and your iPod are communicating correctly. Failure to 
verify this may result in the alarm not being audible if the sound system 
is unable to activate your iPod when needed. When ready, put the sound 
system back into standby mode using the 

On / Standby button

.

17,19

16,18

17,19

20

Summary of Contents for SOUND66

Page 1: ...Please read this manual before use ROBERTS DAB FM RDS Digital Sound System with dock for iPod Enjoy Listening ...

Page 2: ...a preset station 18 iPod docking 19 Navigating your iPod 20 Playing a file on your iPod 20 Search function 21 Setting the alarm times 22 24 Contents To view the alarm settings 25 Cancelling alarms 25 Snooze function 26 Sleep function 27 Setting the clock manually 28 29 To return to auto clock set mode 30 Equaliser function 31 34 Mute function 34 Clock display 35 Display backlight dimmer 35 Softwar...

Page 3: ... Down buttons 3 On Standby button 4 Sleep button 5 Alarm button 6 Preset button 7 Info button 8 Menu button 9 Mode button DAB FM iPod or Aux in 10 Cover for iPod dock connector 11 Rewind button 12 Tuning Up button 13 Fast forward button 14 Select Play Pause button 15 Tuning Down button 1 2 3 4 5 6 7 8 9 10 13 12 11 15 14 ...

Page 4: ...a red sensor 18 Speakers x 2 Controls front Controls rear 19 Telescopic aerial 20 DC in socket 21 Line output socket 22 Headphone socket 23 Auxiliary input socket 24 USB socket for software upgrades 18 16 19 20 17 21 22 23 24 ...

Page 5: ...d button 19 Preset button 20 Select button 21 Volume Up Down buttons 1 Controls remote control Note For the sake of clarity the instructions for the use of the controls throughout this instruction manual show the buttons on the remote control The buttons on the sound system can be used if you prefer However the mute display backlight dimmer and some iPod control functions are only available when u...

Page 6: ...hat the positive side of the battery faces you with the holder positioned as shown 5 Replace the battery holder If the remote is not to be used for an extended period of time it is recommended that the battery is removed IMPORTANT The battery should not be exposed to excessive heat such as sunshine fire or the like After use disposable batteries should if possible be taken to a suitable recycling ...

Page 7: ...CK After a short time the current time will appear on the display 4 If no stations are found NO CLOCK will be displayed It may be necessary to relocate your sound system to a position giving better reception Youshouldthencarryoutascantofindstationsasdescribedon page 11 IMPORTANT The mains adaptor is used as the means of connecting the sound system to the mains supply The mains socket used for the ...

Page 8: ... will show progress of the station search for example 18 The number on the right of the display is the number of stations that have been found When the scan is completed the first station in numeric alpha order 0 9 A Z will be selected 5 If no signals are found then OFF AIR will be displayed and it may be necessary to relocate your sound system to a position giving better reception Youshouldthenca...

Page 9: ...station currently selected 3 Press the Tuning Up or Down buttons to step through the list of available stations 4 When the desired station name appears on the display press the Select button to select the station The display will show TUNING while your sound system finds the new station 5 Adjust the Volume to the required setting Note If after selecting a station the display shows OFF AIR it may b...

Page 10: ...Mostsecondaryservicesdonotbroadcastcontinuallyandiftheselected service is not available the radio will re tune to the associated primary service Display modes DAB Your radio has a range of display options when in DAB mode 1 Press the Info button to cycle through the various options a Station name Displays the station name being listened to b Scrolling text Displays scrolling text messages such as ...

Page 11: ...ion belongs e Time Displays the current time 24 hour clock f Date Displays the current date g Frequency channel Displaysfrequencyandchannelnumber for the currently tuned DAB station h Bit rate Displays the digital audio bit rate for the currently tuned DAB station i Signal error Displays the bit error rate for the currently tuned DAB station d e f g h i ...

Page 12: ... Menu button EQ shows on the display 2 Press the Tuning Up or Down buttons until the display shows SCAN 3 Press and release the Select button Your radio will perform a scan of the Band III DAB channels As new stations are found the station counter on the right hand side of the display will increase and stations will be added to the list 2 2 3 ...

Page 13: ... desired DAB channel Press and release the Select button to tune to the chosen frequency 4 If a signal is present this will be indicated on a signal strength display The minimum signal marker shows the minimum signal strength needed for good DAB reception The signal indicator chevrons go up or down showing the changing signal strength as you adjust the telescopic aerial or your sound system positi...

Page 14: ...utton to select the DAB band 3 Press and release the Menu button the display will show EQ 4 Press the Tuning Up or Down buttons until DRC VAL appears on the display Then press the Select button The display will show the current DRC value 5 PresstheTuningUporDownbuttonstoselecttherequiredDRCsetting default is 0 6 PressandreleasetheSelectbuttontoconfirmthesetting Thedisplay will return to the normal...

Page 15: ...will display the station name 6 To find other stations press and hold the Tuning Up button as before 7 Press and hold down the Tuning Down button for 2 3 seconds to cause your radio to search from high frequency to low frequency and to stop automatically when it finds a station of sufficient strength 8 When the end of the waveband is reached your radio will recommence tuning from the opposite end ...

Page 16: ...esent then the display may change to show the station name 5 When the waveband end is reached the radio will recommence tuning from the opposite waveband end 6 Adjust the Volume to the required setting 7 To switch off your sound system press the On Standby button Note If you find that FM reception is poor try repositioning the Telescopic aerial fully extend and position vertically for optimum rece...

Page 17: ...ss the Info button to cycle through the various modes a Station name Displaysthenameoftheradiostationbeing listened to b Scrolling text Displays scrolling text messages such as artist track name phone in number etc c Programme type Displaystypeofstationbeinglistenedto e g Pop Classic News etc d Time Displays the current time 24 hour clock format e Date Displays current date f Frequency Displays th...

Page 18: ...ss the DAB or FM button to select the desired waveband 3 Tune to the required station as previously described 4 Press and release the Preset button The display will show for example Empty 1 if no station has been stored to that preset 5 Use the Tuning Up or Down buttons to select the desired preset station number under which you wish to store the station 6 Press and hold down the Preset button unt...

Page 19: ... release the Preset button The display will show for example Empty 1 if no station has been stored to that preset If a preset has been stored then the display will show either the station name for DAB stations or the frequency for FM stations 4 Press the Tuning Up or Down buttons to select the desired preset station 5 Press the Preset button Your radio will tune to the chosen preset station stored...

Page 20: ...product without the correct adapter fitted to the sound system Docking your iPod 1 Ensure that the sound system is in standby Carefully remove the iPod dock connector cover from the top of your sound system 2 Place the iPod docking Adapter see above into the iPod docking recess so that it is securely seated 3 Carefully place your iPod onto the Universal Dock connector 4 Press the On Standby button...

Page 21: ... may then navigate further using the Tuning Up or Down and Select buttons Playing a file on your iPod 1 When you have found the required item use the Play Pause button on the sound system to start the iPod playing If you have just docked your iPod you may need to press the button more than once to ensure that the sound system is in communication with your iPod 2 Adjust the volume to the required s...

Page 22: ...Fast forward or Rewind buttons to move through the current file or track Release the button when the desired point in the file or track is reached 2 Press and release either the Fast forward or Rewind buttons to start playing the next or previous file or track 1 2 1 2 ...

Page 23: ...ress the On Standby button to switch on the sound system 2 Press and release the Alarm button SET ALM will appear on the display Press the Select button to enter alarm setup 3 Alarm 1 flashes on the display 4 Press the Tuning Up or Down buttons to select the desired alarm number 1 or 2 5 Press the Select button to enter the setting for the chosen alarm Press the Tuning Up or Down buttons to select...

Page 24: ...und at one time only Daily Will sound everyday Weekdays Will sound only on weekdays Weekends Will sound only on weekends Ifsettingthealarmtoonceonly continuewithstep12below Otherwise skip to step 18 on the following page 12 Press the Select button to enter the setting The alarm year will flash on the display 13 Press the Tuning Up or Down buttons to choose the alarm year 14 Press the Select button...

Page 25: ...larm your sound system will switch to the last used DAB or FM radio station When the alarm activates the alarm will start softly and gradually increase in level For DAB FM or iPod alarm you may adjust the volume while the alarm is active Without intervention the volume will gradually increase up to a mid level Important If using your iPod as the source for the alarm then be sure to dock your iPod ...

Page 26: ...l show on the display Press the Select button to enter the alarm setup 2 Press the Tuning Up or Down buttons to view alarms 1 or 2 3 Press the Select button to cycle through each of the settings for the chosen alarm You may use the Tuning Up and Down buttons to modify any particular setting if desired using the Select button to enter the modification 1 2 3 1 3 2 3 1 ...

Page 27: ... To set the snooze time 1 Press the On Standby button to switch on the sound system If necessary press and release the DAB or FM button to put the sound system into DAB or FM mode 2 To set the snooze to the desired snooze time press and release the Menu button 3 Press the Tuning Up or Down buttons until CLOCK appears on the display Then press the Select button 4 Press the Tuning Up or Down buttons...

Page 28: ...nts from 5 minutes up to 90 minutes A further press will cause the sleep timer to be set to OFF which will cancel the sleep function 3 Press the Select button The display will show the sleep timer setting then exit the sleep options The sleep symbol will show on the display 4 Your sound system will switch off after the preset sleep time has elapsed 5 To cancel the sleep timer and switch off your s...

Page 29: ...or FM mode 2 To set the clock time press the Menu button to enter the setup menu 3 Press the Tuning Up or Down buttons until CLOCK appears on the display Press and release the Select button 4 Press the Tuning Up or Down buttons until MANU CLK appears on the display 5 Press and release the Select button to enter the manual setting procedure The hour digits will then flash on the display 6 Press the...

Page 30: ...he year setting The month will then flash on the display 12 Press the Tuning Up or Down buttons to select the current month 13 Press the Select button to enter the month setting The day in the month will then flash on the display 14 Press the Tuning Up or Down buttons to select the current day 15 Press the Select button to confirm the time setting and return to the normal radio display 10 14 9 15 ...

Page 31: ...e Select button 4 Press the Tuning Up or Down buttons until AUTO CLK appears on the display Press and release the Select button 5 The sound system will immediately set its time according to the information received with the DAB broadcast The sound system will return to normal radio operation with the time currently displayed Note If you select AUTO CLK the current time received will be displayed I...

Page 32: ...lied b Jazz c Rock d Classic e Pop f News g Treble tone setting may be adjusted h Bass tone setting may be adjusted Treble control 2 Press the Equalizer button to cycle through the modes until TREB appears on the display The current treble setting will be shown on the display 3 To adjust the treble setting press and release the Rewind or Fast forward buttons until the desired level is displayed 4 ...

Page 33: ... the display 6 To adjust the bass setting press and release the Rewind or Fast forward buttons until the desired level is displayed 7 Press the Select button to revert to the play mode display To quickly cancel the effect of the treble or bass settings press the Equaliser button until Flat appears on the display The treble and bass settings will be remembered for the next time that you wish to adj...

Page 34: ... f News g Treble tone setting may be adjusted h Bass tone setting may be adjusted Treble control 5 Press the Tuning Up or Down buttons to cycle through the modes until TREB appears on the display The current treble setting will be shown on the display 6 To adjust the treble setting press and release the Rewind or Fast forward buttons until the desired level is displayed 7 If you wish also to adjus...

Page 35: ...lect button to revert to the play mode display To quickly cancel the effect of the treble or bass settings press the Tuning Up or Down buttons until Flat appears on the display The treble and bass settings will be remembered for the next time that you wish to adjust them 8 10 8 9 9 Mute function Remote control only Pressing the Mute button will mute the output from the loudspeakers 1 Press the Mut...

Page 36: ...the remote control to select the dimmer brightness from Low Mid High or OFF settings Software version The software display cannot be altered and is just for your reference Ensure your sound system is switched on and in DAB or FM mode 1 Press and release the Menu button to enter the setup menu 2 Press the Tuning Up or Down buttons until VERSION appears on the display 3 Press the Select button to vi...

Page 37: ...to the required FM radio station as previously described see pages 14 15 3 Press and release the Select button until the display shows MONO While this setting is engaged the radio will play the current station in mono whether listening via headphones or the loudspeaker The Mono override is a temporary setting and is applied to the currently tuned station only It is cancelled automatically by tunin...

Page 38: ...will be cancelled and snooze and sleep timer settings will be set to their default values The display will show ROBERTS and after a few seconds a station scan search will be performed automatically The display will show progress of the station search for example 18 The number on the right of the display is the number of stations that have been found In case of malfunction due to electrostatic disc...

Page 39: ...iary Input Line in socket A 3 5mm stereo Auxiliary Input socket is provided on the rear of your sound system to permit an audio signal to be fed into the unit from an external audio device such as iPod MP3 or CD player 1 Connect a stereo or mono audio source for example iPod MP3 or CD player to the Auxiliary Input socket marked Aux In 2 Press the Aux button until AUX IN is selected on the display ...

Page 40: ... As software updates become available software and information on how to update your sound system can be found at www robertsradio co uk support Line out socket 3 5mm Jack A 3 5mm Line Out socket located on the rear of your sound system is provided for connecting the audio signal to an external amplifier Inserting an audio cable into this socket will not mute the internal loudspeaker Set the volum...

Page 41: ... high It is recommended that the DAB band be used wherever possible as better results in terms of quality and freedom from interference will usually be obtained than on the the FM band The name plate is located on the rear of the unit Your sound system should not be exposed to dripping or splashing and that no objects filled with liquids such as vases shall be placed on the sound system It is reco...

Page 42: ...e for iPod means that an electrical accessory has been designed to connect specifically to iPod and has been certified by the developer to meet Apple performance standards Apple is not responsible for the operation of the device or its compliance with safety and regulatory standards ...

Page 43: ...th removed or defaced serial numbers N B Damaged or broken telescopic aerials will not be replaced under guarantee Procedure Any claim under this guarantee should be made through the dealer from whom the instrument was purchased It is likely that your Roberts dealer will be able to attend to any defect quickly and efficiently but should it be necessary the dealer will return the instrument to the ...

Page 44: ...TS RADIO TECHNICAL SERVICES 97 99 Worton Road Isleworth Middlesex TW7 6EG Technical Helpline 020 8758 0338 Mon Fri during office hours Web site http www robertsradio co uk 2010 Roberts Radio Limited Issue 2 ...

Reviews: