User’s Guide ADI-2/4 Pro SE – v 1.0
27
12.3 Phones Output 1/2 and 3/4
Subpage
Settings
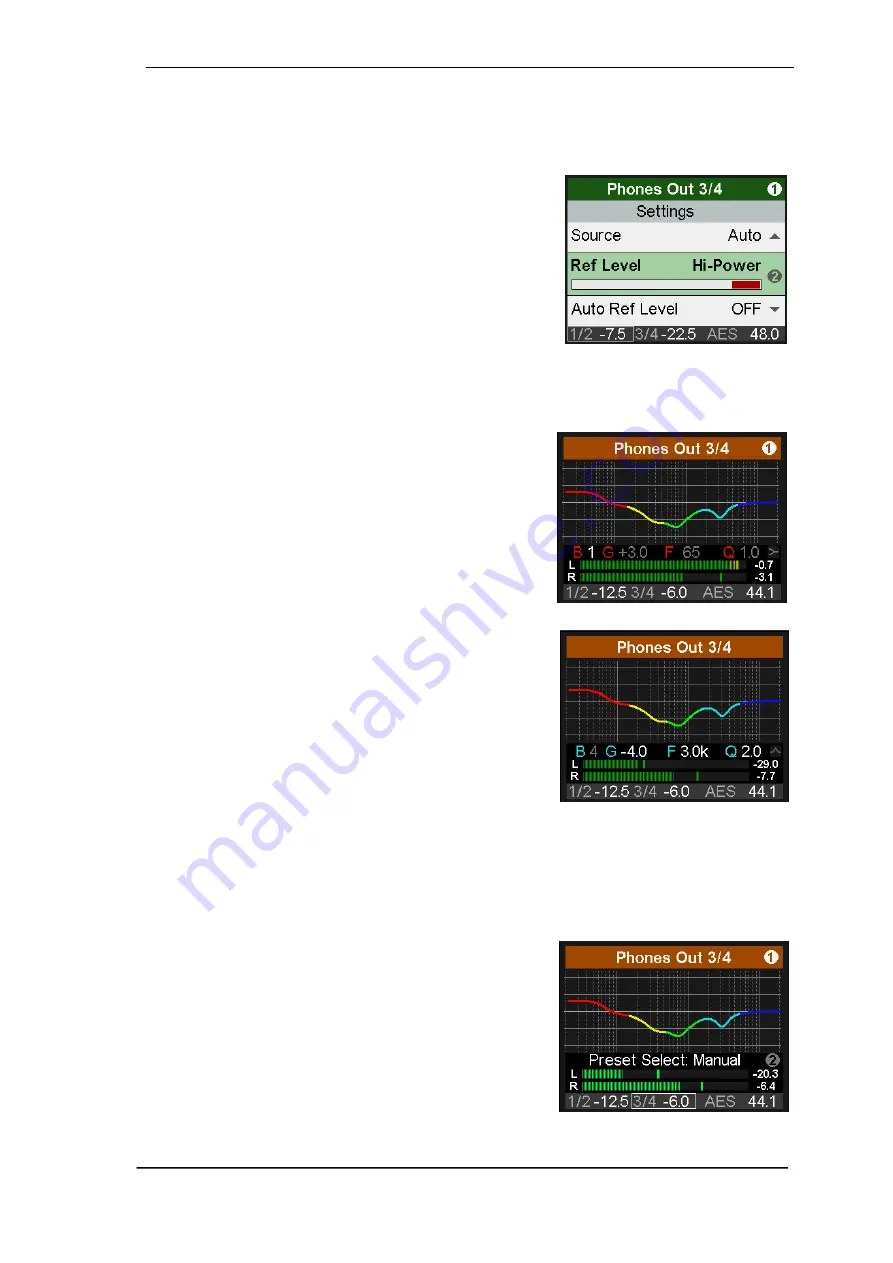
has the same settings as listed for Line Output 1/2, plus:
Source
Default: Auto. The source of the output Phones Out 3/4 can
be chosen manually anytime. Available options are: Auto,
AES, SPDIF, Analog, USB 1/2, USB 3/4. Auto here not only
means current or available signal, but also channels 1/2.
Rear TRS Source (only Phones Out 3/4)
Line 1/2, Phones 3/4. Default: Line 1/2. The rear TRS outputs
can be switched from Line Out 1/2 to Phones 3/4 as source.
See block diagram chapter 34.28. The settings of Phones Out
3/4 are then also active for TRS, including the Ref Level. The
Line Ref Level +13 dBu is therefore not available.
13. EQ
The key EQ brings up a graphical EQ screen (Bode plot) to
set the EQ quickly and with full overview. It is available on
all analog I/Os. The
I/O - Settings
submenu
Parametric EQ
mirrors the settings done in this screen.
On the top level, turn encoder 1 to change between
Analog
Input
,
Line Out 1/2
and
Phones Out 3/4
. Turning encoder 2
will scroll through all 5 bands, as can be seen in the param-
eter line. This function allows to see/check/verify all param-
eters of all bands quickly, without the danger of changing
any of them.
Push encoder 2 to move the cursor to the parameter line,
with all values shown in white color. It is now possible to ad-
just all parameters by turning the three encoders. The Vol-
ume knob changes Gain, encoder 1 Frequency, encoder 2 Q
(Quality factor). All changes are shown in real-time as fre-
quency response curve, making it very easy to find the de-
sired settings.
To change to the next band push the encoder Volume.
The five bands have different colors to clearly show what is currently selected: band 1 red, band
2 yellow, band 3 green, band 4 light blue, band 5 dark blue.
Band 1 and 5 also allow to set the filter to Peak or Shelf mode, plus Hi Pass/Hi Cut. This function
is accessed by pushing encoder 2 so that the cursor moves down to the small filter symbol in the
lower right. It is no longer grayed out. Turning encoder 2 now toggles through the available set-
tings, with the symbol changing according to the selected function.
Another push on encoder 2 changes to the graphical EQ Pre-
set selection screen. Turning encoder 2 will scroll through all
available EQ presets with the frequency graphics showing
the respective curve, and the parameter line showing the
preset name. In this screen Volume, volume selection and
channel selection (encoder 1) are also available.
Summary of Contents for ADI-2 Pro
Page 18: ...18 User s Guide ADI 2 4 Pro SE v 1 0...
Page 51: ...User s Guide ADI 2 4 Pro SE v 1 0 51 User s Guide ADI 2 4 Pro SE Inputs and Outputs...
Page 66: ...66 User s Guide ADI 2 4 Pro SE v 1 0...
Page 69: ...User s Guide ADI 2 4 Pro SE v 1 0 69 User s Guide ADI 2 4 Pro SE Technical Reference...
Page 92: ...92 User s Guide ADI 2 4 Pro SE v 1 0 34 16 Loudness 34 17 Bass Treble...
Page 97: ...User s Guide ADI 2 4 Pro SE v 1 0 97...
Page 110: ...110 User s Guide ADI 2 4 Pro SE v 1 0 34 28 Block Diagram...
Page 111: ...User s Guide ADI 2 4 Pro SE v 1 0 111 User s Guide ADI 2 4 Pro SE Miscellaneous...


