22
User’s Guide ADI-2/4 Pro SE - v 1.0
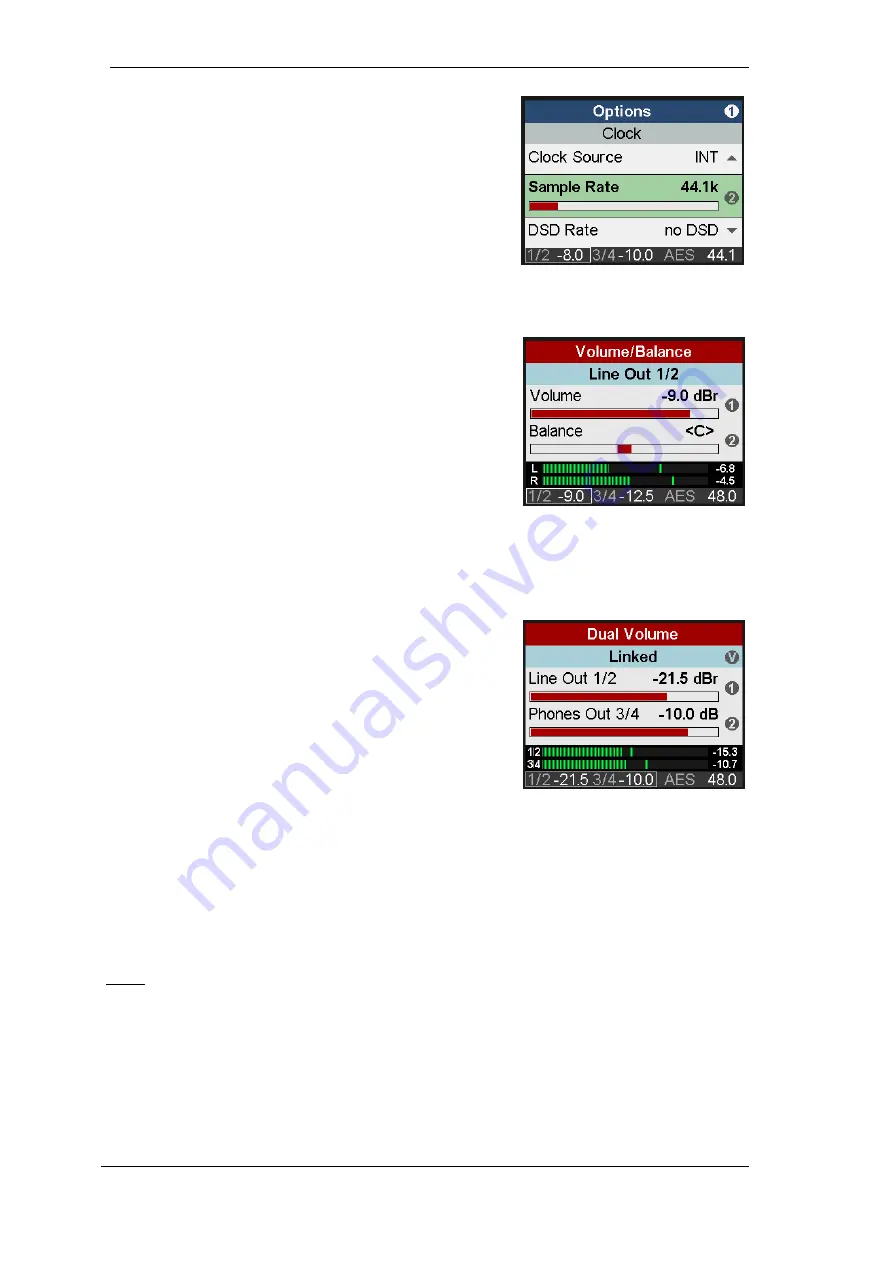
Example: Press the key SETUP. The menu
Setups
is now
shown.
1
within the circle on the right side indicates that by
turning encoder 1 more pages are available. Turn encoder 1
left to enter
Options
. Now turn encoder 2 to scroll horizontally
through all the subpages offered under Options: SPDIF /
Remap Keys, Device Mode / DSD, Clock, Phones, Display.
By pressing encoder 2 the cursor moves down, by pressing
encoder 1 back up. On a selected field or entry,
2
to the right
indicates that the current parameter can be changed by turn-
ing encoder 2. Change Clock Source and Sample Rate to see
how easy it is to select and change important settings.
11. VOL
The VOL key brings up an extended volume screen with bal-
ance control. Pushing the big Volume knob changes the vol-
ume setting between outputs 1/2 and 3/4, which can then be
adjusted by both Volume knob and encoder 1. Turning en-
coder 2 sets the Balance parameter. A push on encoder 2 (T)
sets Balance to center (<C>).
The volume and balance setting is also found in the menu I/O
- Settings, at the end of the list.
A push on encoder 1 (B) mutes the current output. The text in the blue field shows
Line Out 1/2 -
muted
. A second push exits the mute state.
The status bar at the bottom of the display shows the current dB value of both volume settings. A
white rectangle around it (marker) indicates which volume the big encoder is currently set to con-
trol.
Pushing the VOL key a second time enters the
Dual Volume
screen, showing both volume settings at the same time. En-
coder 1 controls Volume 1/2, encoder 2 Volume 3/4, and the
big Volume knob both. This allows to set the outputs at indi-
vidual levels, but also to control those simultaneously. The
linked control operates on a relative base, with individual vol-
umes staying intact when increased or decreased, even to
maximum and minimum.
In the Dual Volume screen, both outputs can be muted by pushing encoder 1 (B) and encoder 2
(T) respectively.
Pushing the VOL key a third time reverts to the level meter screen that has been active before.
Leaving the Dual Volume screen via timeout or a different key than VOL, the Dual Volume mode
stays active, shown by the marker covering both volume indicators. To then leave the Dual Vol-
ume mode briefly press the big VOLUME button.
Notes: Line Out 1/2 defaults to
Auto Ref Level
enabled. The current volume setting is then shown
as
dBr
(dB relative).
Summary of Contents for ADI-2 Pro
Page 18: ...18 User s Guide ADI 2 4 Pro SE v 1 0...
Page 51: ...User s Guide ADI 2 4 Pro SE v 1 0 51 User s Guide ADI 2 4 Pro SE Inputs and Outputs...
Page 66: ...66 User s Guide ADI 2 4 Pro SE v 1 0...
Page 69: ...User s Guide ADI 2 4 Pro SE v 1 0 69 User s Guide ADI 2 4 Pro SE Technical Reference...
Page 92: ...92 User s Guide ADI 2 4 Pro SE v 1 0 34 16 Loudness 34 17 Bass Treble...
Page 97: ...User s Guide ADI 2 4 Pro SE v 1 0 97...
Page 110: ...110 User s Guide ADI 2 4 Pro SE v 1 0 34 28 Block Diagram...
Page 111: ...User s Guide ADI 2 4 Pro SE v 1 0 111 User s Guide ADI 2 4 Pro SE Miscellaneous...


