background image

7

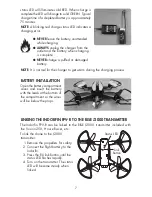
status LED will illuminate solid RED. When charge is 
complete the LED will change to solid GREEN. Typical 
charge time of a depleted battery is approximately 

75 minutes.

NOTE:

 A blinking red charge status LED indicates a 

charging error.


NEVER

 leave the battery unattended 

while charging.


ALWAYS

 unplug the charger from the 

outlet and the battery when charging 
is complete.


 NEVER

 charge a puffed or damaged 

battery.

NOTE:

 It is normal for the charger to get warm during the charging process.

BATTERY INSTALLATION

Open the battery compartment 

cover and insert the battery 

with the leads at the bottom of 

the compartment so the wires 

will be below the props.

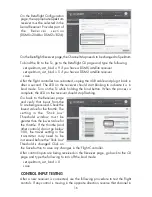
LINKING THE INDORFIN FPV-R TO THE RISE J2000 TRANSMITTER

The Indorfin FPV-R can be linked to the RISE J2000 transmitter included with 

the Vusion 250, House Racer, etc.

To link the drone to the J2000 

transmitter:

 1. 


Remove the propellers for safety.

 2. 


Connect the flight battery to the 

Indorfin.

 3. 


Press the RX link button until the 
status LED flashes rapidly.

 4. 


Turn on the transmitter. The status 

LED will become steady when 
linked.

Link

Button

Status LED

Summary of Contents for INDORFIN 130 RACER

Page 1: ... the place of purchase Manual Specifications and Description Changes The instruction manual warranties and other associated documentation are subject to change without notice Hobbico assumes no responsibility for inadvertent errors to this manual INSTRUCTION MANUAL 130 RACER WARNING This product includes a lithium polymer LiPo battery Improper handling may result in FIRE You are responsible for fo...

Page 2: ...chase MOST IMPORTANT NEVER leave the charger and LiPo battery unattended while charging Keep out of reach of children NEVER charge a LiPo battery on a flammable surface or near combustible materials NEVER charge inside a vehicle or at a location that could be damaged in the event of a LiPo fire Do not charge or use a battery that is deformed bent crushed or has any type of visible damage Only use ...

Page 3: ...iability shall be assumed nor accepted for any damage resulting from the use by the user of the final user assembled product By the act of using the user assembled product the user accepts all resulting liability If the buyer is not prepared to accept the liability associated with the use of this product the buyer is advised to return this kit immediately in new and unused condition to the place o...

Page 4: ...verning body of model aviation and membership is required to fly at AMA clubs Though joining the AMA provides many benefits one of the primary reasons to join is liability protection Coverage is not limited to flying at contests or on the club field It even applies to flying at public demonstrations and air shows Failure to comply with the Safety Code may endanger insurance coverage Additionally t...

Page 5: ...while lifting up on the transmitter from the same side LOW BATTERY ALARM When the flight battery voltage gets low the drone will beep to indicate that it needs to land soon WARNING Do not continue flying the Indorfin until the battery voltage is too low for the drone to stay in the air The battery can be damaged if the voltage drops below 3 0 volts per cell 9 volts BETAFLIGHT CONFIGURATOR INSTALLA...

Page 6: ...nt in the back of the transmitter Turn on the transmitter and connect the flight battery After the Indorfin beeps 3 times check the Receiver status LED on the bottom of the drone If it is flashing slowly the receiver is not linked to the transmitter Please refer to the Linking the Indorfin FPV R to Vusion Transmitter section on page 7 to link the transmitter and receiver NOTE Always turn on the RI...

Page 7: ...get warm during the charging process BATTERY INSTALLATION Open the battery compartment cover and insert the battery with the leads at the bottom of the compartment so the wires will be below the props LINKING THE INDORFIN FPV R TO THE RISE J2000 TRANSMITTER The Indorfin FPV R can be linked to the RISE J2000 transmitter included with the Vusion 250 House Racer etc To link the drone to the J2000 tra...

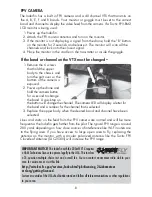
Page 8: ...the channel The camera LED will display a letter for the band and a number for the channel that is selected 3 Replace the upper body when the desired band and channel have been selected Lines and static on the feed from the FPV camera are normal and will be more frequent as the Indorfin gets farther from the pilot The typical FPV range is around 200 yards depending on how close sources of interfer...

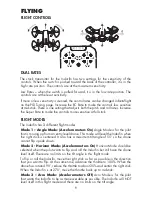
Page 9: ...ccelerometers On Angle Mode is for the pilot that is moving up from an entry level drone This mode will level the Indorfin when the right stick is centered It also has a maximum tilt angle of 55 so the drone cannot flip upside down Mode 2 Horizon Mode Accelerometers On Horizon Mode should be selected when the pilot wants to flip and roll the Indorfin but still have the drone level itself There are...

Page 10: ... assist with locating the drone when it crashes If possible fly in an open area with tall grass to help protect the Indorfin from crash damage Stay low use low rates and mode 1 or 2 until you can control the drone s height without assistance When you are comfortable flying in an open area practice flying a pre set course MOTOR ARMING D R HIGH YAW RIGHT FULL DOWN THROTTLE While the throttle is at i...

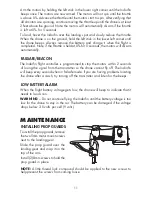
Page 11: ...ndorfin flight controller is programmed to stop the motors within 2 seconds of losing the signal from the transmitter so the drone cannot fly off The Indorfin will beep every second when in failsafe mode If you are having problems locating the drone after a crash try turning off the transmitter and listen for the beeps LOW BATTERY ALARM When the flight battery voltage gets low the drone will beep ...

Page 12: ... motors marked 1104 4100KV CW The CCW props should be installed on the front right and rear left motors marked 1104 4100KV CCW FLIGHT CONTROLLER REPLACEMENT If the flight controller has been damaged and needs to be replaced 1 Remove the 6 screws that hold the Upper and Lower Body parts to the frame 2 Unplug the camera and put the upper body aside 3 Remove the flight battery connector cover 4 Remov...

Page 13: ...our PC Do NOT plug the battery into the drone 3 Open the Motors screen 4 Read the Motor Test Mode Notice and click on the I understand button to activate the controls 5 Move the Master control up to its highest setting 6 Plug the flight battery into the Indorfin 7 When the ESC stops beeping move the Master control to its lowest setting 8 Slowly move the Master control up again and verify that all ...

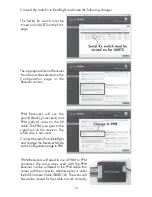
Page 14: ...ed and PPM yellow wires on the RX cable The PPM wire goes to the signal pin on the receiver The white wire is not used Connect the Indorfin to Betaflight and change the Receiver Mode on the Configuration page to PPM PWM Receivers will need to use a PWM to PPM converter The same wires used with the PPM Receiver can be soldered to the PPM cable that comes with the converter Another option is order t...

Page 15: ...he plug Futaba SBE 1 PWM to S bus adapter can also be used if you have a PWM receiver Connect your receiver to the adapter as described below Connect the adapter to the Indorfin using the Black Red and white wires on the RX Extension cable Aileron Channel 1 on the adapter Roll Channel 2 Throttle Channel 3 Yaw Channel 4 Aux 1 Channel 5 Aux 2 Channel 6 Connect the Indorfin to Betaflight and make the...

Page 16: ...utton When the process is complete the LED on the receiver should stop flashing Go back to the Receiver page and verify that inputs from the Tx are being received Check the lowest value for the throttle The setting in the Stick Low Threshold window must be greater than the lowest value for the throttle If the throttle and other controls do not go below 1100 the travel setting in the transmitter ma...

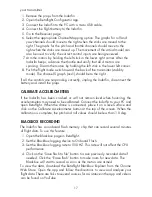
Page 17: ...e battery and install the props CALIBRATE ACCELEROMETERS If the Indorfin has been crashed or will not remain level when hovering the accelerometers may need to be calibrated Connect the Indorfin to your PC and open Betaflight When the drone is connected place it on a level surface and click on the Calibrate Accelerometer button at the top of the screen When the calibration is complete the pitch an...

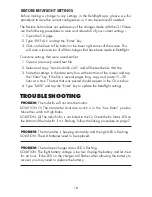
Page 18: ...t the bottom of the screen and tap the Enter key If the file is several pages long copy and paste 15 20 lines at a time The text that was pasted should appear in the CLI window 4 Type SAVE and tap the Enter key to update the Betaflight settings TROUBLESHOOTING PROBLEM The Indorfin will not arm the motors SOLUTION 1 The transmitter dual rate switch is in the Low Rates position Move the switch to Hi...

Page 19: ...rs are spinning SOLUTION 2 Check the motors by manually spinning each prop If one or more motors do not spin freely check the motor for damage SOLUTION 3 Check the props for damage and verify that they are mounted on the correct motor Please refer to the Propeller Replacement section on page 11 ...

Page 20: ...20 EXPLODED VIEW 7 16 15 8 3 5 13 12 2 3 1 14 4 6 3 9 10 13 8 11 14 14 14 14 ...

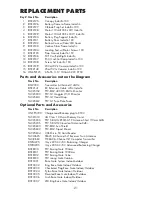
Page 21: ...ACZ5152 FPV RM2 40CH 5 8GHz Monitor TACZ5200 FPV G1 Goggles W O Monitor TACZ5610 FPV G1 Head Strap TACZ5612 FPV G1 Face Plate Foam Optional Parts and Accessories Stock No Description ONXP5720 Charge Lead Banana plug to XT30 TACZ1010 4G Class 10 Micro Memory Card TACZ5300 FPV 5 8GHz RP SMA TX Antenna Short 110mm 3dBi TACZ5305 FPV 5 8GHZ Cloverleaf Antenna 3dBi TACZ5600 FPV RM2 Sun Shield TACZ5602 F...

Page 22: ... approved by RISE will void the user s authority to operate this Tx Operation is subject to the following two conditions 1 This device may not cause harmful interference 2 This device must accept any interference received including interference that may cause undesired operation NOTE This equipment has been tested and found to comply with the limits for a Class B digital device pursuant to part 15...

Page 23: ...ipment The separate collection and recycling of your waste equipment at the time of disposal will help to conserve natural resources and ensure that it is recycled in a manner that protects human health and the environment For more information about where you can drop off your waste equipment for recycling please contact your local city office your household waste disposal service or location wher...

Page 24: ... 2018 RISE a Hobbico company RTF RISE0210 FPV R RISE0211 v1 1 ...

Reviews: