rinnai new Zealand Limited
E-Frost Solar Collector Split System
install manual: 11497-a
15
mounting collectors on a metal roof
The rinnai standard mounting rails are for arrangements where the hot outlet connection is
on the top right hand corner. if you have an arrangement that requires a top left hot outlet
connection you will need a different top mounting rail. This can be purchased as an accessory
from rinnai.
Unpainted galvanised roofs will require painting under the area where the collector is installed
and any subsequent run off areas (e.g. down the guttering below).
Check purlin
size
Position top
collector
fasten top
mounting rail
1.
2.
3.
Check purlins are a minimum size of 50 x 50 mm. if there are no
sufficiently sized purlins available at the correct centres they can be
added between the rafters or trusses at the correct spacing.
Establish the position at a suitable purlin, usually identified by a row
of fasteners. The assembled collectors should cross as many rafters as
possible and be evenly distributed across them.
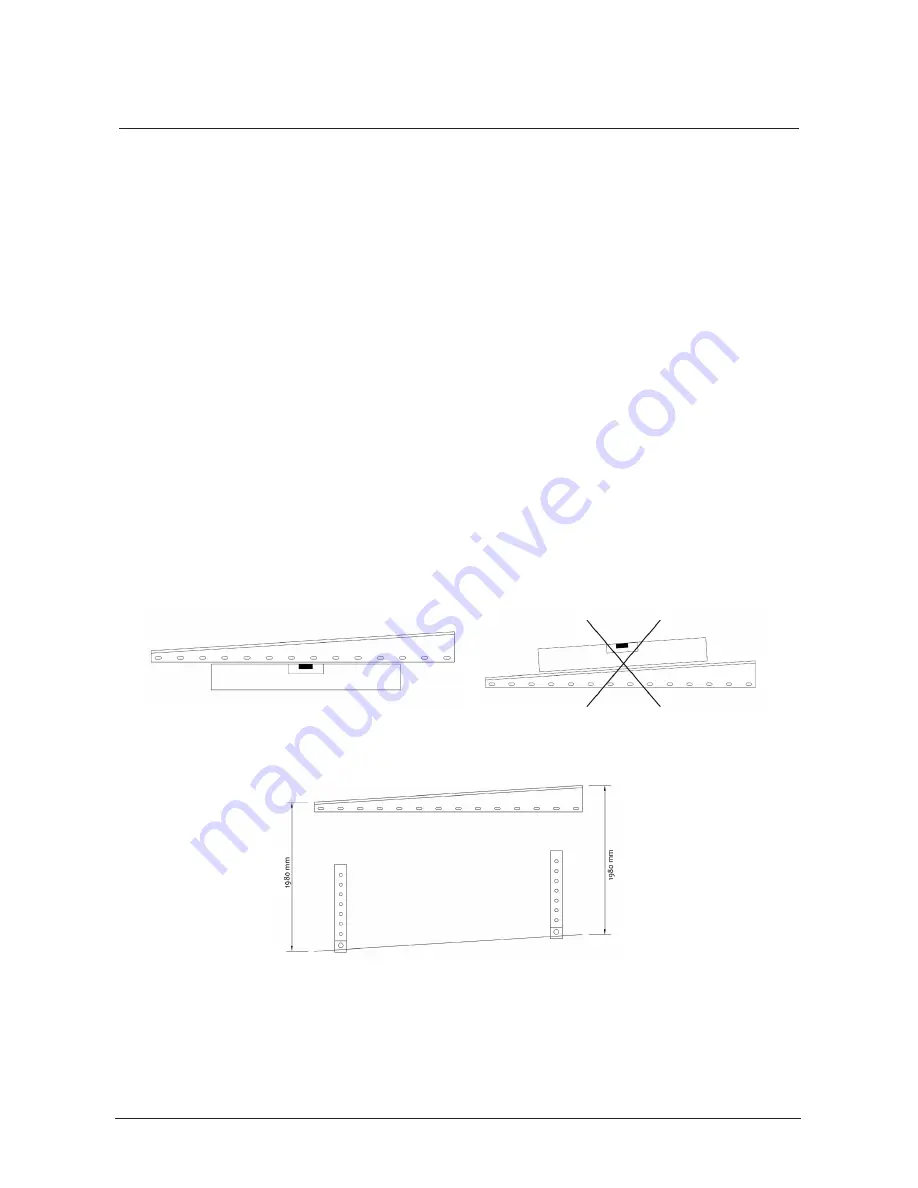
Fasten with the bottom edge level and horizontal as shown below. Use a
minimum of 8 x 8 gauge fasteners per collector. Two are secured into the
purlin with the balance either into the purlin or metal roof cladding.
Each fastener should have a suitable EdPm or similar washer under its
head and between the rail and roofing material. There should be no metal
to metal contact between the roof and rail.
Top mounting rail
Level
Mark
position for
strap hooks
and secure
4.
measure down the roof from each end of the top rail and mark the
position for the strap hook as follows:
Fit strap hook approximately 75 mm in from each edge of the mounting
rail. Screw both straps to the roof using a minimum of 4 x 8 gauge
fasteners per strap. Trim off any excess length.
at least one fastener per strap must be attached to a purlin. Use EdPm
washers underneath to avoid direct contact between the strap and the
roof.


