– 28 –
Before the Cold Season Begins:
■
Check the air supply/exhaust connection.
●
Before using this heater, inspect the air supply/exhaust connection to make sure the pipe is not
disconnected or bent.
■
Check the main unit and the air supply/exhaust.
●
Make sure there is no combustible or flammable material near the main unit or the air
supply/exhaust.
CAUTION:
If you find a problem with the air supply/exhaust, do not use the unit. Contact your dealer or the nearest
Rinnai office.
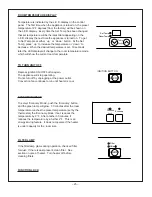
Function Lock:
The Function lock feature prevents accidents due to tampering by small children.
■
Press the “Function Lock” button.
The “Function Lock” lamp should come on and engage the function lock.
■
Canceling the Function lock.
Press the “Function Lock” button again and hold for two (2) seconds.
This will disengage the function lock.
Note:
If the Function lock is engaged while the unit is operating, all operations by switches and buttons will be
disabled except turning the unit off.
If the Function lock is engaged while the unit is off, all operation will be disabled. When you turn the unit
on and the Function lock is engaged, you must cancel the Function lock before preceding.
AIR FLOW CONTROL:
■
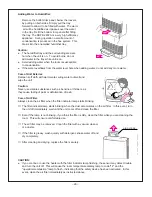
The direction of air flow may be changed to the
left or right.
Use a screwdriver or a similar object to change
the direction of the vertical louver.
CAUTION:
●
Do not adjust repeatedly (more than 5
-
6 times), as it
may cause the louver to break.
●
The horizontal louver (which determines the vertical
air flow direction) is fixed and cannot be adjusted.
●
Do not adjust the air flow direction while warm air is
flowing, as it may cause burn injury.
Sensible Temperature Control:
The sensible temperature control feature enables comfortable heating which matches the conditions in
the room.
•
Based on the information collected by the room temperature thermistor when the heating starts,
the heating capacity is automatically adjusted to achieve a comfortable heating effect and to
reach the set room temperature quickly.
LOCKED
Summary of Contents for RHFE-263FA 2
Page 14: ... 12 CUT AWAY DIAGRAM ...
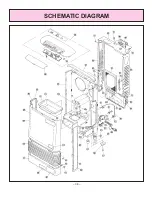
Page 40: ... 38 SCHEMATIC DIAGRAM ...
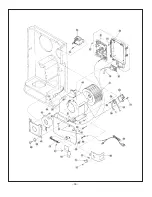
Page 41: ... 39 ...
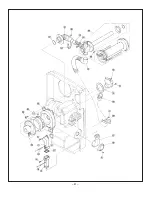
Page 42: ... 40 ...
Page 43: ... 41 ...
Page 44: ... 42 ...
Page 55: ... 53 ...

