– 15 –
GAS CONNECTION
1. The gas supply line shall be gas-tight, sized and so installed as to provide a supply of gas sufficient
to meet the maximum demand of the heater without loss of pressure.
2. A shut off valve (and appliance connector valve) should be installed in the upstream of the gas line
to permit servicing.
3. Flexible pipe and any appliance connector valve used for gas piping shall be types approved by
nationally recognized agencies.
4. Any compound used on the threaded joint of the gas piping shall be a type which resists the action
of liquefied petroleum gas.
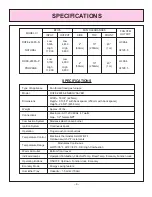
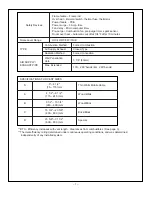
5. Supplied gas pressure must be within the limits shown in the specifications.
6. After completion of gas pipe connections, all joints including the heater must be checked for gas
tightness by means of leak detector solution, soap and water, or an equivalent nonflammable
solution, as applicable.
CAUTION: Since some leak test solutions, including soap and water, may cause corrosion or stress
cracking, the piping shall be rinsed with water after testing, unless it has been determined that the
leak test solution is noncorrosive.
7. The appliance and its appliance main gas valve must be disconnected from the gas supply piping
system during any pressure testing of that system at test pressures in excess of 1/2 P.S.I (3.5kPa).
The appliance must be isolated from the gas supply piping system by closing its individual manual
shut off valve during any pressure testing of the gas supply system at test pressures equal to or less
than 1/2 psig.
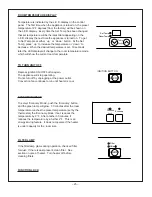
8. Two 1/8" test plugs are provided for testing of manifold differential pressure. See schematic for
location. (On page 40, item # 126)
At time of installation, installer must supply a 1/8" N.P.T. plugged tapping, accessible for test
manometer connection, immediately up stream of the gas supply connection to the appliance.
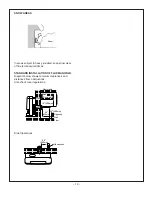
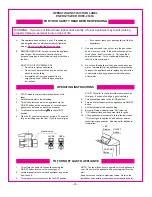
9. Notice to installer: Install manual gas cut-off valve so that it can be accessed for easy operation. Do not
conceal manual cut-off valve behind back spacer. See diagram.
Summary of Contents for RHFE-263FA 2
Page 14: ... 12 CUT AWAY DIAGRAM ...
Page 40: ... 38 SCHEMATIC DIAGRAM ...
Page 41: ... 39 ...
Page 42: ... 40 ...
Page 43: ... 41 ...
Page 44: ... 42 ...
Page 55: ... 53 ...


