background image

20085953

32 

GB

Start-up, calibration and operation of the burner

6.5.3

Minimum gas pressure switch

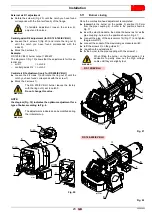
Adjust the minimum gas pressure switch (Fig. 37) after having
performed all other burner adjustments with the pressure switch
set to the start of the scale.

With the burner operating at maximum output, increase adjust-
ment pressure by slowly turning the relative knob clockwise until
the burner locks out.

Then turn the knob anticlockwise by 2 mbar and repeat the burn-
er start-up to ensure it is regular.

If the burner locks out again, turn the knob anticlockwise again by
1 mbar.

6.5.4

PVP pressure switch kit

Adjust the pressure switch for the valve leak detection control de-
vice (PVP Kit), if present, according to the instructions supplied
with the Kit itself. 

6.6

Steady-state operation

Burner without modulating operation kit

Once the start-up cycle is completed, the servomotor command
moves on to the thermostat/pressure switch TR that controls the
pressure or the temperature in the boiler.

If the temperature or the pressure is low (so the thermostat/
pressure switch TR is closed), the burner progressively
increases the output as far as the MAX value (point “P9”).

If the temperature or the pressure increases as far as the
opening of the thermostat/pressure switch TR, the burner
progressively reduces the output as far as the MIN value
(point “P1”). And so on.

The burner switches off when the request for heat is lower
than the heat supplied by the burner at MIN output. 

The thermostat/pressure switch TL opens and the control
box carries out the switching off phase. 

The damper closes completely to reduce thermal disper-
sions to a minimum. 

Burner with modulating operation kit

See the manual supplied with the regulator.

6.7

Ignition failure

If the burner does not switch on, there is a lockout within 3s of the
electrical supply reaching the gas valve.

It may be that the gas does not arrive at the combustion head
within the safety time of 3 s. 

In this case, increase gas delivery upon ignition.

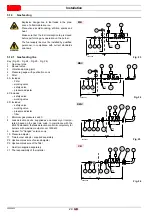
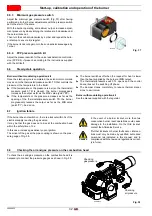
The arrival of the gas at the pipe coupling is shown on the pres-
sure gauge of Fig. 38.

6.8

Checking the air and gas pressure on the combustion head

To check the air and gas pressure on the combustion head it is
necessary to connect the pressure gauges as shown in Fig. 38.

Fig. 37

D3855

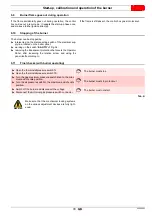
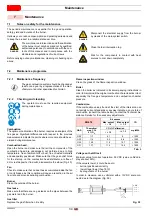
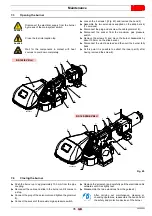
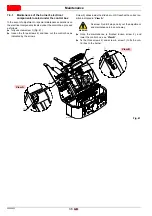
WARNING

In the event of a burner lockout, more than two
consecutive burner reset operations could cause
damage to the installation. On the third lockout,
contact the Aftersales Service.

DANGER

If further lockouts or burner faults occur, interven-
tions must only be made by qualified, authorised
personnel (as indicated in this manual, and in
compliance with the laws and regulations current-
ly in force).

20082133

Checking
gas pressure

Checking
air pressure

 Fig. 38

Summary of Contents for RS 120/EV BLU

Page 1: ...aintenance instructions 20085953 1 04 2014 Forced draught gas burners Progressive two stage or modulating operation CODE MODEL TYPE 20085769 RS 120 EV BLU 85769X 20085770 RS 160 EV BLU 85770X 20085771 RS 200 EV BLU 85771X GB ...

Page 2: ...Translation of the original instructions ...

Page 3: ...1 Notes on safety for the installation 17 5 2 Handling 17 5 3 Preliminary checks 17 5 4 Operating position 18 5 5 Preparing the boiler 18 5 5 1 Introduction 18 5 5 2 Boring the boiler plate 19 5 5 3 Blast tube length 19 5 6 Positioning electrode for RS 120 EV BLU 20 5 7 Positioning probe electrode 20 5 8 Securing the burner to the boiler 21 5 9 Pre calibrating the combustion head 22 5 10 Combustio...

Page 4: ... on the combustion head 32 6 9 Burner flame goes out during operation 33 6 10 Stopping of the burner 33 6 11 Final checks with burner operating 33 7 Maintenance 34 7 1 Notes on safety for the maintenance 34 7 2 Maintenance programme 34 7 2 1 Maintenance frequency 34 7 2 2 Checking and cleaning 34 7 3 Opening the burner 35 7 4 Closing the burner 35 7 4 1 Maintenance of the burner s electrical compo...

Page 5: ...pliance with the following Technical Standards EN 676 EN 12100 and according to the European Directives MD 2006 42 EC Machine Directive LVD 2006 95 EC Low Voltage Directive EMC 2004 108 EC Electromagnetic Compatibility The quality is guaranteed by a quality and management system certified in accordance with UNI EN ISO 9001 Legnago 10 10 2013 Executive Director RIELLO S p A Burner Department Resear...

Page 6: ...ried out correctly may cause damage to the ma chine and or injury to people DANGER DANGER LIVE COMPONENTS This symbol indicates operations which if not car ried out correctly lead to electric shocks with le thal consequences DANGER FLAMMABLE MATERIAL This symbol indicates the presence of flammable materials DANGER BURNING This symbol indicates the risks of burns due to high temperatures DANGER CRU...

Page 7: ...of damage to things or injury to people if such damage injury was due to any of the following causes incorrect installation start up use and maintenance of the burner improper incorrect or unreasonable use of the burner intervention of unqualified personnel carrying out of unauthorised modifications on the equipment use of the burner with safety devices that are faulty incor rectly applied and or ...

Page 8: ...nce Only those parts envisaged by the manufacturer can be replaced 3 2 Personnel training The user is the person body or company that has acquired the machine and intends to use it for the specific purpose He is re sponsible for the machine and for the training of the people work ing around it The user undertakes to entrust the machine exclusively to suitably trained and qualified personnel undert...

Page 9: ...of auxiliaries 230 50 60 110 50 60 3N 400V 50Hz 3 230V 50Hz 230V 50 60Hz 110V 50 60Hz Heavy oil E Electronic cam EV Electronic cam and variable speed with Inverter M Mechanical cam P Proportional air gas valve S L LS N Head TC Standard head TL Long head Emission C01 or MZ BLU MX Class 1 EN676 Class 2 EN676 Class 3 EN676 Class 3 EN676 3 400 230 50 3N 400V 230V 50Hz R S 200 EV TC FS1 FS2 3 400 230 5...

Page 10: ... kW Mcal h 600 1300 516 1118 930 1860 800 1600 1380 2400 1187 2064 Min kW Mcal h 300 258 300 258 550 473 Fuel Natural gas G20 methane gas G21 G22 G23 G25 G31 Gas pressure at max output 2 Gas G20 G25 Gas G31 mbar 22 5 33 6 19 6 17 7 26 4 19 6 28 0 41 8 19 6 Operation Intermittent min 1 stop in 24 hours Two progressive or modulating stages with kit see ACCESSORIES Standard applications Boilers water...

Page 11: ...872 373 222 430 1442 230 141 260 2 RS 200 EV BLU 732 427 305 555 872 373 222 430 1442 230 141 260 2 WARNING to use area B RS 120 EV BLU as well the pre calibration of the combustion head is necessary as explained in the paragraph Pre calibrating the combustion head on page 22 CAUTION The firing rate Fig 2 of the model RS 200 EV BLU refers to the operation with fuel G20 G25 In case G31 is used the ...

Page 12: ...1 it is necessary to reduce the output of the burner The reduction in output is accompanied by a reduction in the combustion chamber pressure Qr reduced output H1r reduced pressure Example 5 reduction in output Qr Q x 0 95 H1r H1 x 0 95 2 With the new values Qr and H1r repeat steps 2 5 Tab F Qe Q F kW H3 H2 x F mbar WARNING The combustion head should be adjusted in rela tion to the equivalent outp...

Page 13: ...ype approved for boilers or ovens with combustion chambers of very different di mensions compared to those shown in the diagram of Fig 4 pre liminary checks are recommended 4 9 Burner equipment The burner is supplied complete with Gas train flange No 1 Gasket for gas train flange No 1 Thermal insulation screen No 1 Screws M10 x 35 to fix the flange No 4 Screws M12 x 35 to fix the burner flange to ...

Page 14: ... bustion head 21 Gas pressure test point and head fixing screw 22 Air pressure test point 23 Earthing screws 24 Air damper 25 Fan air inlet 26 Screws to secure fan to pipe coupling 27 Gas input pipe 28 Gas butterfly valve 29 Boiler fixing flange 30 Flame stability disk 31 Fan motor 32 RPM sensor 33 EMERGENCY STOP button 34 Din rail available for accessories 35 FUEL ON indicator light 36 T1 electro...

Page 15: ...as pressure test point and head fixing screw 22 Air pressure test point 23 Earthing screws 24 Air damper 25 Fan air inlet 26 Screws to secure fan to pipe coupling 27 Gas input pipe 28 Gas butterfly valve 29 Boiler fixing flange 30 Flame stability disk 31 Fan motor 32 RPM sensor 33 EMERGENCY STOP button 34 Din rail available for accessories 35 FUEL ON indicator light 36 T1 electronic cam transforme...

Page 16: ...pment of conden sate and humidity Otherwise before switching on again make sure that the entire control box is perfectly dry Static charges must be avoided since they can damage the control box s electronic components when touched Mechanical structure The LMV52 control box is a system to check the burners based on a microprocessor and equipped with components to adjust and monitor medium and large...

Page 17: ...Nominal current Power factor 0 5A cos 0 4 Load on output terminals Total load on the contacts Mains voltage Total unit input current safety circuit load on contacts due to Fan motor contactor Ignition transformer Valve Oil pump magnetic clutch AC 230V 15 10 Max 5A Single contact loading Fan motor contactor nominal voltage Nominal current Power factor 1A cos 0 4 Alarm output nominal voltage Nominal...

Page 18: ...al low voltage section The static torque is reduced when the electrical supply of the actuator is switched off The housing cover may only be removed for short periods of time for wiring or when making the addressing In similar cas es make sure that dust or dirt does not penetrate inside the actuator The actuator comprises a PCB with ESD sensitive compo nents The top side of the board carries a cov...

Page 19: ...be free from hazardous mixes e g chloride fluoride halo gen if present it is highly recommended to carry out cleaning and maintenance more frequently WARNING The handling operations for the burner can be highly dangerous if not carried out with the great est attention keep any unauthorised people at a distance check the integrity and suitableness of the available means of handling Check also that ...

Page 20: ... In standard conditions the head of the burner is fitted with a second group of tubes from which the gas emerges in a different direction compared with the others With the kit this second group of tubes is substi tuted so that all the tubes are the same After assembling the kit check its efficiency by measuring the flue gases and CO WARNING The burner is designed to operate only in positions 1 2 3...

Page 21: ...r door com plete with its refractory The lengths L available are Tab I For boilers with front flue passes 13 Fig 17 or flame inversion chambers a protection in refractory material 11 must be inserted between the boiler refractory 12 and the blast tube 10 This protection must not compromise the extraction of the blast tube For boilers with a water cooled frontal a refractory cover is not necessary ...

Page 22: ...s 6 and re screw the screws 2 including the safety plate disconnect the electrode wires and then pull the burner com pletely off the slide bars 5 7 Positioning probe electrode If in the previous check the position of the electrode was not cor rect is necessary remove the screw 1 Fig 16 extract the inner part 2 Fig 16 of the head and adjust them WARNING Measures must be respected 7 9 3 2 20086315 F...

Page 23: ...ulating gasket 8 supplied Use the 4 screws supplied with a tightening torque of 35 40 Nm after protecting their thread with anti seize products Provide an adequate lifting system of the burner WARNING Before fixing the burner to the boiler if its maxi mum output is included in area A or B of the firing rate Fig 2 If it is in area A no intervention is required If it is in area B it is necessary to ...

Page 24: ...st and this adjustment depends only on the maximum output of the burner Two adjustments of the head are foreseen external air R1 central gas air R2 for RS 120 160 EV BLU central air R3 only for RS 200 EV BLU In the diagram Fig 19 find the notch at which to adjust both air and central gas air WARNING The head must be pre calibrated for model RS 120 EV BLU only if its maximum output is within area B...

Page 25: ...adjustment is completed reassemble the burner on the guides 3 at about 100 mm from the pipe coupling 4 burner in the position shown in Fig 17 insert the electrode cable then slide the burner as far as the pipe coupling burner in the position shown in Fig 21 connect the plug of the servomotor 14 Fig 17 and tighten the grommet 15 connect the socket of the maximum gas pressure switch refit the screws...

Page 26: ...ak detection control is compulsory for burners with maximum outputs over 1200 kW 9 Gasket for flanged versions only 10 Pressure adjuster 11 Train burner adaptor supplied separately P2 Upstream pressure of valves adjuster P3 Upstream pressure of the filter L Gas train supplied separately L1 The responsibility of the installer Explosion danger due to fuel leaks in the pres ence of a flammable source...

Page 27: ... point 1 Fig 28 with combustion chamber at 0 mbar burner working at maximum output Column 2 Pressure loss at gas butterfly valve 2 Fig 28 with maximum opening 90 DANGER Disconnect the electrical power using the main system switch Check that there are no gas leaks Beware of train movements danger of crushing of limbs Make sure that the gas train is properly installed by checking for any fuel leaks ...

Page 28: ... maximum output of 1600 kW shown in corresponds to 13 0 mbar pressure column 1 This value serves as a rough guide the effective output must be measured at the gas meter To know the required gas pressure at test point 1 Fig 28 set the maximum output required from the burner operation then find the nearest output value in the for the burner in question Read on the right column 1 the socket pressure ...

Page 29: ...termittent use This means they should compulsorily be stopped at least once every 24 hours to enable the control box to per form checks of its own start up efficiency Normally burner stopping is guaranteed by the boiler s thermostat pres sure switch If this is not the case a time switch should be fitted in series to TL to stop the burner at least once every 24 hours Refer to the wiring diagrams Th...

Page 30: ...the motor cable 1 as shown in Fig 30 It is very importatnt to fix the cable shielding as shown in Fig 30 Fig 30 20082301 WARNING The measurement of speed sensor 1 Fig 31 must be respected WARNING It is important that the disc 2 is installed on the burner as shown in the Fig 32 Fig 31 D11729 WARNING For the specific electrical connections of the in verter please refer to the SHEET For the setting o...

Page 31: ...ain as shown on the charac teristics label Bleed the air from the piping of the gas train connecting a plastic tube to the pressure test point 1 Fig 33 of the mini mum gas pressure switch Take the vent tube outside the building so you can notice the smell of gas Connect two lamps or testers to the two gas line solenoids to check the exact moment at which voltage is supplied This operation is unnec...

Page 32: ...f ignitions 10 ts safety time sec Example for gas G 20 9 45 kWh Sm3 ignition output 150 kW corresponding to 15 87 Sm3 h After 10 ignitions with lockout the delivery indicated on the meter must be equal to or less than 6 4 2 Maximum output The MAX output must be set within the firing rate Fig 2 Gas adjustment Measure the gas delivery on the meter As a general rule this value can be found on just re...

Page 33: ...lockwise During these op erations it may be useful to measure the air pressure with a pres sure gauge The connection of the pressure gauge is shown in Fig 35 The standard configuration is that with the air pressure switch connected in absolute mode Note the presence of a T connec tion not supplied In certain applications in strong depression situations the con nection of the pressure switch does n...

Page 34: ... the burner progressively reduces the output as far as the MIN value point P1 And so on The burner switches off when the request for heat is lower than the heat supplied by the burner at MIN output The thermostat pressure switch TL opens and the control box carries out the switching off phase The damper closes completely to reduce thermal disper sions to a minimum Burner with modulating operation ...

Page 35: ... AUTO of Fig 34 removing the transparent protection that covers the Operator Panel after loosening the relative screw and using the panel itself according to 6 11 Final checks with burner operating Tab K Open the thermostat pressure switch TL Open the thermostat pressure switch TS The burner must stop Turn the gas maximum pressure switch knob to the mini mum end of scale position Turn the air pres...

Page 36: ...boiler as indicated in its accompanying instructions in order to maintain all the original combustion characteristics intact especially the flue gas temperature and combustion chamber pressure Combustion If the combustion values found at the start of the intervention do not satisfy current standards or anyway indicate a poor state of combustion consult the table below contact the Technical As sist...

Page 37: ...from the pipe coupling Reconnect the cable and slide in the burner until it comes to a stop Connect the plug of the servomotor and tighten the grommet 8 Connect the socket of the maximum gas pressure switch Replace the screws 3 and carefully pull the electrode cable outwards until it is slightly taut Disassemble the two extensions from the guides 4 DANGER Disconnect the electrical supply from the ...

Page 38: ... 1 Fig 41 loosen the three screws 2 and take out the control box as indicated by the arrows Screw 3 slides inside the slide bar until it reaches the correct po sition indicated in View A Once the maintenance is finished loosen screw 3 and lower the control box see View B fix the three screws 2 and screw in screw 1 to fix the con trol box to the burner WARNING Fix screw 3 until it stops carry out t...

Page 39: ...BLU 373 503 3010442 RS 200 EV BLU 373 503 3010474 Burner Type dB A Code RS 120 EV BLU RS 160 200 E BLU C4 5 10 3010404 Burner Thickness mm Code RS 120 EV BLU 135 3010129 RS 160 200 EV BLU 102 3000722 Burner Model Code RS 120 EV BLU RS 160 200 EV BLU OCI412 3010437 Burner Max output kW Code RS 120 EV BLU 3 0 20063533 RS 160 200 EV BLU 5 5 20062679 Burner Gas train type Code RS 120 EV BLU RS 160 200...

Page 40: ...20085953 38 GB Appendix Accessories Gas flange DN80 kit Gas trains in compliance with EN 676 Please refer to manual Burner Code RS 120 EV BLU RS 160 200 EV BLU 3010439 ...

Page 41: ...tional layout LMV52 5 Operational layout LMV52 6 Operational layout LMV52 7 Operational layout LMV52 8 Operational layout LMV52 9 Operational layout LMV52 10 Operational layout LMV52 11 Electrical connection set by installer 12 Electrical connection set by installer 13 Electrical connection set by installer 1 2 Sheet no 1 A1 Co ordinates Indication of references ...

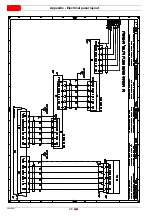
Page 42: ...20085953 40 GB Appendix Electrical panel layout 0 112 3 0 0 0 112 4 4 4 5 4 6 4 4 4 4 4 4 4 4 4 4 5 4 7 ...

Page 43: ...41 20085953 GB Appendix Electrical panel layout ...

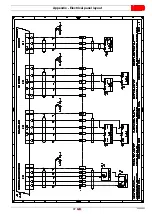
Page 44: ...20085953 42 GB Appendix Electrical panel layout 0 1 2 1 2 3 1 3 4 1 5 1 3 1 3 3 1 1 1 21 2 1 61 6 6 2 1 1 3 4 1 3 ...

Page 45: ...43 20085953 GB Appendix Electrical panel layout ...

Page 46: ...20085953 44 GB Appendix Electrical panel layout ...

Page 47: ...45 20085953 GB Appendix Electrical panel layout ...

Page 48: ...20085953 46 GB Appendix Electrical panel layout 0 0 1 0 1 0 2 3 3 3 4 3 5 3 3 3 3 3 3 3 63 6 6 3 3 4 3 ...

Page 49: ...47 20085953 GB Appendix Electrical panel layout 0 1 0 1 0 2 0 3 0 0 0 0 0 10 1 0 40 4 4 1 0 0 2 0 5 ...

Page 50: ...20085953 48 GB Appendix Electrical panel layout 01 23 4 4 4 5 4 4 6 6 6 7 6 6 6 6 6 6 6 6 6 6 6 7 6 2 01 23 23 2 01 2 01 ...

Page 51: ...3 3 3 3 2 1 1 6 3 1 3 3 3 3 3 0 1 1 1 0 3 1 1 5 0 A 1 5 1 3 3 3 0 A 3 1 1 0 3 0 2 1 1 6 3 0 A 1 ਅ 1 0 2 1 1 1 1 1 3 0 A 3 1 1 0 0 3 1 0 0 3 1 0 0 0 1 1 01 1 1 4 0 0 1 0 0 1 1 3 01 0 1 1 5 01 A 0 1 0 1 0 1 0 1 0 A 0 3 5 A C 1 0 A 4 A 1 3 A 0 3 0 A A A 1 A A A 1 3 1 1 1 1 1 0 1 A 0 A C 1 0 1 0 A 0 0 1 7 1 9 B 3 1 1 1 7 9 B 9 B 1 9 B 3 1 1 1 ...

Page 52: ...20085953 50 GB Appendix Electrical panel layout ৼ 0 1 1 1 1 1 2 2 2 0 2 2 2 2 2 2 2 2 2 2 2 0 2 3 ...

Page 53: ...ature control probe GF Inverter H1 Green indicator light POWER ON H2 Green indicator light FUEL ON ION Ionisation probe MV Fan motor K2 Relay K2 clean contacts OVERLOAD K3 Relay K3 clean contacts BURNER LOCK OUT K6 Relay K6 clean contacts BURNER ON PA Air pressure switch PE Burner earth PGMax Maximum gas pressure switch PGMin Minimum gas pressure switch PGVP Gas pressure switch for valve leak dete...

Page 54: ......

Page 55: ......
Page 56: ...Subject to modifications RIELLO S p A I 37045 Legnago VR Tel 39 0442 630111 http www riello it http www rielloburners com ...

Reviews: