background image

24

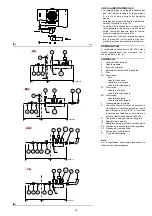
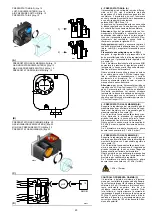
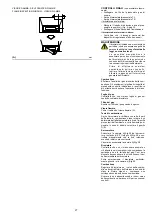
4 - LUFTDRUCKWÄCHTER (A)

Der  Luft-Druckwächter  (Differentialtyp)  wird 

durch  den  Unterdruck  und  den  Druck  des 

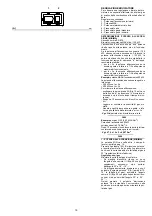
Gebläses beansprucht, siehe 1)(A).

Der Brenner kann daher auch in Brennkammern 

mit  Unterdruck  und  hohen  Modulationsverhält-

nissen  funktionieren  Mindest  -  Höchstleistung 

bis 1/6.

In  diesem  Fall  benötigt  der  Luft-Druckwächter 

keine Einstellung und seine Funktion ist auf die 

kontrolle des Gebläsebetriebs beschränkt.

Achtung:

 der Gebrauch des Luftdruckwächters 

als  Differentialschalter  ist  nur  für  Industriean-

wendungen  zugelassen.  Er  ist  auch  dort  zuge-

lassen, 

wo 

laut 

Vorschriften 

der 

Luftdruckwächter nur den Gebläsebetrieb, ohne 

Bezug auf CO-Grenzen, überwacht.
Bei  Zivilanwendungen  muß  man  die  Gebläse-

ansaugleitung, siehe 2)(A), abnehmen und den 

Druckwächter wie folgt einstellen.

Luft-Druckwächter wie in 2)(A) verbunden:

die  Einstellung  des  Luftdruckwächters  erfolgt 

nach allen anderen Brenner-Regulierungen; der 

Druckwächter wird auf Skalenbeginn (A) einge-

stellt.
Bei Brennerbetrieb auf Mindestleistung den Ein-

stelldruck  durch  Drehen  des  dafür  bestimmten 

Drehknopfs im Uhrzeigersinn langsam erhöhen 

bis eine Störabschaltung erfolgt.
Dann  den  Drehkopf  gegen  den  Uhrzeigersinn 

um  etwa  20%  des  eingestellten  Druckwertes 

zurückdrehen  und  den  Brenner  wieder  anfah-

ren,  um  zu  überprüfen,  ob  dieser  ordnungsge-

mäß arbeitet.
Sollte eine Störabschaltung eintreten, den Dreh-

knopf ein bißchen wieder noch zurückdrehen.

Achtung:

 als Regel gilt, daß der Luftdruckwäch-

ter verhindern muß, daß das CO im Abgas 1% 

(10.000 ppm) überschreitet.

Um  das  sicherzustellen,  einen  Verbrennungs-

analysator  in  den  Kamin  einfügen,  die  Ansau-

göffnung des Gebläses langsam schließen (zum 

Beispiel mit Pappe) und prüfen, daß die Störab-

schaltung des Brenners erfolgt, bevor das CO in 

den Abgasen 1% überschreitet.

5 - GAS-HÖCHSTDRUCKWÄCHTER (B)

Die  Einstellung  des  Gas-Höchstdruckwächters 

erfolgt  nach  allen  anderen  Brennereinstellun-

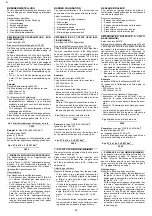
gen, wobei der Wächter auf Skalenende (B) ein-

gestellt wird.

Bei Brennerbetrieb auf Höchstleistung den Ein-

stelldruck  durch  langsames  Drehen  des  Dreh-

knopfs  gegen  den  Uhrzeigersinn  vermindern, 

bis eine Störabschaltung erfolgt.

Darauf  den  Drehknopf  im  Uhrzeigersinn  um 

0,2 kPa  (2 mbar)  vordrehen  und  den  Brenner 

wieder anfahren. Falls eine Störabschaltung ein-

treten sollte, im Uhrzeigersinn noch um 0,1 kPa 

(1 mbar) vordrehen.

6 - GAS-MINIMALDRUCKWÄCHTER (C)

Die  Einstellung  des  Gas-Minimaldruckwächters 

erfolgt  nach  allen  anderen  Brennereinstellun-

gen,  wobei  der  Wächter  auf  Skalenbeginn  (C) 

eingestellt wird. Bei Brennerbetrieb auf Höchst-

leistung  den  Einstelldruck  durch  langsam  dre-

hen  des  dafür  bestimmten  drehknopfs  im 

uhrzeigersinn  erhöhen,  bis  der  brenner  zum 

stillstand  kommt.  dann  den  Drehknopf  gegen 

den Uhrzeigersinn um 0,2 kPa (2 mbar) zurück-

drehen  und  den  Brenner  wieder  anfahren,  um 

zu überprüfen, ob dieser ordnungsgemäß arbei-

tet.  Sollte  der  Brenner  wieder  zum  Stillstand 

kommen,  den  Drehknopf  noch  einmal  gegen 

den Uhrzeigersinn um 0,1 kPa (1 mbar) drehen.

1 kPa = 10 mbar

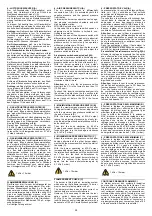
FLAMMENÜBERWACHUNG (D)

Der  Brenner  ist  mit  einem  Ionisationsgerät  zur 

Flammenüberwachung  ausgerüstet.  Der  erfor-

derliche  Mindeststrom  beträgt  6  µA.  Da  der 

Brenner  einen  weitaus  höheren  Strom  erreicht, 

sind  normalerweise  keine  Kontrollen  nötig.  Will 

man  den  Ionisationsstrom  messen,  muß  der 

Steckanschluß 23)(A)S.12 am Kabel der Ionisa-

tionssonde  ausgeschaltet  und  ein  Gleichstrom-

Mikroamperemeter, Meßbereich 100 µA, einge-

schaltet werden. 

Auf richtige Polung achten!

ACHTUNG

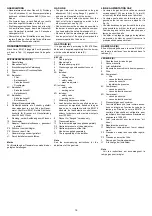
4 - AIR PRESSURE SWITCH (A)

The  air  pressure  switch  is  differentially 
connected, see 1)(A), it is activated by both the 
negative  pressure  and  the  general  pressure 
from the fan.
In this way the burner can operate even in nega-
tive  pressure  combustion  chambers  and  with 
high modulation ratios: 
MIN / MAX outputs of up to 1/6.
In  this  case  the  air  pressure  switch  needs  no 
adjustment  and  its  function  is  limited  to  con-
trolling fan operation.
Attention: the use of the air pressure switch with 
differential operation is allowed only in industrial 
applications  and  where  rules  enable  the  air 
pressure  switch  to  control  only  fan  operation 
without any reference to CO limit.
In civil applications the pipe from the fan air inlet 
should  be  removed,  see  2)(A)  and  adjust  the 
pressure switch as follows.

Air pressure switch connected as 2)(A):

adjust  the  air  pressure  switch  after  having  per-
formed all other burner adjustments with the air 
pressure switch set to the start of the scale (A).
With  the  burner  operating  at  min.  output, 
increase adjustment pressure by slowly turning 
the relative knob clockwise until the burner locks 
out. Then turn the knob anti-clockwise by about 
20% of the set point and repeat burner starting 
to ensure it is correct.
If the burner locks out again, turn the knob anti-
clockvise a little bit more.

Attention: 

as  a  rule,  the  air  pressure  switch 

must limit the CO in the fumes to less than 1% 
(10.000 ppm).
To check this, insert a combustion analyser into 
the  chimney,  slowly  close  the  fan  suction  inlet 
(for example with cardboard) and check that the 
burner  locks  out,  before  the  CO  in  the  fumes 
exceeds 1%.

5 - MAXIMUM GAS PRESSURE SWITCH (B)

Adjust  the  maximum  gas  pressure  switch  after 
having  performed  all  other  burner  adjustments 
with  the  maximum  gas  pressure  switch  set  to 
the end of the scale (B).
With  the  burner  operating  at  MAX  output, 
reduce  the  adjustment  pressure  by  slowly  tur-
ning the adjustment knob anticlockwise until the 
burner locks out.
Then  turn  the  knob  clockwise  by  0,2 kPa 
(2 mbar)  and  repeat  burner  firing.  If  the  burner 
locks  out  again,  turn  the  knob  again  clockwise 
by 0,1 kPa (1 mbar).

6 - MINIMUM GAS PRESSURE SWITCH (C)

Adjust  the  minimum  gas  pressure  switch  after 
having  performed  all  the  other  burner  adjust-
ments with the pressure switch set at the start of 
the scale (C).
With  the  burner  operating  at  MAX  output, 
increase adjustment pressure by slowly turning 
the relative knob clockwise until the burner locks 
out.  Then  turn  the  knob  anti-clockwise  by 
0,2 kPa  (2 mbar)  and  repeat  burner  starting  to 
ensure  it  is  uniform.  If  the  burner  locks  out 
again,  turn  the  knob  anti-clockwise  again  by 
0,1 kPa (1 mbar).

1 kPa = 10 mbar

FLAME PRESENT CHECK (C)

The  burner  is  fitted  with  an  ionisation  system 
which ensures that a flame is present. The mini-
mum current for plant operation is 6 µA. 
The burner provides a much higher current, so 
that controls are not normally required. 
However, if it is necessary to measure the ioni-
sation  current,  disconnect  the  plug-socket 
23)(A)p.12  on  the  ionisation  probe  cable  and 
insert a direct current microamperometer with a 
base scale of 100 µA. Carefully check polarities!

WARNING

4 - PRESSOSTAT DE L'AIR (A)

Le pressostat de l’air est relié de façon différen-

tielle,  voir  1)(A),  c’est-à-dire  qu’il  est  sollicité 

aussi bien par la dépression que par la pression 

produites par le ventilateur.

De cette façon, le brûleur peut fonctionner éga-

lement  dans  la  chambre  de  combustion  en 

dépression  et  avec  des  rapports  élevés  de 

modulation: puissances MIN / MAX jusqu’à 1/6.

Dans ce cas, le pressostat de l’air ne nécessite 

d’aucun  réglage  et  sa  fonction  se  limite  au 

contrôle du fonctionnement du ventilateur.

Attention:

  on  ne  peut  utiliser  le  pressostat  de 

l'air  à fonctionnement  différentiel que dans des 

applications  industrielles  et  quand  les  normes 

permettent que le pressostat de l'air ne contrôle 

que le fonctionnement du ventilateur, sans limit 

de référence pour le CO.

Dans  les  applications  civiles  il  faut  enlever  le 

conduit provenant de l’aspiration du ventilateur, 

voir 2)(A), et régler le pressostat comme suit.

Pressostat de l’air relié comme sur la fig. 2)(A):

effectuer le réglage du pressostat de l’air après 

avoir  effectué  tous  les  autres  réglages  du  brû-

leur  avec  le  pressostat  de  l’air  réglé  en  début 

d’échelle (A). Lorsque le brûleur fonctionne à la 

puissance  MIN,  augmenter  la  pression  de 

réglage en tournant lentement dans le sens des 

aiguilles d’une montre la petite molette prévue à 

cet  effet  jusqu’au  blocage  du  brûleur.  Tourner 

ensuite dans le sens contraire la petite molette 

du 20% du valeur reglé et répéter le démarrage 

du brûleur pour en vérifier la régularité. Si le brû-

leur  se  bloque  à  nouveau,  tourner  encore  un 

peu la petite molette dans le sens contraire aux 

aiguilles d’une montre.

Attention:

 comme le veut la norme, le pressos-

tat  de  l'air  doit  empêcher  que  le  CO  dans  les 

fumées dépasse 1% (10.000 ppm). 

Pour  s'en  rendre  compte,  placer  un  analyseur 

de  combustion  dans  le  conduit,  fermer  lente-

ment  la  bouche  d'aspiration  du  ventilateur  (par 

exemple avec un carton) et vérifier qu'il y ait blo-

cage  du  brûleur,  avant  que  le  CO  dans  les 

fumées ne dépasse 1%. 

5 - PRESSOSTAT GAZ SEUIL MAXIMUM (B)

Effectuer  le  réglage  du  pressostat  gaz  seuil 

maximum  après  avoir  effectué  tous  les  autres 

réglages  du  brûleur  avec  le  pressostat  gaz 

maximum réglé en fin d'échelle (B).

Avec  le  brûleur  fonctionnant  à  la  puissance 

MAX,  diminuer  la  pression  de  réglage  en  tour-

nant  lentement  dans  le  sens  contraire  aux 

aiguilles  d'une  montre  la  petite  molette  de 

réglage  jusqu’au  blocage  du  brûleur.  Tourner 

ensuite dans le sens des aiguilles d’une montre 

la petite molette de 0,2 kPa (2 mbar) et répéter 

le démarrage du brûleur. Si le brûleur se bloque 

à nouveau, tourner encore dans le sens inverse 

aux aiguilles d'une montre de 0,1 kPa (1 mbar).

6 - PRESSOSTAT GAZ SEUIL MINIMUM (C)

Effectuer  le  réglage  du  pressostat  gaz  seuil 

minimum  après  avoir  effectué  tous  les  autres 

réglages du brûleur avec le pressostat réglé en 

début  d'échelle  (C).  Lorsque  le  brûleur  fonc-

tionne à la puissance MAX, augmenter la pres-

sion  de  réglage  en  tournant  lentement  dans  le 

sens des aiguilles d'une montre la petite molette 

prévue à cet effet jusqu'à l'arrêt du brûleur. Tour-

ner  ensuite  dans  le  sens  contraire  la  petite 

molette de 0,2 kPa (2 mbar) et répéter le démar-

rage du brûleur pour en vérifier la régularité. Si 

le  brûleur  s'  arrête  à  nouveau,  tourner  encore 

dans le sens inverse aux aiguilles d'une montre 

de 0,1 kPa (1 mbar).

1 kPa = 10 mbar

CONTROLE PRESENCE FLAMME (C)

Le  brûleur  est  muni  d'un  système  à  ionisation 

pour  contrôler  la  présence  de  la  flamme.  Pour 

faire fonctionner le boîtier de contrôle le courant 

minimum est de 6 µA. Le brûleur produit un cou-

rant  nettement  supérieur  qui  ne  nécessite  nor-

malement d'aucun contrôle. Toutefois, si on veut 

mesurer  le  courant  d'ionisation,  il  faut  décon-

necter  la  fiche-prise  23)(A)p.12  placée  sur  le 

câble  de  la  sonde  d'ionisation  et  connecter  un 

microampèremètre pour courant continu de 100 

µA bas d'échelle. Attention à la polarité!

ATTENTION

Summary of Contents for 882 T

Page 1: ...ien Bruciatori di gas ad aria soffiata D Gas Gebl sebrenner GB Forced draught gas burners F Br leurs gaz air souffl Funzionamento bistadio progressivo o modulante Zweistufig gleitender oder modulieren...

Page 2: ...Macchine LVD 2014 35 UE Direttiva Bassa Tensione EMC 2014 30 UE Compatibilit Elettromagnetica La qualit viene garantita mediante un sistema di qualit e management certificato secondo ISO 9001 2015 Di...

Page 3: ...014 35 UE Niederspannungsrichtlinie EMC 2014 30 UE Elektromagnetische Vertr glichkeit Die Qualit t wird durch ein gem ISO 9001 2015 zertifiziertes Qualit ts und Managementsystem garantiert Erkl rung d...

Page 4: ...achine Directive LVD 2014 35 UE Low Voltage Directive EMC 2014 30 UE Electromagnetic Compatibility The quality is guaranteed by a quality and management system certified in accordance with ISO 9001 20...

Page 5: ...pareils Gaz MD 2006 42 CE Directive Machines LVD 2014 35 UE Directive Basse Tension EMC 2014 30 UE La qualit est garantie gr ce un syst me de qualit et de gestion certifi conforme ISO 9001 2015 D clar...

Page 6: ...sono cos indicate 1 A Particolare 1 della figura A nella stessa pagina del testo 1 A p 8 Particolare 1 della figura A riportata a pagina 8 D INHALT TECHNISCHE ANGABEN Seite 2 Elektrische Daten 2 Brenn...

Page 7: ...ext 1 A p 8 part 1 of figure A page number 8 F INDEX DONNEES TECHNIQUES page 4 Donn es lectriques 4 Description br leur 6 Emballage Poids 6 Encombrement 6 Equipement standard 6 Plage de puissance 8 Ch...

Page 8: ...assima del bruciatore 3 Pressione sonora misurata nel laboratorio combustione del costruttore con bruciatore funzionante su caldaia di prova alla potenza massima La Potenza sonora misurata col metodo...

Page 9: ...renners 3 Schalldruck gemessen im Verbrennungslabor des Herstellers bei laufendem Brenner am Pr fkessel bei H chstleistung Die Schallleistung wird mit der von der Norm EN 15036 vorgesehenen Free Field...

Page 10: ...aximum burner output 3 Sound pressure measured in manufacturer s combustion laboratory with burner operating on test boiler and at maximum rated output The sound power is measured with the Free Field...

Page 11: ...du br leur 3 Pression sonore mesur e dans le laboratoire de combustion du constructeur avec le br leur fonctionnant sur la chaudi re d essai la puis sance maximale La puissance sonore est mesur e gr...

Page 12: ...arecchiatura elettrica con avvisatore luminoso di blocco e pulsante di sblocco 20 Un interruttore per funzionamento automatico manuale spento Un pulsante per aumento diminuzione potenza 21 Spine per i...

Page 13: ...ation probe cable 24 Maximum gas pressure switch 25 Motor contact maker and thermal cutout with reset button 26 Engine protection Two types of burner failure may occur CONTROL BOX LOCK OUT if the cont...

Page 14: ...ndo la norma EN 676 Riportiamo in B diametro e lunghezza della camera di combustione di prova Esempio Potenza 350 Mcal h diametro 50 cm lunghezza 1 5 m CALDAIE COMMERCIALI C L abbinamento bruciatore c...

Page 15: ...combustion chamber Example Output 350 Mcal h diameter 50 cm length 1 5 m COMMERCIAL BOILERS C The burner boiler combination does not pose any problems if the boiler is CE approved and its combustion c...

Page 16: ...abella RS 64 M MZ una potenza di 500 kW Questo valore serve come prima approssima zione la portata effettiva va misurata al conta tore Per conoscere invece la pressione del gas necessaria alla presa 1...

Page 17: ...at the gas meter To calculate the required gas pressure at test point 1 B set the maximim output required from the burner operation find the nearest output value in the table for the burner in questio...

Page 18: ...1 12 se non vi espressa richiesta del costruttore della caldaia FISSAGGIO DEL BRUCIATORE ALLA CALDAIA D Prima di fissare il bruciatore alla caldaia verifi care dall apertura del boccaglio se la sonda...

Page 19: ...D Before securing the burner to the boiler check through the blast tube opening to make sure that the flame sensor probe and the ignition electrode are correctly set in position as shown in D Now det...

Page 20: ...a far collimare la tacca trovata con il piano anteriore 5 A della flangia Esempio Potenza MAX bruciatore 500 Mcal h Dal diagramma B risulta che per questa potenza la regolazione dell aria va effettuat...

Page 21: ...f the flange Example MAX output 500 Mcal h If we consult diagram B we find that for this output air must be adjusted using notch 7 5 as shown in figs A Once you have finished setting up the head refit...

Page 22: ...dicato in tab C LEGENDA B 1 Condotto arrivo del gas 2 Valvola manuale 3 Giunto antivibrante 4 Manometro con rubinetto a pulsante 5 Filtro 6A Comprende filtro valvola di sicurezza regolatore di pressio...

Page 23: ...essure gauge with pushbutton cock 5 Filter 6A Includes Filter working valve safety valve pressure adjuster 6C Includes safety valve working valve 6D Includes safety valve working valve 7 Minimum gas p...

Page 24: ...ccendere il bruciatore opportuno regolare la rampa del gas in modo che l accen sione avvenga nelle condizioni di massima sicu rezza e cio con una piccola portata di gas SERVOMOTORE E Il servomotore re...

Page 25: ...rofile cam and the gas butterfly valve The angle of rotation of the servomotor is equal to the angle on the graduated sector controlling the gas butterfly valve The servomotor rotates through 90 in 24...

Page 26: ...scollegare la spina presa 23 A p 12 sul cavo della sonda di ionizzazione il bruciatore si accende e va in blocco dopo il tempo di sicu rezza Eseguire 10 accensioni con blocchi consecu tivi Leggere al...

Page 27: ...e quantity of gas burned This quantity must be equal to or lower than the quantity given by the formula for ts 3s Vg Qa max burner output x n x ts 3600 Example for gas G 20 9 45 kWh Sm3 ignition outpu...

Page 28: ...ndicazioni date a pag 16 Se bisogna ridurla diminuire la pressione del gas in uscita e se gi al minimo chiudere un po la valvola di regolazione VR Se bisogna aumentarla incrementare la pres sione del...

Page 29: ...livery needs to be increased increase outlet gas pressure Adjusting air delivery Progressively adjust the end profile of cam 4 A by turning the cam adjustment screws as they appear through the access...

Page 30: ...in senso antiorario Attenzione per norma il pressostato aria deve impedire che il CO nei fumi superi l 1 10 000 ppm Per accertarsi di ci inserire un analizza tore della combustione nel camino chiudere...

Page 31: ...ressure switch after having performed all other burner adjustments with the maximum gas pressure switch set to the end of the scale B With the burner operating at MAX output reduce the adjustment pres...

Page 32: ...o di avviamento FUNZIONAMENTO A REGIME A Bruciatore senza il kit per funzionamento modulante Terminato il ciclo di avviamento il comando del servomotore passa al termostato pressostato TR che controll...

Page 33: ...emperature control point C The control box continues however to check that the flame is present and that the air pres sure switch is in the correct position If the temperature or pressure is low and t...

Page 34: ...icheranno i punti dove pi attenta dovr essere l operazione di manu tenzione Fughe di gas Controllare che non vi siano fughe di gas sul condotto contatore bruciatore Filtro del gas Sostituire il filtro...

Page 35: ...er Gas filter Change the gas filter when it is dirty Flame inspection window Clean the flame inspection window A Combustion head Open the burner and make sure that all compo nents of the combustion he...

Page 36: ...venire secondo le fasi seguenti Avvio del motore del ventilatore per la pre ventilazione Esecuzione del controllo di tenuta valvole gas se previsto Completamento della pre ventilazione Raggiungimento...

Page 37: ...with a burner start up attempt The starting cycle should take place with the fol lowing phases Starting of the fan motor for the pre purging Control of the gas valve leak detection if ap plicable Comp...

Page 38: ...250 000 cicli di funzionamento Valvole gas tipo so lenoide 10 anni o 250 000 cicli di funzionamento Pressostati 10 anni o 250 000 cicli di funzionamento Regolatore di pressione 15 anni Servomotore ca...

Page 39: ...lenoid 10 years or 250 000 operation cycles Pressure switches 10 years or 250 000 operation cycles Pressure adjuster 15 years Servomotor electronic cam if present 10 years or 250 000 operation cycles...

Page 40: ...tore Ruotarlo come in figura ed infilare nel foro di una delle due guide la copiglia 9 in modo che il bruciatore rimanga in quella posizione A questo punto possibile estrarre il distributore del gas 7...

Page 41: ...y back Turn the burner as shown in the figure and fit the split pin 9 into one of the slide bar holes so that the burner remains in position Now extract the gas distributor 7 after having removed the...

Page 42: ...si avvia e poi si arresta in blocco Pressostato aria non commuta per pressione aria insufficiente 15 Pressostato aria mal regolato Regolarlo o sostituirlo 16 Tubetto presa pressione del pressostato os...

Page 43: ...interruttori Controllare collega menti 39 Telecomando limite o di sicurezza aperto Regolarlo o sostituirlo 40 Fusibile di linea interrotto Sostituirlo 41 Apparecchiatura elettrica difettosa Sostituirl...

Page 44: ...ltung Luftdruckw chter schaltet nicht um weil Luftdruck nicht ausreichend 15 Luftdruckw chter falsch eingestellt Einstellen oder auswechseln 16 Leitung der Druckentnahmestelle des Druckw chters versto...

Page 45: ...Sicherheitsfernsteuerung offen Einstellen oder auswechseln 40 Leitungssicherung unterbrochen Auswechseln 41 Defektes Steuerger t Auswechseln 42 Kein Gas Die handbet tigten Ventile zwischen Z hler und...

Page 46: ...he burner switches on but then stops in lockout Air pressure switch inoperative due to insufficient air pressure 15 Air pressure switch incorrectly adjusted Adjust or replace 16 Pressure switch pressu...

Page 47: ...pen Adjust or replace 40 Line fuse blocked Replace 41 Defective control box Replace 42 No gas supply Open the manual valves between contactor and train 43 Mains gas pressure insufficient Contact your...

Page 48: ...ression air insuffisante 15 Pressostat air mal r gl R gler ou remplacer 16 Tube de prise de pression du pressostat obstru Nettoyer 17 T te mal r gl e R gler 18 Haute pression dans le foyer Raccorder l...

Page 49: ...rique Fermer interrupteurs Contr ler raccorde ments 39 T l commande de limite ou de s curit ouverte R gler ou remplacer 40 Fusible de ligne interrompu Remplacer 41 Coffret de s curit d fectueux Rempla...

Page 50: ...termico I bruciatori RS 64 M MZ sono stati omologati per funzionamento intermittente Ci significa che devono fermarsi per Norma almeno 1 volta ogni 24 ore per permettere all apparecchiatura elettrica...

Page 51: ...ersorgung 230 V betr gt den Motoranschlu Stern oder Dreieckschaltung und die Einstellung des berstromausl sers ver ndern Die Brenner RS 64 M MZ sind f r intermittierenden Betrieb typgepr ft Das bedeut...

Page 52: ...f 400V If 230V power supply is used change the motor connection from star to delta and change the setting of the thermal cutout as well The burners RS 64 M MZ have been approved for intermittent opera...

Page 53: ...limentation est 230V changer la connexion du moteur d toile triangle et le r glage du relais thermique Les mod les RS 64 M MZ ont t homologu s pour fonctionner de fa on intermittente Cela veut dire qu...

Page 54: ...nti elettrici a cura dell installatore Elektroanschlusse vom Installateur auszuf hren Electrical connections set by installer Raccordements lectriques par l installateur 3 Schema funzionale Betriebssc...

Page 55: ...0 1 2 2 2 2 3 33 3 4 3 3 4 5 3 3 3 6 5 5 5 5 3 3 4 2 2 7 5 8 9 8 9 5 8 9 5 5 5 2 3 2 2 7 5 8 A 08 8 B C C D D D E D F D D D D D D D D D D E D D D D E D F D D D D D D D D D D E D G 3 48...

Page 56: ...49...

Page 57: ...0 0 0 1 2 2 3 4 4 4 2 4 4 5 67 4 8 8 8 9 9 9 9 9 9 9 9 9 9 9 9 9 9 9 8 50...

Page 58: ...0 1 2 0 0 0 3 4 5 06 0 0 7 0 7 0 7 8 7 2 7 7 7 7 7 07 0 7 67 6 6 0 7 7 8 7 51...

Page 59: ...XTM Terra mensola X4 Spina 4 poli X5 Spina 5 poli X6 Spina 6 poli X7 Spina 7 poli ZEICHENERKL RUNG SCHEMEN A Steuerger t B Entst rungsfilter BB Komponenten an Bord der Brenner BC Komponenten an Bord...

Page 60: ...elf earth X4 4 pin plug X5 5 pin plug X6 6 pin plug X7 7 pin plug L GENDE SCH MAS ELECTRIQUE A Coffret de s curit B Protection contre parasites radio BB Composants sur br leurs BC Composants sur chaud...

Page 61: ...4 KIT TESTA LUNGA codice 3010427 KIT CONTATTI PULITI codice 3010419 KIT POTENZIOMETRO PER INDICAZIONE POSIZIONE DI CARICO codice 3010109 KIT INTERFACE ADAPTER RMG TO PC codice 3002719 RAMPE GAS DA ABB...

Page 62: ...lnr 3010427 KIT POTENTIALFREIE KONTAKTEN Bestellnr 3010419 KIT POTENTIOMETER ZUR ANZEIGE DER F LLPOSITION Bestellnr 3010109 KIT INTERFACE ADAPTER RMG TO PC Bestellnr 3002719 MIT DEM BRENNER ZU KOMBINI...

Page 63: ...14 KIT LONG HEAD code 3010427 CLEAN CONTACTS KIT code 3010419 POTENTIOMETER KIT FOR THE INDICATION OF LOAD POSITION code 3010109 KIT INTERFACE ADAPTER RMG TO PC code 3002719 GAS TRAINS TO COUPLE WITH...

Page 64: ...Con riserva di modifiche nderungen vorbehalten Subject to modifications Sous r serve de modifications RIELLO S p A I 37045 Legnago VR Tel 39 0442 630111 http www riello it http www riello com...

Reviews: