


For the EC tanks, you need to specify the
capacity of the venturis (dosing
channels).
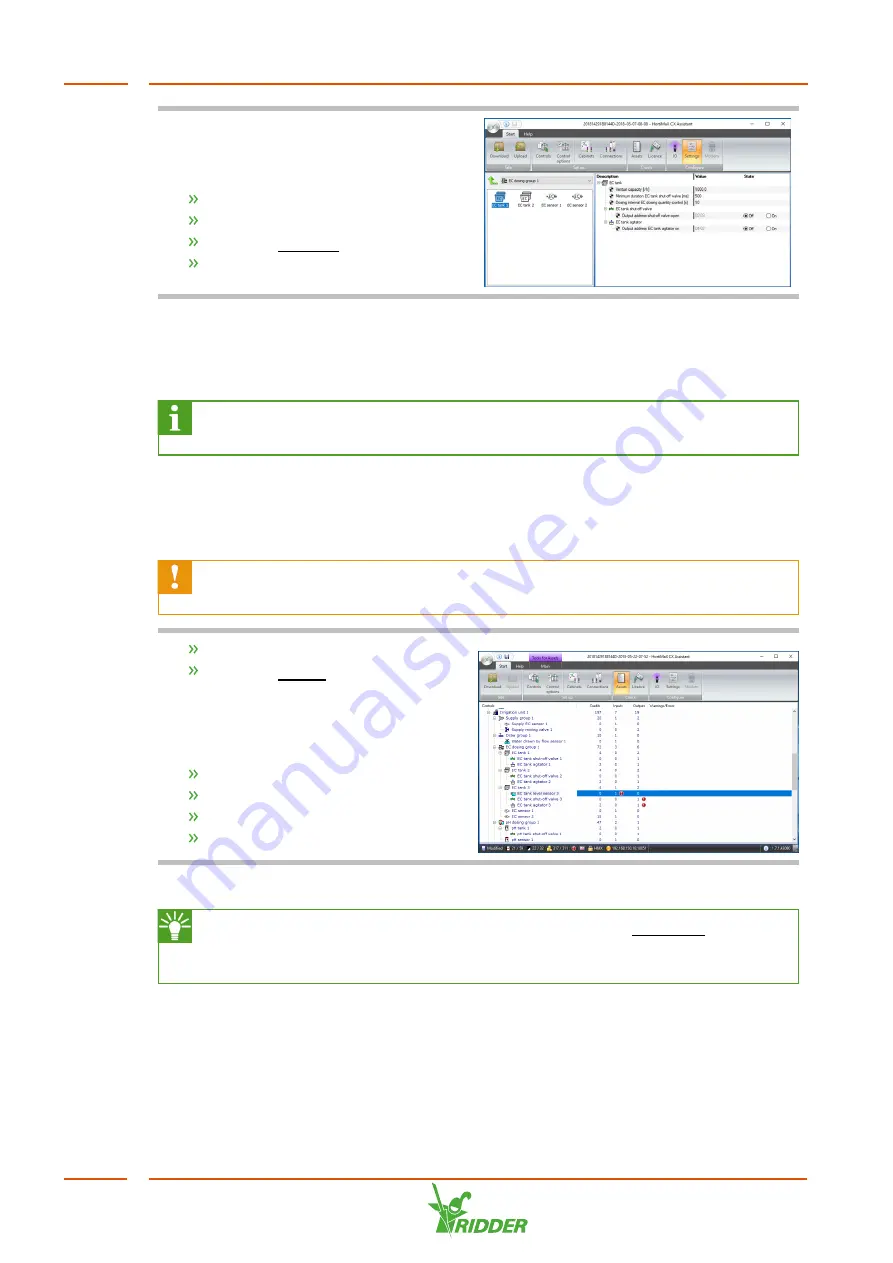
Select the EC tank.
Click the
Start
tab.
Click the Settings button.
Enter the capacity of the venturis.
5.2.2
Checking the configuration
The configuration of the CX Assistant is saved as a file with the name: site file. This
file is then uploaded to the HortiMaX CX500 on the IPC.
The HortiMaX CX500 controls the HortiJet Pro. This software runs on the IPC
that is located inside the main panel (hardware cabinet).
Before the configuration file can be uploaded, it is important to check that the settings
are valid. You can check the configuration you have created using the <Assets>
button. The Assets screen shows an overview of the configuration including any
warning messages or errors.
A configuration can only be uploaded to the IPC when all errors (red
exclamation marks) have been removed. To check the configuration:
Click the
Start
tab.
Click the Assets button.
The screen shows all the selected controls
in a tree structure. For each control, the
following is displayed:
Credits;
Inputs;
Outputs;
Warnings/Errors.
The "CX Assistant Tutorial” guide describes how you can resolve any error messages.
We recommend always downloading the site file (use the Download button to
do this). This will prevent you from accidentally testing the system with the
wrong site file.
5.2.3
Upload configuration
Once the configuration is complete, you need to upload it to the HortiMaX CX500 on
the IPC.
HortiJet Pro
34