Attaching Hard Disk Drive Type 4000
47
3
I
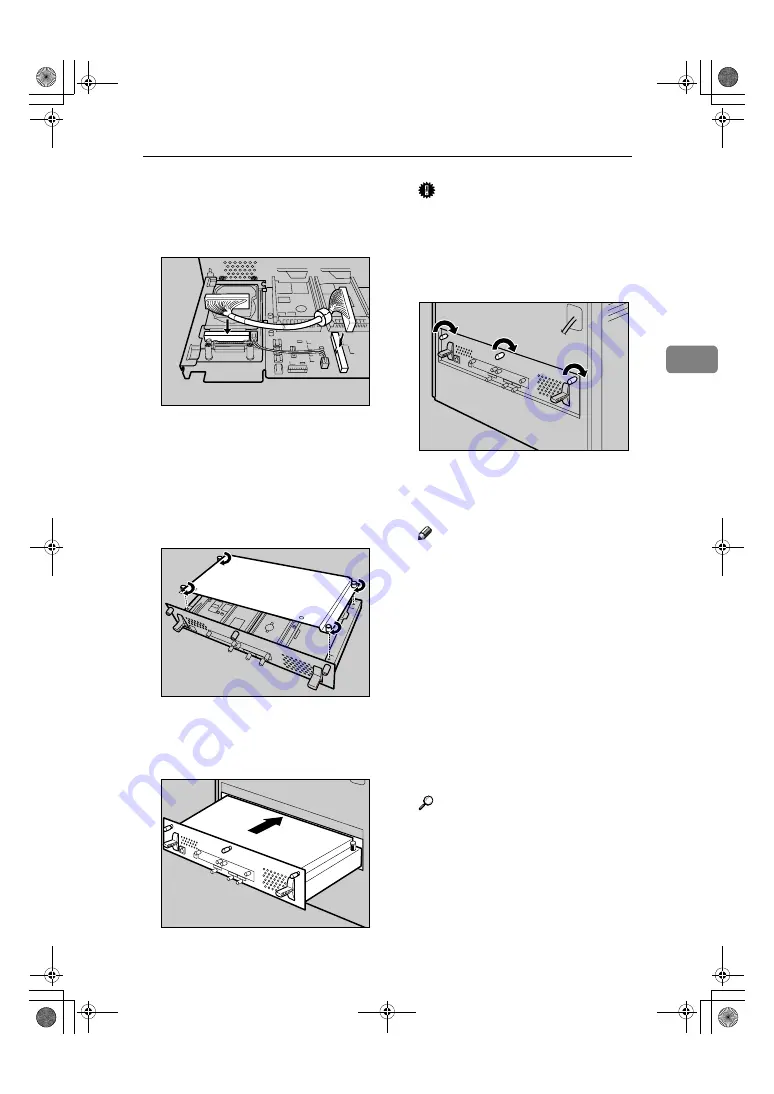
Connect the flat cable to the hard
disk drive and the controller
board. Connect the blue end of the
flat cable to the controller board.
J
When installing other options on
the controller board, do not close
the controller board, but go to the
steps for installing the option.
K
Fasten the four screws to attach
the cover.
L
Align the controller board with
the left and right rails, and then
push it carefully in, until it stops.
Important
❒
The printer may malfunction if
the controller board is not prop-
erly installed.
M
Fasten the controller board to the
printer using the three screws.
When the power is turned on, the
hard disk drive will be formatted
automatically.
Note
❒
After finishing installation, you
can check whether the hard disk
drive is properly installed: Print
the configuration page from the
“List/Test Print” menu. If it is
installed properly, you will see
“Printer Hard Disk Drive” for
“Controller Option”.
❒
If the hard disk drive is not in-
stalled properly, reinstall it
from step
A
. If you cannot in-
stall it properly even after at-
tempting reinstallation, contact
your sales or service representa-
tive.
Reference
For printing the configuration
page, see p.30 “Test Printing”.
Install the controller board care-
fully. board. For details, see p.36
“Caution when re-installing the
controller board”.
AKQ006S
AET070S
AET071S
AET072S
GaiaP1GB_Setup-F4_FM_forPaper.book Page 47 Friday, June 3, 2005 7:50 AM
Summary of Contents for Aficio CL4000DN
Page 62: ...Installing Options 58 3 GaiaP1GB_Setup F4_FM_forPaper book Page 58 Friday June 3 2005 7 50 AM...
Page 84: ...80 MEMO GaiaP1GB_Setup F4_FM_forPaper book Page 80 Friday June 3 2005 7 50 AM...
Page 85: ...81 MEMO GaiaP1GB_Setup F4_FM_forPaper book Page 81 Friday June 3 2005 7 50 AM...
Page 86: ...82 GB GB G105 8600A MEMO GaiaP1GB_Setup F4_FM_forPaper book Page 82 Friday June 3 2005 7 50 AM...


