Contents
© Rice Lake Weighing Systems
●
All Rights Reserved
i
Technical training seminars are available through Rice Lake Weighing Systems. Course descriptions and dates can be viewed at
www.ricelake.com/training
or obtained by calling 715-234-9171 and asking for the training department.
1.0 Introduction . . . . . . . . . . . . . . . . . . . . . . . . . . . . . . . . . . . . . . . . . . . . . . . . . . . . . . . . . . . . . . . . . . . . . . . . . . . . 1
1.1
Safety . . . . . . . . . . . . . . . . . . . . . . . . . . . . . . . . . . . . . . . . . . . . . . . . . . . . . . . . . . . . . . . . . . . . . . . . . . . . . . . . . . . . . . . . . . . . . 1
2.0 Setup. . . . . . . . . . . . . . . . . . . . . . . . . . . . . . . . . . . . . . . . . . . . . . . . . . . . . . . . . . . . . . . . . . . . . . . . . . . . . . . . . . 2
2.1
Unpacking the Scale . . . . . . . . . . . . . . . . . . . . . . . . . . . . . . . . . . . . . . . . . . . . . . . . . . . . . . . . . . . . . . . . . . . . . . . . . . . . . . . . . . 2
2.2
Scale Setup. . . . . . . . . . . . . . . . . . . . . . . . . . . . . . . . . . . . . . . . . . . . . . . . . . . . . . . . . . . . . . . . . . . . . . . . . . . . . . . . . . . . . . . . . 2
2.2.1
Display Mounting . . . . . . . . . . . . . . . . . . . . . . . . . . . . . . . . . . . . . . . . . . . . . . . . . . . . . . . . . . . . . . . . . . . . . . . . . . . . . 2
2.3
Power . . . . . . . . . . . . . . . . . . . . . . . . . . . . . . . . . . . . . . . . . . . . . . . . . . . . . . . . . . . . . . . . . . . . . . . . . . . . . . . . . . . . . . . . . . . . . 3
2.4
Connections . . . . . . . . . . . . . . . . . . . . . . . . . . . . . . . . . . . . . . . . . . . . . . . . . . . . . . . . . . . . . . . . . . . . . . . . . . . . . . . . . . . . . . . . 3
3.0 Operation . . . . . . . . . . . . . . . . . . . . . . . . . . . . . . . . . . . . . . . . . . . . . . . . . . . . . . . . . . . . . . . . . . . . . . . . . . . . . . 4
3.1
Keys and Symbols . . . . . . . . . . . . . . . . . . . . . . . . . . . . . . . . . . . . . . . . . . . . . . . . . . . . . . . . . . . . . . . . . . . . . . . . . . . . . . . . . . . 4
3.1.1
Initial Power Up . . . . . . . . . . . . . . . . . . . . . . . . . . . . . . . . . . . . . . . . . . . . . . . . . . . . . . . . . . . . . . . . . . . . . . . . . . . . . . 5
3.1.2
Weigh Mode. . . . . . . . . . . . . . . . . . . . . . . . . . . . . . . . . . . . . . . . . . . . . . . . . . . . . . . . . . . . . . . . . . . . . . . . . . . . . . . . . 5
3.1.3
Tare . . . . . . . . . . . . . . . . . . . . . . . . . . . . . . . . . . . . . . . . . . . . . . . . . . . . . . . . . . . . . . . . . . . . . . . . . . . . . . . . . . . . . . . 5
4.0 Configuration . . . . . . . . . . . . . . . . . . . . . . . . . . . . . . . . . . . . . . . . . . . . . . . . . . . . . . . . . . . . . . . . . . . . . . . . . . . 6
4.1
User Menu. . . . . . . . . . . . . . . . . . . . . . . . . . . . . . . . . . . . . . . . . . . . . . . . . . . . . . . . . . . . . . . . . . . . . . . . . . . . . . . . . . . . . . . . . . 6
4.2
Service Menu . . . . . . . . . . . . . . . . . . . . . . . . . . . . . . . . . . . . . . . . . . . . . . . . . . . . . . . . . . . . . . . . . . . . . . . . . . . . . . . . . . . . . . . 7
4.2.1
Access Service Menu. . . . . . . . . . . . . . . . . . . . . . . . . . . . . . . . . . . . . . . . . . . . . . . . . . . . . . . . . . . . . . . . . . . . . . . . . . 7
4.2.2
Configure Service Parameters. . . . . . . . . . . . . . . . . . . . . . . . . . . . . . . . . . . . . . . . . . . . . . . . . . . . . . . . . . . . . . . . . . . 8
4.3
Gravity Mode Setting. . . . . . . . . . . . . . . . . . . . . . . . . . . . . . . . . . . . . . . . . . . . . . . . . . . . . . . . . . . . . . . . . . . . . . . . . . . . . . . . . 10
5.0 Calibration . . . . . . . . . . . . . . . . . . . . . . . . . . . . . . . . . . . . . . . . . . . . . . . . . . . . . . . . . . . . . . . . . . . . . . . . . . . . 11
5.1
Span Calibration . . . . . . . . . . . . . . . . . . . . . . . . . . . . . . . . . . . . . . . . . . . . . . . . . . . . . . . . . . . . . . . . . . . . . . . . . . . . . . . . . . . . 11
5.2
Linear Calibration . . . . . . . . . . . . . . . . . . . . . . . . . . . . . . . . . . . . . . . . . . . . . . . . . . . . . . . . . . . . . . . . . . . . . . . . . . . . . . . . . . . 12
6.0 Communication . . . . . . . . . . . . . . . . . . . . . . . . . . . . . . . . . . . . . . . . . . . . . . . . . . . . . . . . . . . . . . . . . . . . . . . . 14
6.1
Scale to Computer Port Connections . . . . . . . . . . . . . . . . . . . . . . . . . . . . . . . . . . . . . . . . . . . . . . . . . . . . . . . . . . . . . . . . . . . . 14
6.2
I/O Specifications . . . . . . . . . . . . . . . . . . . . . . . . . . . . . . . . . . . . . . . . . . . . . . . . . . . . . . . . . . . . . . . . . . . . . . . . . . . . . . . . . . . 14
6.3
USB. . . . . . . . . . . . . . . . . . . . . . . . . . . . . . . . . . . . . . . . . . . . . . . . . . . . . . . . . . . . . . . . . . . . . . . . . . . . . . . . . . . . . . . . . . . . . . 15
6.4
Interface Protocols . . . . . . . . . . . . . . . . . . . . . . . . . . . . . . . . . . . . . . . . . . . . . . . . . . . . . . . . . . . . . . . . . . . . . . . . . . . . . . . . . . 16
6.4.1
NCI General Serial Communications Protocol. . . . . . . . . . . . . . . . . . . . . . . . . . . . . . . . . . . . . . . . . . . . . . . . . . . . . . 16
6.4.2
SMA Interface Protocol . . . . . . . . . . . . . . . . . . . . . . . . . . . . . . . . . . . . . . . . . . . . . . . . . . . . . . . . . . . . . . . . . . . . . . . 18
6.5
Sealing Scale for Weights and Measures . . . . . . . . . . . . . . . . . . . . . . . . . . . . . . . . . . . . . . . . . . . . . . . . . . . . . . . . . . . . . . . . . 21
6.5.1
Seal Scale . . . . . . . . . . . . . . . . . . . . . . . . . . . . . . . . . . . . . . . . . . . . . . . . . . . . . . . . . . . . . . . . . . . . . . . . . . . . . . . . . 21
7.0 Maintenance and Troubleshooting . . . . . . . . . . . . . . . . . . . . . . . . . . . . . . . . . . . . . . . . . . . . . . . . . . . . . . . . 22
7.1
Troubleshooting . . . . . . . . . . . . . . . . . . . . . . . . . . . . . . . . . . . . . . . . . . . . . . . . . . . . . . . . . . . . . . . . . . . . . . . . . . . . . . . . . . . . 22
7.1.1
Diagnostics Menu. . . . . . . . . . . . . . . . . . . . . . . . . . . . . . . . . . . . . . . . . . . . . . . . . . . . . . . . . . . . . . . . . . . . . . . . . . . . 22
7.1.2
Power Troubleshooting . . . . . . . . . . . . . . . . . . . . . . . . . . . . . . . . . . . . . . . . . . . . . . . . . . . . . . . . . . . . . . . . . . . . . . . 22
7.2
Load Cell Wiring . . . . . . . . . . . . . . . . . . . . . . . . . . . . . . . . . . . . . . . . . . . . . . . . . . . . . . . . . . . . . . . . . . . . . . . . . . . . . . . . . . . . 22
8.0 Compliance . . . . . . . . . . . . . . . . . . . . . . . . . . . . . . . . . . . . . . . . . . . . . . . . . . . . . . . . . . . . . . . . . . . . . . . . . . . 23
9.0 Specifications . . . . . . . . . . . . . . . . . . . . . . . . . . . . . . . . . . . . . . . . . . . . . . . . . . . . . . . . . . . . . . . . . . . . . . . . . 24
9.1
Dimensions . . . . . . . . . . . . . . . . . . . . . . . . . . . . . . . . . . . . . . . . . . . . . . . . . . . . . . . . . . . . . . . . . . . . . . . . . . . . . . . . . . . . . . . . 25
9.1.1
BenchPro Postal . . . . . . . . . . . . . . . . . . . . . . . . . . . . . . . . . . . . . . . . . . . . . . . . . . . . . . . . . . . . . . . . . . . . . . . . . . . . 25
9.2
Options . . . . . . . . . . . . . . . . . . . . . . . . . . . . . . . . . . . . . . . . . . . . . . . . . . . . . . . . . . . . . . . . . . . . . . . . . . . . . . . . . . . . . . . . . . . 25
9.2.1
Column Bracket and Post Option (PN 174783) . . . . . . . . . . . . . . . . . . . . . . . . . . . . . . . . . . . . . . . . . . . . . . . . . . . . . 25
9.2.2
Tabletop Display Post Option (PN 183103) . . . . . . . . . . . . . . . . . . . . . . . . . . . . . . . . . . . . . . . . . . . . . . . . . . . . . . . . 26
9.2.3
Customer Display Option (PN 180901) . . . . . . . . . . . . . . . . . . . . . . . . . . . . . . . . . . . . . . . . . . . . . . . . . . . . . . . . . . . 26
9.2.4
Second Operator Display Option (PN 174784) . . . . . . . . . . . . . . . . . . . . . . . . . . . . . . . . . . . . . . . . . . . . . . . . . . . . . 26
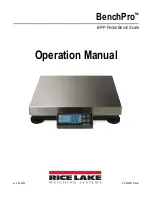
Page 1: ...BenchPro BP P Postal Bench Scale Operation Manual PN 180557 Rev E July 22 2020...
Page 2: ...marks of their respective companies All information contained within this publication is to the best of our knowledge complete and accurate at the time of publication Rice Lake Weighing Systems reserv...
Page 3: ...e Service Parameters 8 4 3 Gravity Mode Setting 10 5 0 Calibration 11 5 1 Span Calibration 11 5 2 Linear Calibration 12 6 0 Communication 14 6 1 Scale to Computer Port Connections 14 6 2 I O Specifica...
Page 4: ...Pro Postal BP P Scale ii Visit our website www RiceLake com Rice Lake continually offers web based video training on a growing selection of product related topics at no cost Visit www ricelake com web...
Page 5: ...ion to and loss of data General Safety Do not operate or work on this equipment unless this manual has been read and all instructions are understood Failure to follow the instructions or heed the warn...
Page 6: ...e the protective cover from the weigh platter 2 Place the scale on a sturdy level surface near a power outlet Ensure the scale and weigh platter are clear of obstructions 3 Level the scale by adjustin...
Page 7: ...HID requirements Four AA alkaline batteries not included Figure 2 2 BP P Top View with Weigh Platter Removed Once the scale is connected to a power source the power LED illuminates Press to power on t...
Page 8: ...right 4 Tare Button Perform a tare function if enabled Press Scroll left NOTE Enabling tare could violate metrological approvals Table 3 1 Display Key and Annunciator Functions Item No Description 5 M...
Page 9: ...s indicates the scale is at a stable zero 3 1 3 Tare Tare function must be enabled in the configuration menu for the tare key to be functional The factory default setting is disabled 1 Place an item o...
Page 10: ...ngs 4 Press to accept the value selected 5 Once all parameters have been set navigate to the parameter and press to confirm and save settings See Section 4 2 2 on page 8 for additional explanation on...
Page 11: ...platter from the scale displays 3 Remove the 8 mm hex screw and open the PCB compartment Figure 4 1 BP P Top View with Weigh Platter Removed 4 Press the Setup Switch 5 Configure all service parameter...
Page 12: ...y update rate Settings Med normal filtering average update rate Hi more filtering slower update rate Lo less filtering faster update rate Manufacturing mode only Do not use Do not adjust Settings OFF...
Page 13: ...le purchased most models have a minimum of two units of measure turned on to avoid incorrect weight being displayed or transmitted to the PC only have the applicable units of measure turned on setting...
Page 14: ...nchPro uses four values to the left of the decimal place and it may be necessary to round the values prior to input Use the following steps to modify the local gravity constant setting 1 See Section 4...
Page 15: ...scale model The model number of the scale is located on the serial tag on the bottom of the scale 1 See Section 4 2 1 on page 7 to access service menu displays 2 Press until displays 3 Press to accep...
Page 16: ...calibration function if instructed by Rice lake Weighing Systems and an authorized scale technician The BenchPro includes an optional linear calibration feature This is an additional feature to perfor...
Page 17: ...r calibration of 23 Press to accept value displays 24 Place the calibration weight on the scale and wait for the value to stabilize the raw A D counts displays 25 Press to accept and calibrate at The...
Page 18: ...tibility chart can be found on the Rice Lake Weighing Systems website 6 2 I O Specifications The unit includes both a straight pass through RS 232 cable and USB Cable For functional pin information se...
Page 19: ...ale interface After plugging into the USB port turn the scale on The following is displayed Figure 6 2 USB Driver Install When the driver is installed using Device Manager the BenchPro will be identif...
Page 20: ...LF p W W l b sp W W W o z CR LF H1 H2 CR ETX In lb oz LF p sp W W W l b sp W W o z CR LF H1 H2 CR ETX Table 6 4 Request Displayed Weight Command H CR 48h 0dh OverCapacity Invalid Data LF U U CR LF H1...
Page 21: ...Bit Byte 1 H1 Byte 2 H2 0 0 stable 0 not under capacity 1 not stable 1 under capacity 1 0 not at zero point 0 not over capacity 1 at zero point 1 over capacity 2 0 RAM ok 0 Flash ROM ok 1 RAM error 1...
Page 22: ...W W W W W W U U U CR In lb oz LF s r n m f W W W W W W W W W U U U CR s Z or O or U LF s r n m f U U U CR Table 6 15 Request Displayed Weight Command LF H CR 0Ah 48h 0dh In lb oz kg g normal data LF s...
Page 23: ...Stability Command LF Q CR 0Ah 51h 0dh In lb oz kg g Normal Data LF s r n m f W W W W W W W W W U U U CR In lb oz kg g LF s r n m f W W W W W W W W W U U U CR In lb oz kg g LF s r n m f W W W W W W W W...
Page 24: ...G y y y y y y y CR Step2 Product Module LF M O D y y y y y y y CR Step3 Software Revision LF R E V y y y y y y y CR Step4 Serial Number LF S N sp y y y y y y y CR Step5 End LF E N D CR Table 6 26 Abo...
Page 25: ...cale 1 Lift the weigh platter from the scale 2 Guide sealing wire through the drilled hex screw and through the PCB compartment door handle 3 Seal the wire to secure Figure 6 4 Top View with Weigh Pla...
Page 26: ...al to the weights being placed on the scale for performing span calibration damaged load cell Repeat calibration Replace load cell Power up or initial zero error Upon power up weight or item on the pl...
Page 27: ...UHIHUV WR LV LQ FRQIRUPLW ZLWK WKH IROORZLQJ VWDQGDUG V RU RWKHU UHJXODWLRQV GRFXPHQW V HXWVFK LU HUNOlUHQ XQWHU XQVHUHU DOOHLQLJHQ 9HUDQWZRUWXQJ GDVV GLH 3URGXNWH DXI GLH VLFK GLHVH UNOlUXQJ EH LHKW...
Page 28: ...ies 6 V with low battery indication at 4 3 volts not included Battery Life 50 250 hours depending on backlight and auto shutdown settings USB HID USB 2 0 max speed Vendor ID 1C19 Product ID 0002 Const...
Page 29: ...with the remote display not included Figure 9 2 Optional Column Bracket and Post Model A B C D 12 x 14 12 14 14 5 2 7 Table 9 1 Stainless Mild Steel Scale Dimensions Inches Part Number Description 17...
Page 30: ...ter using the mounting holes and adequate hardware The remote display attaches to the mounting bracket using two magnets which are included with each display Figure 9 3 Optional Tabletop Display Post...
Page 31: ......
Page 32: ...anada Mexico 800 321 6703 International 715 234 9171 Europe 31 0 26 472 1319 Rice Lake Weighing Systems is an ISO 9001 registered company Rice Lake Weighing Systems Specifications subject to change wi...