


19
Camera Menu
Selecting displays the Camera Menu.
PTZ:
Selecting
PTZ
and choosing the camera number allows you to control the selected
camera as long as it has Pan, Tilt and Zoom capabilities.
Zoom:
Selecting
Zoom
and choosing the camera number zooms the current image
of the selected camera on the screen.
Audio:
Selecting
Audio
toggles audio output On and Off.
Color Control:
Selecting
Color Control
and choosing the camera number allows
you to control brightness, contrast, hue and saturation for each camera for the selected
camera.
Edit Group:
Selecting
Edit Group
enters to the Active Cameo mode.
Search
Selecting displays the Search Menu.
All Channels:
Selecting
All Channels
exits the live monitoring mode and enters the
search mode.
Triplex:
Selecting
Triplex
enters the Triplex mode.
Setup
Selecting enters the Main Setup screen.
Status
Selecting will allow you to check the status of the DVR’s system, inputs and storage.
Searching Video
While in the search mode, pressing the
MENU
button displays the following Search menu on the right edge of
the screen. Pressing the
MENU
button again hides the menu. You can navigate through menus and items by
pressing the arrow buttons.
Search
Go To
Bookmark
Display
Previous Group
Next Group
Alarm
Panic
Camera Menu
Export
Status
Data Source
Exit
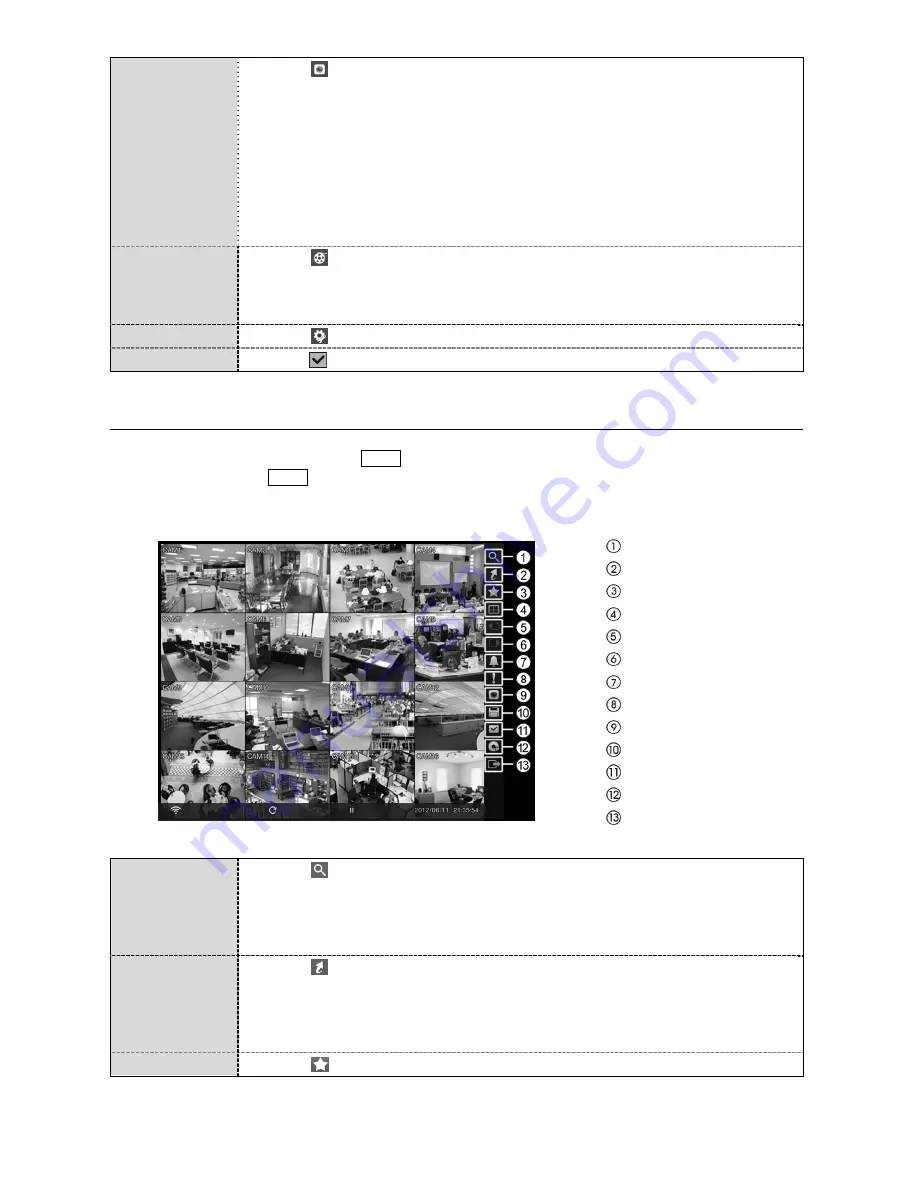
Search
Selecting displays the Search menu.
Event Log Search:
Selecting
Event Log Search
selects video from the event log.
Record Table Search:
Selecting
Record Table Search
selects using a recording table.
Motion Search:
Selecting
Motion Search
selects motion events.
Text-In Search:
Selecting
Text-In Search
selects text input strings.
Go To
Selecting displays the Go to menu.
Go to the First:
Selecting
Go to the First
displays the first recorded image.
Go to the Last:
Selecting
Go to the Last
displays the last recorded image.
Go to the Date/Time:
Selecting
Go to the Date/Time
allows you to set the date
and time you want to search for video.
Bookmark
Selecting adds the current playback point to the bookmark list.


