


10
Configuration
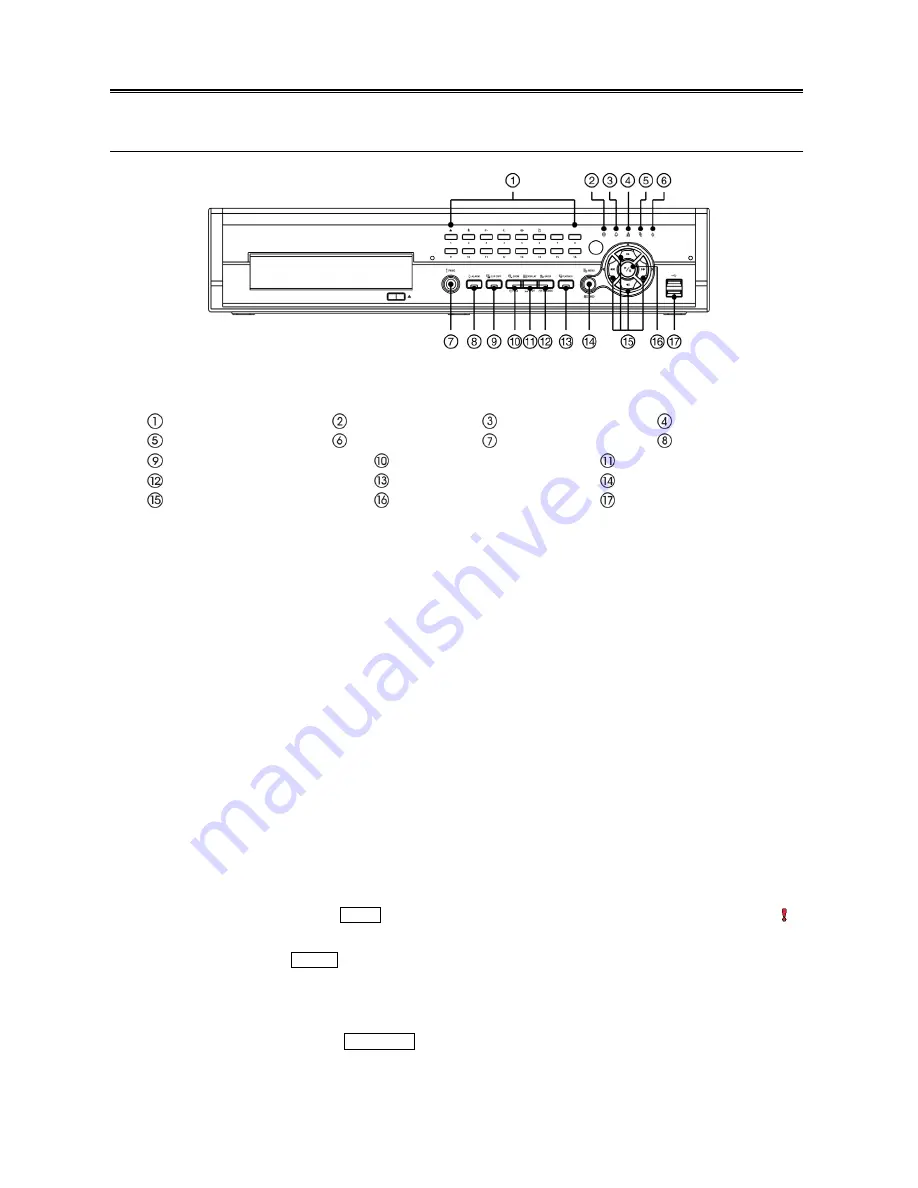
Front Panel Buttons and LEDs
< 16-Channel DVR front panel >
Camera Buttons
HDD LED
Alarm Out LED
Network LED
Clip Copy LED
Power LED
Panic Button
Alarm Button
Clip Copy Button
Zoom/PTZ Button
Display/SPOT Button
Group/Sequence Button
Playback Mode Button
Menu/Cameo Button
Arrow Buttons
Play/Pause Button
USB Connector
NOTE:
The infrared sensor on the DVR is just to the right of the camera buttons. Make certain that nothing
blocks the sensor, or the remote control will not function properly.
When you use wireless communication devices (such as Wi-Fi or Bluetooth) near the DVR, the
remote control might not function properly.
You can also use a USB mouse to navigate through the screens and menus much like you would
on a computer.
Camera Buttons
Pressing the individual camera buttons will cause the selected camera to display full
screen. Buttons 1 to 9 are also used to enter passwords.
In the PTZ mode, pressing the button 1 zooms in the screen and the button 2 zooms out
the screen, pressing the button 3 focuses near and button 4 focuses far, and pressing the
button 5 moves to the preset and button 6 saves the preset.
HDD LED
The HDD LED flickers when the DVR is recording or searching video on the hard disk
drive.
Alarm Out LED
The Alarm Out LED is lit when alarm output or internal buzzer is activated.
Network LED
The Network LED is lit when the unit is connected to a network via Ethernet.
Clip Copy LED
The Clip Copy (Backup) LED is lit when the DVR is clip-copying.
Power LED
The Power LED is lit when the unit is On.
PANIC Button
Pressing the
PANIC
button starts panic recoding of all camera channels, and displays on
the screen. Pressing the button again will stop panic recording.
ALARM Button
The
ALARM
button has two functions. First, it will reset the DVR’s outputs including
the internal buzzer during an alarm. Second, it will display the event log when you are
in the live monitoring mode unless there is an active alarm. This operation can be user
password protected.
CLIP COPY Button
Pressing the
CLIP COPY
(Backup) button allows you to copy video clips.


