12
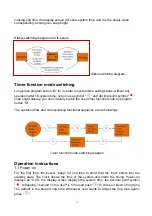
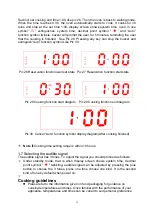
Oven programmer/timer display
13)
Timer “minus” button
14)
Manual button / Program button
15)
Timer “plus” button
16)
“Auto” function symbol
17)
Manual mode symbol/ oven in use symbol
18)
“Minute minder” symbol
19)
Decimal point symbol
9. Setting and using the oven programmer/timer
Before first use
To remove any residue from the oven that may have been left from the manufacturing
process, you should select the fan oven function and set the thermostat to its maximum
temperature setting.
It is perfectly normal for a smell to be produced during this process.
You should make sure that any windows in the room are left open during this process.
It is advisable for you not to remain in the room whilst the burning off process is taking
place.
You should leave the oven on maximum setting for 30 – 40 minutes.
After the oven cavity has cooled, it should then be cleaned with warm soapy water, using
either a sponge or soft cloth. No abrasive cleaners should be used.
Outer parts of the oven should be cleaned with warm soapy water, using either a sponge
or soft cloth. No abrasive cleaners should be used.
We would recommend that an appropriate stainless steel cleaner and polish is regularly
used on the stainless steel surfaces of this appliance.
Timer working status
Switching the timer status
The timer has 3 status, they are standby, function to be selected and working status.
Stand-by status:
After connected to the power supply, the display screen displays the
system time, the decimal point symbol flashes, it is the status before entering cooking
function; If exceeds 10 seconds without any operation under standby mode, the display
brightness automatically reduces, press any key to recover to the original brightness.
Function to be selected status:
Long press program button under standby status, the
display screen will show system time, it is the status when oven in use symbol and decimal
point symbol keep bright.
Working status:
After completed setting any one of the system time, clock, cooking time or
Summary of Contents for DIGI SET 8 GLAS PP
Page 58: ...Rating label ...


