5
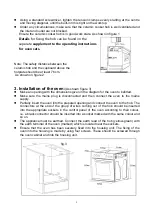
Using a standard screwdriver, tighten the tension clamps evenly starting at the centre
and moving diagonal, until the built-in rim is tight on the worktop.
Under any circumstances, make sure that the ceramic cooker hob is well ventilated and
the inlet and outlet are not blocked.
Ensure the ceramic cooker hob is in good work state. As shown in figure 1.
Details
for fixing the hob can be found on the
separate
supplement to the operating instructions
for oven sets.
Note: The safety distance between the
ceramic hob and the cupboard above the
hotplate should be at least 76 cm.
As shown
on
figure
2
3.
Installation of the oven:
(As shown figure 3)
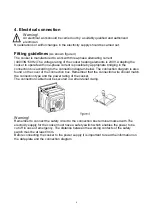
Make an opening with the dimensions given in the diagram for the oven to befitted.
Make sure the mains plug is disconnected and then connect the oven to the mains
supply.
Partially insert the oven into the prepared opening and connect the oven to the hob. The
connectors at the end of the group of wires coming out of the hob should be inserted
into the appropriate sockets in the control panel of the oven according to their colour,
i.e. a black connector should be inserted into a socket marked with the same colour and
so on.
The appliance must be earthed. Connect the earth lead of the hob (yellow-green) with
the earth terminal of the oven (marked) which is located near the sockets.
Ensure that the oven has been securely fixed into the housing unit. The fixing of the
oven into the housing is made by using four screws. These should be screwed through
the oven cabinet and into the housing unit.
fig.3
Summary of Contents for DIGI SET 8 GLAS PP
Page 58: ...Rating label ...

