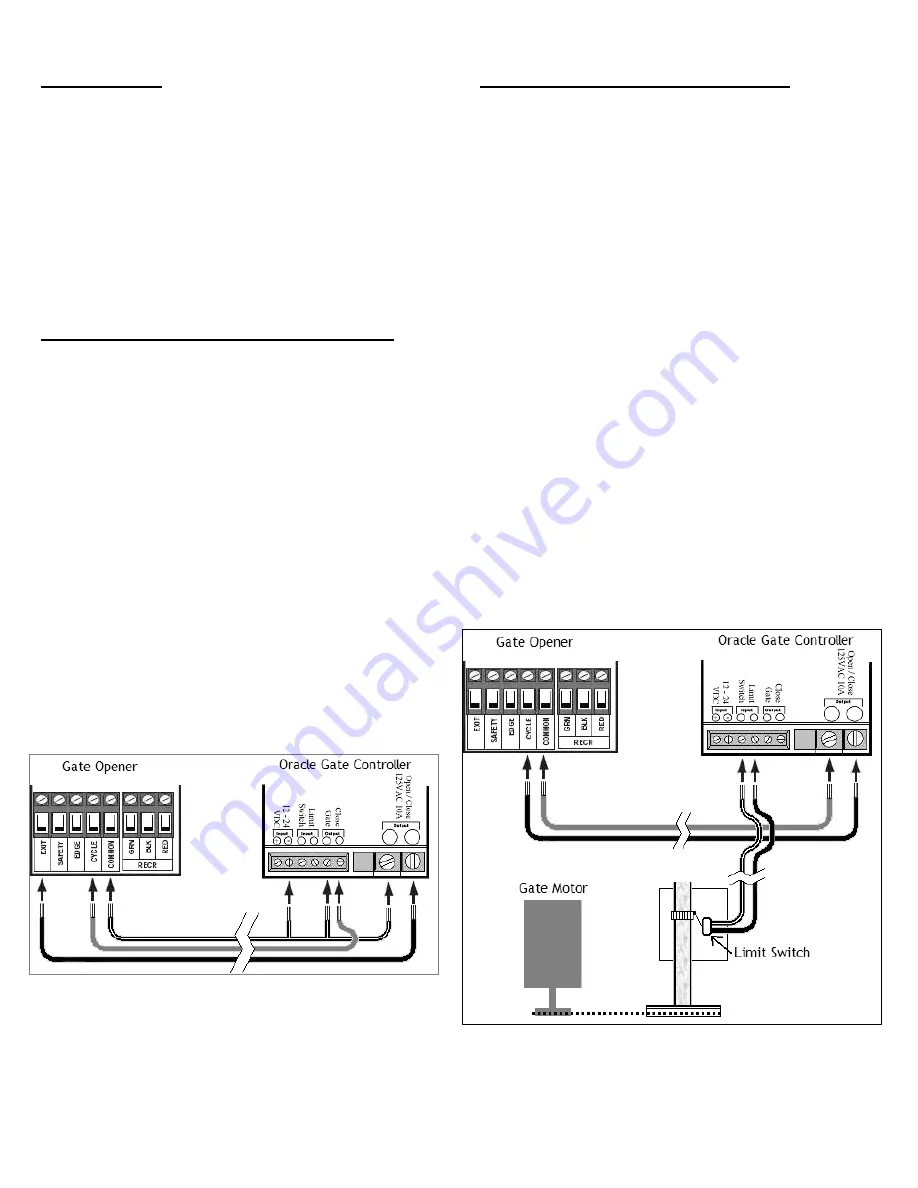
Sample Configuration 1:
Open Gate Only
Use this configuration when you wish to use the
Reporter Gate System as an open-only system, which
automatically closes, based on a timer or a magnetic
loop.
Enable the Auto-close feature on your Automatic Gate
Opener. Connect the Reporter Gate
Controller as
shown in the Basic Gate Controller Installation
diagram. Please refer to your product-specific manual
for wiring information. On the Reporter Intercom,
disable gate status checking (as described above).
Sample Configuration 2:
Wiring to separate OPEN and CLOSE terminals
Use this configuration when you wish to use the
Reporter Gate System to open and close your gate and
check the gate’s last known status, without connecting
to a limit switch or external gate status indicator.
Disable the Auto-close feature on your Automatic Gate
Opener.
Connect Contact 2 to Ground, COM, or (-) on your
Automatic Gate Opener.
Connect Reporter Gate Controller Contacts 7 and 8 to
“Strike Open”, “Open Only”, “Remote” or a similarly
named contact pair on your Automatic Gate Opener.
Please refer to your product-specific manual for wiring
information.
If your Automatic Gate Opener has a “Close” or “Close
Only” contact pair (e.g. connecting like a 3-button
station), connect Contacts 5 and 6 to the “Close”
contacts
Slide Gate Controller Dipswitch #5 to the UP position.
If desired, enable Auto-close on the Gate Controller by
flipping Gate Controller Dipswitch #6 to the UP position.
Sample Configuration 3:
Open, Close Gate and Verify Gate Status
Use this configuration when you wish to use the
Reporter Gate System to open and close your gate and
check the gate’s actual status, connecting the Gate
Controller to a limit switch or external gate status
indicator.
Enable or disable the Auto-close feature on your
Automatic Gate Opener.
Connect Reporter Gate Controller Contacts 7 and 8 to
“Strike Open”, “Open Only”, “Remote” or a similarly
named contact pair on your Automatic Gate Opener.
Please refer to your product-specific manual for wiring
information.
Connect Contact 2 to Ground, COM, or (-) on your
Automatic Gate Opener.
Flip Gate Controller Dipswitch #3 to the UP position to
enable status checking.
If your Automatic Gate Opener has a “Close” or “Close
Only” contact pair (e.g. connecting like a 3-button
station), connect Contacts 5 and 6 to the “Close”
contacts and flip Gate Controller Dipswitch #5 to the UP
position.
If desired, enable Auto-close on the Gate Controller by
flipping Gate Controller Dipswitch #6 to the UP position.
If you use this feature, disable auto-close on your
Automatic Gate Opener.
Connect terminals #3 and #4 across the “Gate Closed”
limit switch. Polarity does not matter.
7


