


en
6.2 Automatically starting SIMPLEX print
When you click the "Print" command in SIMPLEX sliceware, SIMPLEX print is automatically started�
⇒
Close the error message with "OK"�
⇒
Click "Printers" and "Detect SIMPLEX 3D printers" to activate the connected SIMPLEX 3D-fila
-
ment-printer (alternatively, press CTRL+R)�
♦
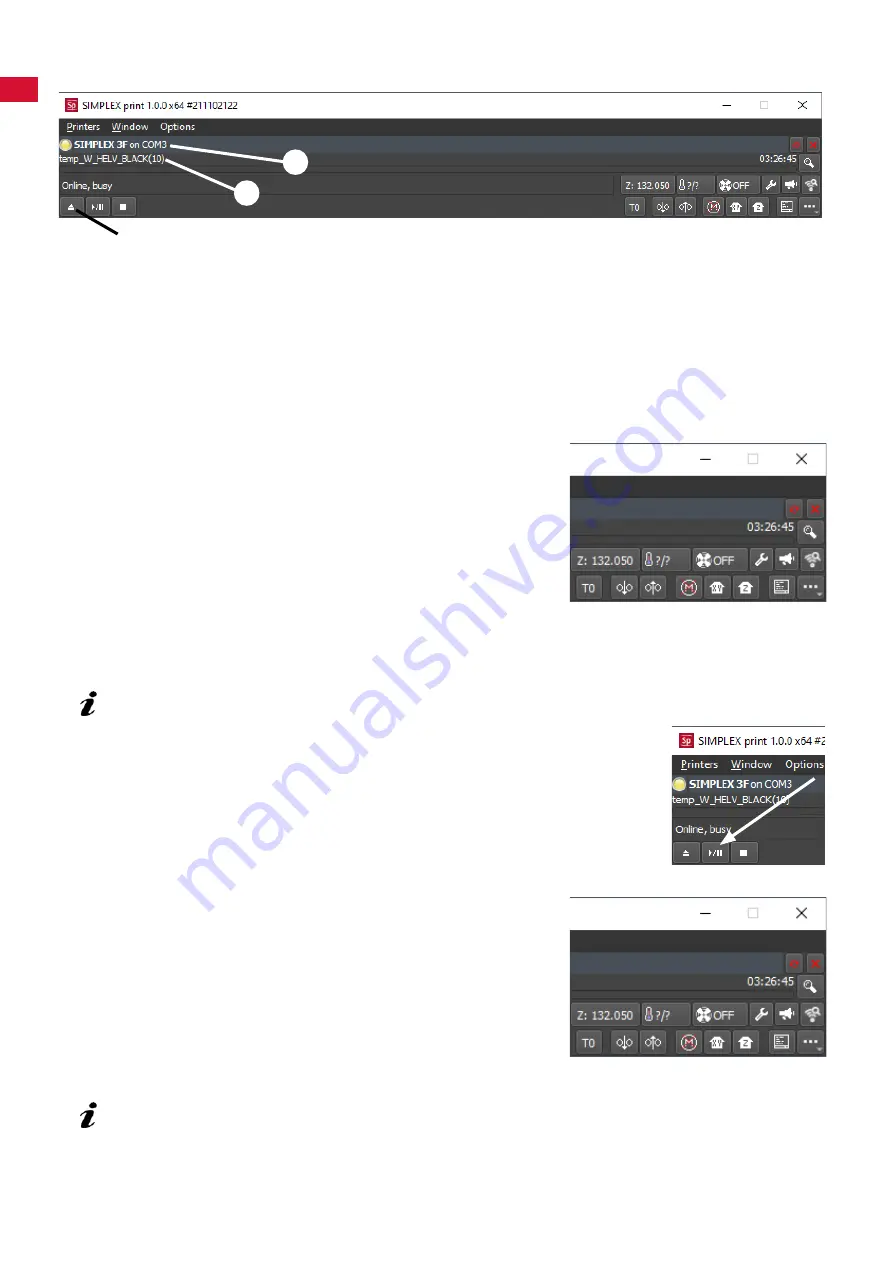
The SIMPLEX is shown in the status bar (1, Fig� 4)
⇒
Select and load the G-Code by clicking the load button (3, Fig� 4)�
♦ The corresponding file name is shown in the status bar (2, Fig. 4)
You can use the control keys at the bottom right of the program
window to remotely control the SIMPLEX 3D printer�
The following actions are possible:
•
Adjust the print bed to a specified height.
• Adjust the print bed to the home position�
• Adjust the tool head to the home position�
•
Switch off the motors.
• Manual extrusion
6.3 Print process using SIMPLEX print
Before starting the print process, check that the correct filament has been placed in the SIMPLEX!
The print process is started in SIMPLEX print by clicking the start / pause button
(Fig� 6)�
The extruder and print bed are heated to the temperatures specified in the
G-Code�
Printing begins as soon as the required temperatures have been reached�
You can pause printing using the pause button and cancel it using the stop button�
You can use the control keys at the bottom right of the program
window to control the print process�
The following actions are possible:
• Modify the printing speed
• Adjust the quantity to be extruded
•
Switch the cover fan on / off
• Modify the extruder temperature
• Modify the temperature of the print bed
For printing, a larger amount of G-Code data is always sent to the SIMPLEX.
There is no response to the pause / stop button or control key commands until the G-Code that
has already been sent has been fully processed.
In some cases, this can take several minutes.
Fig. 4
1
2
3
Fig. 5
Fig. 6
Fig. 7
- 18 -


