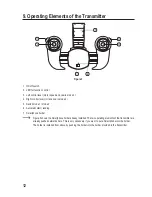


26
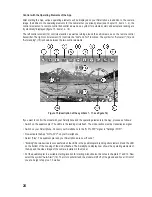
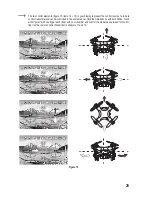
In the basic configuration, the App is set to "30%" (figure 15, item 5). This corresponds to beginner's mode (also see
chapter 11). The control functions are limited in their effects.
If you touch this symbol again, "60%" will appear. This corresponds to advanced mode. The model reacts more agile
to the control commands.
If you touch the symbol again, "100%" will appear. This corresponds to professional mode. The control functions
are not limited then. If you touch the symbol again, the display will return back to "30%" and beginner's mode will be
activated.
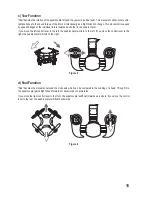
If the model drifts in flight, you can fix this drift with the respective trim element. If, for example, the model turns around
its own axis to the left, push the trim element for "yaw" (16) and trim to the right until the model stops rotating.
If the model drifts, e.g., to the left, use the trim element for "Roll" (17) and trim to the right until the model stops drifting
to the left. A drift of the control function "Nod" can be fixed with the respective trim element (18).
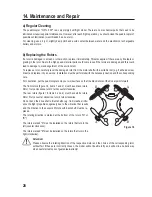
If the options of the trim elements are not sufficient to make the model fly stably or if it is flying differently
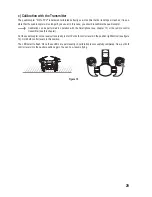
from what you are used to, you need to re-calibrate the sensors of your quadrocopter. For this, put the
quadrocopter onto a level surface ready to start. Push the icon for calibration (8). The LEDs in the landing
legs start to flash. Calibration is successfully completed when the LEDs are lit permanently again.
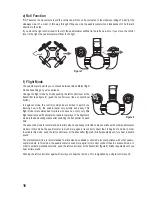
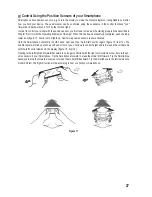
Pushing the arrow (figure 15, item 7) can make the model do a flip (a 360° turn). For this, put the quadrocopter into a
stable hover flight at an altitude of at least 1.5 metres at sufficient distance from the pilot and any obstacles. Select the
arrow symbol (figure 15, item 7). Then move the right control element forward/back/to the left or right (one direction
only!). The model will now flip in that direction. This function works according to the function on the remote control
transmitter. Therefore, observe the notes in chapter 12 as well when using this function.


