background image

ENGLISH 

21 

INSTALLATION 

1. 

First decide where to place the dialler: 

no more than one metre from the nearest power outlet and close to a telephone or telephone 
jack (we also recommend that the dialler is concealed for safety reasons) 

in a place that is NOT easily accessible 

at a safe distance from doors or windows through which intruders can gain access 

at a safe distance from extreme temperature sources (radiators, ovens, stoves, etc.) and 
large metal objects that can disrupt the wireless signal transfer. 

2. 

When you have chosen a place, you can start the dialler. 

Starting the backup supply for the auto dialler/distress alarm 

1. 

Undo the screw holding the battery compartment cover. Remove the cover. 

2. 

Insert four new AA alkaline batteries, with the correct polarity as indicated by the symbols in the 
battery compartment. Refit the cover. 

3. 

Connect the mains adapter to the dialler and to a wall socket. 

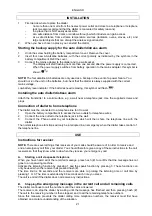
The display will start flashing no more than one second after the power supply is connected. 

When the power supply switches from battery operation to the mains adapter, this symbol is 

shown 

NOTE!

 The four alkaline AA batteries are only used as a backup in the event of a power failure. You 

should not run the unit on the batteries, but check that the dialler is always supplied with the correct 
mains voltage. 
Low battery level indicator: If the batteries need replacing, this symbol will flash 

Installing the auto dialler/distress alarm 

Attach the transmitter to a solid surface, e.g. a wall near a telephone jack. Use the supplied screws and 
plugs. 

Connection of dialler to home telephone 

The dialler must be connected to a telephone line for it to work. 
1. 

Open the battery compartment to access the two outlets for telephone wires. 

2. 

Connect the Line outlet to the telephone jack in the wall. 

3. 

Connect the Phone outlet to your telephone, which will then share the telephone line with the 
dialler. 

The normal telephone functions will only be interrupted in an emergency when the dialler takes control of 
the telephone line. 

USE 

Instructions for receiver 

NOTE.

 There are several things that receivers of your calls should be aware of in order to receive and 

end an emergency call from your dialler. You should therefore give a copy of these instructions to the call 
receivers so that they know what to do when they receive your emergency call. 

A. 

Starting a call via speaker telephone 

When you have heard all of the recorded message, press hash (#) to confirm that the message has not 
gone to an answering machine. 
Activate the listening function by pressing 1 and the speak function by pressing 3. These functions can 
only be used when the receiver has pressed hash (#). 
The time limit is 60 seconds and the receivers are able to prolong the listening time or call time by 
pressing 1 or 3. The time is extended by 60 seconds each time you press. 
The call is ended if the dialler does not receive any instructions. 

B. Stopping

 the emergency message in the current call and all remaining calls


The dialler continues to call the numbers until the call is answered. 
The receiver can stop the dialler by waiting until the message has finished and then pressing hash (#). 
The call to the receiving number is then stopped, and to all the remaining telephone numbers. 
Since this measure prevents the dialler calling more telephone numbers, the receiver must first have 
obtained an accurate understanding of the situation. 

Summary of Contents for 41-087

Page 1: ...salarm Instrukcja obsługi systemu powiadamiania głosowego alarmu napadu Red Shield Operating Instructions for Red Shield Auto Dialler Distress Alarm 441 087 SV Bruksanvisning i original NO Bruksanvisning i original PL Instrukcja obsługi w oryginale EN Operating instructions in original 12 10 2011 Jula AB ...

Page 2: ...tiske oppringeren til hustelefonen 10 BRUK 10 Anvisninger for mottakeren 10 Avbryte den automatiske oppringeren 11 Innstillinger for boligsikkerhetskoder 11 FeIlsØking 11 Hurtigstartveiledning 11 VEDLIKEHOLD 13 Batterier 13 Begrensninger for alarmsystemet 13 POLSKI 14 OPIS 14 Zawartość zestawu 14 MONTAŻ 15 Uruchomienie zasilania zapasowego systemu powiadamiania głosowego alarmu napadu 15 Montaż sy...

Page 3: ...ling the auto dialler distress alarm 21 Connection of dialler to home telephone 21 use 21 Instructions for receiver 21 Interruption of dialler 22 Setting the house code 22 Troubleshooting 22 Quick start guide 22 maintenance 24 Batteries 24 Limitations of the alarm system 24 ...

Page 4: ...ändig enhet eller i kombination med Red Shield villalarm vilket innebär att enheten aktiveras när systemets Smart Panel utlöses av en av sina sensorer Uppringaren kan aktiveras på tre olika sätt När Red Shield villalarmet löses ut och skickar ut larmaktiveringssignalen När panikknapparna och på uppringarens knappsats trycks in samtidigt När den röda nödknappen på panikfjärrkontrollen trycks in Läs...

Page 5: ...ppna batterifacket så att de två uttagen för telefonkablar blir åtkomliga 2 Anslut uttaget Line till telejacket i väggen 3 Anslut uttaget Phone till din telefon som därmed kommer att dela telefonlinje med uppringaren De normala telefonfunktionerna bryts bara vid nödfall då uppringaren tar kontrollen över telefonlinjen HANDHAVANDE Anvisningar för mottagaren OBS Det finns några saker mottagarna av d...

Page 6: ...e är tillslagna ON För att systemet ska fungera korrekt måste byglarna på Smart Panel och alla övriga systemmoduler sensorer och sirener överensstämma exakt Byglar för huskod HOUSE CODE Smart Panel Alla sensorer Fabriksinställd huskod 1 ON 2 ON 3 ON 4 ON Bygel ON isatt OFF utdragen DIP omkopplare för huskod Fjärrkontroll Fabriksinställd huskod 1 ON 2 ON 3 ON 4 ON FELSÖKNING Om meddelandet FAIL vis...

Page 7: ...k på Menu knappen på displayen visas 1 för det första numret Upprepa detta för att välja vilket telefonnummer 1 8 du vill radera Tryck på Program och sedan på Enter Exit för att bekräfta raderingen Programmering av antalet uppringningscykler Tryck på Menu knappen på displayen visas 1 för det första numret Upprepa detta tills 3 visas på displayen Tryck på Program och ange sedan antalet cykler som d...

Page 8: ...lämnas till återvinning enligt gällande regler Släng inte batterierna i hushållssoporna BRÄNN ALDRIG BATTERIER Larmsystemets begränsningar Inte ens de mest avancerade larmsystem kan ge 100 procentigt skydd mot inbrott eller miljöhändelser Alla larmsystem kan drabbas av försämrade funktioner eller kan av olika skäl misslyckas med att larma Observera att du kan få problem med larmsystemet om sensore...

Page 9: ...med boligalarmsystemet fra Red Shield da den aktiveres når systemets smartpanel utløses av en av sensorene Den automatiske oppringeren kan aktiveres på tre måter Når boligalarmsystemet fra Red Shield utløses og sender ut aktiveringssignalet for alarmen Når panikknappene og på tastaturet til oppringeren trykkes ned samtidig Når den røde nødknappen på panikkfjernkontrollen trykkes ned Gjør deg kjent...

Page 10: ...oppringeren må være koblet til en telefonlinje for at den skal fungere 1 Åpne batterilommen og finn 2 kontakter for telefonkabler 2 Koble Line kontakten til telefonkontakten i veggen 3 Koble Phone kontakten til telefonen som da vil dele telefonlinjen med den automatiske oppringeren Normale telefonfunksjoner avbrytes bare i en nødsituasjon når den automatiske oppringeren tar kontroll over telefonli...

Page 11: ...et Ta vekk dekslet til batterilommen og flytt DIP switchkontaktene for å endre boligsikkerhetskoden Hvis DIP switchen er opp er den ON og hvis den er nede er den OFF Standardkoden til den automatiske oppringeren er at alle DIP switchene er ON opp For å forsikre deg om at systemet fungerer korrekt må du passe på at broene på smartpanelet og alle andre systemmoduler sensorer og sirener stemmer nøyak...

Page 12: ...mer trykker du på Clear for å slette og angir deretter telefonnummeret på nytt Trykk på Enter Exit for å avslutte Slette et lagret telefonnummer Trykk på Menu knappen displayet viser 1 for det første nummeret Gjenta dette for å velge hvilket telefonnummer 1 8 du vil slette Trykk på Program og deretter på Enter Exit for å bekrefte slettingen Programmere antall oppringings sykluser Trykk på Menu kna...

Page 13: ...al de avhendes hos et egnet gjenvinningssted Ikke kast dem sammen med restavfallet MÅ IKKE BRENNES Begrensninger for alarmsystemet Selv det mest avanserte alarmsystem kan ikke garantere 100 beskyttelse mot innbrudd eller miljøbetingede problemer Alle alarmsystemer er utsatt for mulig risiko eller svikt i varsling av ulike årsaker Merk at det kan oppstå problemer med systemet hvis Sensorene ikke pl...

Page 14: ...ą się w domu gdzie włączył się alarm co umożliwia lepsze rozpoznanie sytuacji alarmowej System powiadamiania głosowego alarm napadu mogą być używane jako niezależna jednostka lub w zestawie z systemem alarmu domowego Red Shield co oznacza że jednostka się aktywuje kiedy panel Smart Panel włączy jeden ze swoich czujników System powiadamiania głosowego aktywuje się na jeden z trzech sposobów Kiedy s...

Page 15: ...ilania sieciowego Jednostka nie powinna działać na baterie powinno się jej zapewnić odpowiednie stałe napięcie sieciowe Wskaźnik niskiego poziomu naładowania baterii Jeśli należy wymienić baterie mruga symbol Montaż systemu powiadamiania głosowego alarmu napadu Zamontuj nadajnik na stabilnej powierzchni np na ścianie w pobliżu gniazdka telefonicznego W tym celu użyj dołączonych śrub i kołków rozpo...

Page 16: ...one lub jeżeli muszą zostać zmienione aby rozwiązać problem zakłóconej współpracy między panelem a czujnikami lub panel i czujniki zakłócają działanie innych systemów kod domowy musi zostać zmieniony we wszystkich modułach systemu czujniki i syreny Ustawienia kodu zmienia się zgodnie z poniższymi wskazówkami Na każdej jednostce znajdują się cztery zworki i przełącznik typu DIP Zdejmij pokrywę bate...

Page 17: ...ejny numer Zapisywanie i przechowywanie numerów telefonów Naciśnij przycisk Program na wyświetlaczu pojawi się 1 dla pierwszego numeru Powtórz czynność aż wybierzesz numer telefonu 1 8 który chcesz zaprogramować Wpisz numer telefonu najwięcej 15 cyfr Jeśli numer jest błędny naciśnij Clear aby skasować numer po czym wpisz go ponownie Naciśnij Enter Exit aby zakończyć Usuwanie zachowanego numeru tel...

Page 18: ...nuj aby woda nie dostała się do środka produktu i nigdy nie próbuj czyścić go od wewnątrz Baterie Upewnij się że baterie nie rdzewieją i nie przeciekają ponieważ może to spowodować trwałe uszkodzenia produktu Włóż baterie odpowiednimi biegunami zgodnie z oznaczeniem wewnątrz przegródki na baterie Nie łącz starych i nowych baterii ani baterii różnego typu Nie używaj baterii wielokrotnego ładowania ...

Page 19: ...czujniki i syreny działają poprawnie System alarmowy umożliwia opłacanie niższych składek ubezpieczeniowych ale nigdy całkowicie nie zastąpi ubezpieczenia Z zastrzeżeniem prawa do zmian W razie ewentualnych problemów skontaktuj się telefonicznie z naszym działem obsługi klienta pod numerem 801 600 500 Jula Poland Sp z o o ul Malborska 49 03 286 Warszawa Polska www jula pl ...

Page 20: ...tion with Red Shield Home Alarm which means that the unit is activated when the system s Smart Panel is tripped by one of its sensors The dialler can be activated in three different ways When Red Shield Home Alarm is tripped and sends an alarm activation signal When the panic buttons and on the dialler keypad are pressed at the same time When the red emergency button on the panic remote control is...

Page 21: ...ler must be connected to a telephone line for it to work 1 Open the battery compartment to access the two outlets for telephone wires 2 Connect the Line outlet to the telephone jack in the wall 3 Connect the Phone outlet to your telephone which will then share the telephone line with the dialler The normal telephone functions will only be interrupted in an emergency when the dialler takes control ...

Page 22: ...ange the house code When a DIP switch is in the upper position it is switched on ON and when in the lower position switched off OFF The factory set code on the dialler means that all the DIP switches are switched on ON In order for the system to function correctly the jumpers on Smart Panel and all the other system modules sensors and sirens must correspond exactly Jumpers for house code HOUSE COD...

Page 23: ...ng number press Clear to delete and then key in the telephone number again Press Enter Exit to finish Deleting stored telephone numbers Press the Menu button 1 is shown on the display for the first number Repeat this to select the telephone number 1 8 you want to delete Press Program and then Enter Exit to confirm the deletion Programming the number of call cycles Press the Menu button 1 is shown ...

Page 24: ...batteries must be recycled in compliance with regulations in force Do not dispose of batteries in household waste NEVER BURN BATTERIES Limitations of the alarm system Not even the most advanced alarm systems can provide 100 protection against intruders or environmental impact All alarm systems can be affected by reduced performance or can fail to emit an alarm for various reasons Note that you may...

Page 25: ......

Reviews: