


RealMan (Beijing) Intelligent Technology Co., Ltd.
77
Point” button.
12. Click the “Add-to-After” button to add the point to the display area.
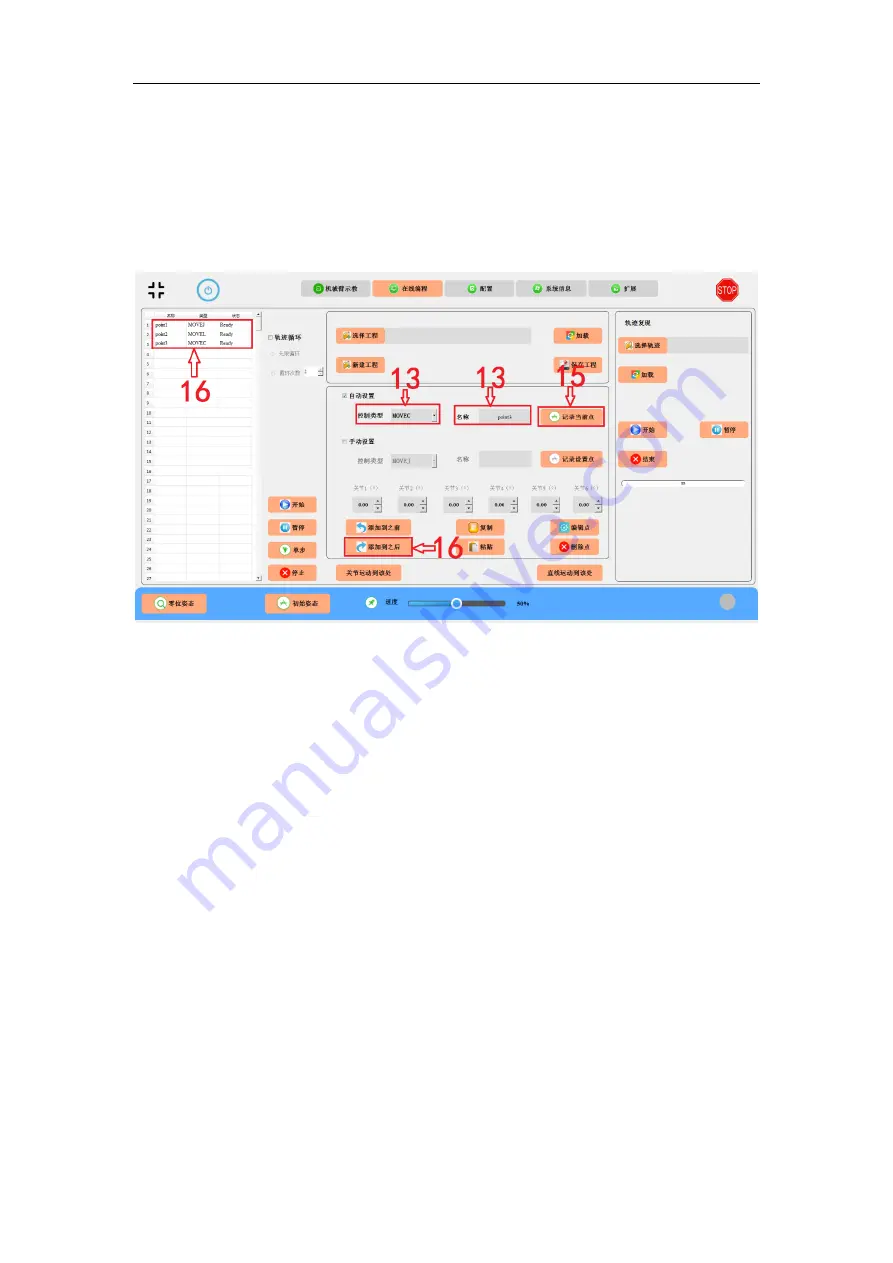
13. Insert the third programmable point, e.g., point3, with a control method of e.g.,
MOVEC.
Fig. 9-5 Automatic setting point3.
14. Go to “Teaching the Robot” panel and move the robot to the third programmable
point, i.e., point3.
15. Back to “Online Programming” interface and click “Record the Current Point”
button.
16. Click the “Add-to-After” button to add the point to the display area.
17. Likewise, repeat step 12-15 can set a fourth point, e.g., point4. Notice that because
point3 applies MOVEC, point4 can only apply MOVEC. After completion, it looks as
the screen shot as follows.


