Chapter 1: Before You Begin
6
Chapter 1
Overview of buttons and jacks
The following pages explain what each button does — some of the buttons have more than one function depending upon
whether or not you’re playing music, videos, or viewing photos.
9
4
7
8
1
2
6
3
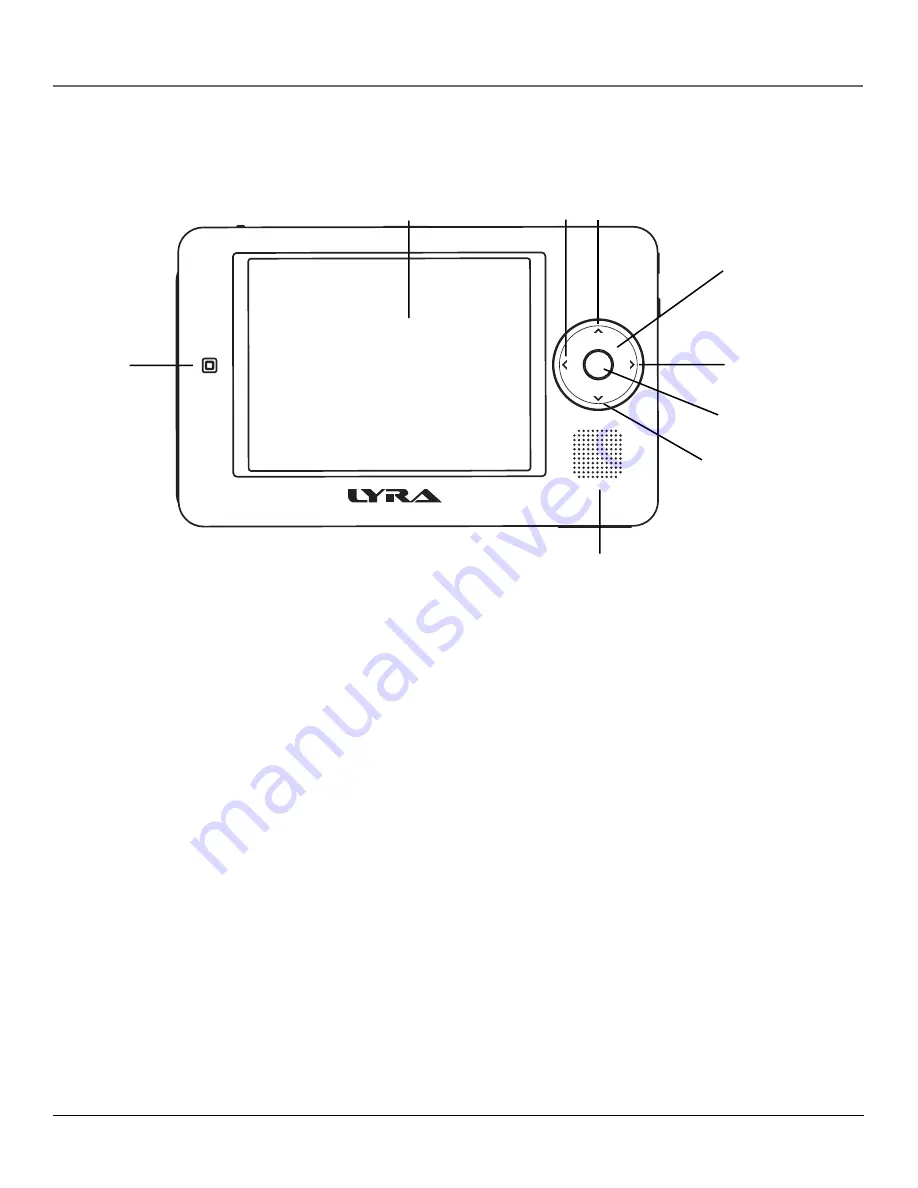
Front View
1. Remote control sensor
2.
LCD (Liquid Crystal Display)
screen –
This is where the Lyra’s user interface and multimedia content appear.
3.
Left arrow button
–
Moves highlight left. When you’re playing a fi le, press and release to skip back to the previous
fi le (press and hold to scan backwards in the audio or video fi le that’s playing).
4. Up arrow button
–
Moves highlight up.
5.
Touchpad –
Quickly navigates the menus. Slide your fi nger clockwise or counterclockwise.
6.
Right arrow button
–
Moves highlight right. When you’re playing a fi le, press and release to skip forward to the
next fi le (press and hold to scan forward in the audio or video fi le that’s playing).
7. SELECT
button
–
When using the Lyra Recorder menu, selects a highlighted item. Also displays the Options menu
while playing for advanced features. The button on the remote that corresponds to the SELECT button is the OK
button.
8. Down arrow button
–
Moves highlight down.
9.
Speaker
5


