background image

E-12

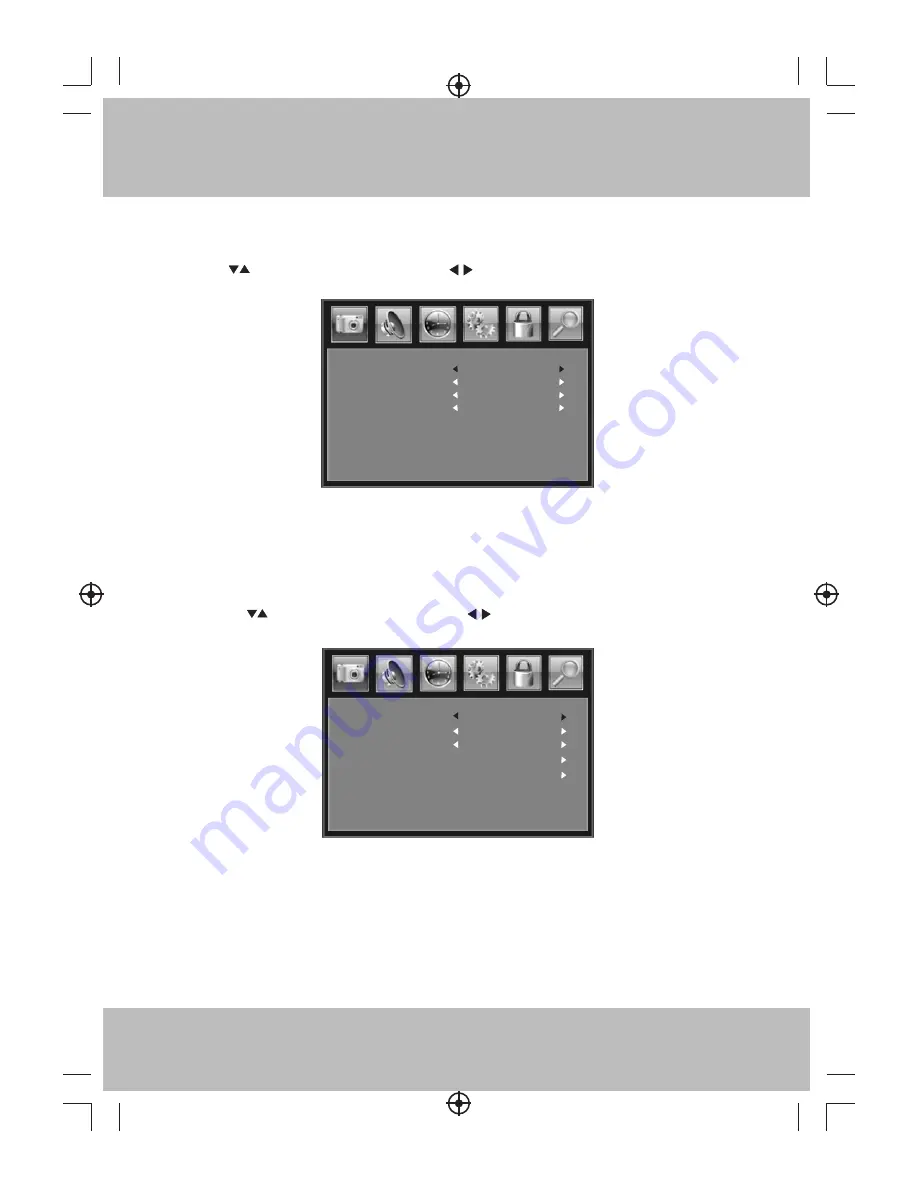
3) TIMER MENU

The third item  of  the Main  MENU  is  the TIMER MENU. 
Press         to  select 

items in  the menu, press         to  adjust  items,  press MENU  to  exit.

4) SETUP  MENU

1)  The forth  item  of  the Main  MENU  is  the SETUP MENU  for system  setup.
     Press         to  select 

items in  the menu, press         to  adjust  items,  press MENU  to  exit.

Note: 
Restore Default: Reset all the settings to default  values.

Time zone

DST

Time Format

Auto Sync

Pacific

Off

12-hour

On

English

Menu Language

Aspect Mode

Menu Time Out

Closed Caption

Wide

15 se c

Restore Default

Summary of Contents for RTV86073

Page 1: ...Innovative DTV Solutions Inc Santa Fe Springs CA90670 RTV86073 User Manual Read these instruction book before using your new product for the first time ...

Page 2: ...ions 3 Introduction 4 Safety Information 5 Remote Control 6 Built in Rechargeable Battery Management 7 Front and Rear Panel Illustration 8 Getting Started 9 Picture Mode 11 Audio Mode 11 Timer Menu 12 Setup Menu 12 V Chip Menu 13 Channel Menu 17 Service Support 18 Specifications 18 E 1 ...

Page 3: ...erence in a residential installation This equipment generates uses and can radiate radio frequency energy and if not installed and used in accordance with the instructions may cause harmful interference to radio communications However there is no guarantee that interference will not occur in a particular installation If this equipment does cause harmful interference to radio or television receptio...

Page 4: ...trician for replacement of the obsolete outlet 10 Protect the power cord from being walked on or pinched particularly at plugs convenience receptacles and the point where they exit from the apparatus 11 Only use attachments accessories specified by the manufacturer 12 Use only with a cart stand tripod bracket or table specified by the manufacturer or sold with the apparatus When a cart is used use...

Page 5: ... following items Portable TV Remote Control CR2025 battery included User Manual Magnetic base antenna Power adapter Look out for this symbol It indicates useful and important tips If the AC DC adapter is connected while the TV is powered on it will supply the unit with power Note The battery can only be recharged when the unit switch to OFF position Warning Change or modifications to this unit not...

Page 6: ...ched by items placed on or against them Do not use the Portable TV in humid or damp conditions Do not allow the Portable TV to get wet Do not expose the Portable TV to dripping or splashing Do not place water filled objects such as vases around the Portable TV Do not have open flame sources such as candles around the Portable TV Cleaning ALWAYS unplug the Portable TV before you clean it Do not use...

Page 7: ...ode 11 SOUND Adjusts Sound mode 12 ASPECT Adjusts aspect mode 13 CH Changes to next channel up 14 CH Changes to next channel down 15 Navigates Up the menu screens or changes to next channel up 16 VOL Navigates Left the menu screens or adjusts the volume in non menu state 17 OK Confirms selection 18 EXIT Exits menu 19 Navigates Down the menu screens or changes to next channel down 20 CC Enables Dis...

Page 8: ...tery liquid from the battery compartment then replace Built in Rechargeable Battery Management Built in rechargeable Lithium Polymer battery which can provide about 100 min of operation depending on the usage conditions This portable TV uses a smart battery management system inside which can support low battery detection 1 If the battery voltage falls below a specific value the unit will enter the...

Page 9: ... signal from the remote control No shown on product 12 LCD screen 13 Antenna input Connects to an external RF signal 14 Speaker Left Right The speaker Selects the next channel down Navigates Right the menu screens or adjusts the volume when in non menu mode Changes display mode or returns to previous menu 13 Left View 1 2 3 4 1 2 3 10 4 5 6 7 8 9 11 12 14 1 2 3 4 EARPHONE JACK Outputs analog audio...

Page 10: ...e of the unit Please ensure you have the antenna securely attached to the jack 2 Connect the power adaptor to the DC IN 12V jack on the left side of the unit 3 Switch on the portable LCD TV using the power switch on the left side of the unit 4 Press the MENU button and select the rightmost icon channel menu use the VOL button E 9 TV Source Auto Scan Air 6 1 Auto Scan Add CH Show Hide Channel No Ch...

Page 11: ...n to select the TV source and then select Air or CATV 6 Select the Auto Scan or Auto Scan Add CH option and press the RIGHT VOL button to start auto search 7 After completing the Auto Scan use the channel button or numeric buttons remote control only to select a TV channel It will search for all available channels in your area The Auto Scan feature will perform a fresh scan erasing previously scan...

Page 12: ...t the contrast brightness etc 1 PICTURE MODE 2 AUDIO MODE The second item of the Main MENU is Press to select items in the menu press to adjust items press MENU to exit the SOUND MODE Picture mode Standard Contrast 50 Brightness 50 Color 50 Tint Sharpness Color Temp Normal 0 50 Sound mode Standard Treble 50 Bass 50 Balance 0 Audio Channel Primary Audio ...

Page 13: ... 1 The forth item of the Main MENU is the SETUP MENU for system setup Press to select items in the menu press to adjust items press MENU to exit Note Restore Default Reset all the settings to default values Time zone DST Time Format Auto Sync Pacific Off 12 hour On English Menu Language Aspect Mode Menu Time Out Closed Caption Wide 15 sec Restore Default ...

Page 14: ...ting up Parental Control Parental control Input the password it will go into the menu The product s default password is 0000 Note if you change the password and later forget your password you can to unlock to Parental Control by using 8888 Parental Control 5 1 Input the correct password using your remote control the screen will display CC Mode Basic Selection Advanced Selection CC Off CC1 Service1...

Page 15: ...ord again 5 2 V CHIP switch When the System Lock is ON the options below can be adjusted 5 3 US Press button the screen will display 1 TV Press button the screen will display as follow 2 Enter Old Password Input the old password Enter Old Password Enter New Password Confirm Password TV MPAA N A ALL FV V S L D TV Y TV Y7 TV G TV PG TV 14 TV MA ...

Page 16: ... MPAA switch the movie rating control level N A G PG PG 13 R NC 17 X Rating Description Age G General audiences All Ages admitted PG Parental Guidance suggested Some material may not be suitable for children PG 13 Parents strongly cautioned Some material may be inappropriate for children under 13 R NC 17 X Restrict Under 17 requires accompanying parent or adult guardian age varies in some jurisdic...

Page 17: ...nant elements of the storyline But it must be integral to the development of plot or character Language usage could be profane and nudity present with in the context of theme 18 Adults Intended for viewers 18 years and older and might contain while related to the development of plot character or themes are intended for adult viewing Could contain graphic language and portrayals of nudity depiction...

Page 18: ...e below menu 4 Show Hide Press the right button to enter show hide menu press the up down button to select channel then press OK button to display or hide channel 5 Channel NO Display the current channel number 6 Channel lable Press right button to enter channel lable edit menu press the up down button to edit channel name 7 DTV signal Display DTV signal be selected or adjusted strength Cannot TV ...

Page 19: ...at front panel Check for obstructions Check battery are inserted correctly Replace remote control battery Check with dealer Check Antenna Try to reposition the antenna E 18 Press the POWER SWITCH to ON Specifications Color TFT LCD Air 2 69 Cable 1 135 7 inches measured diagonally Analog stereo DC IN 12V 15W 220 x 125 x 32mm 0 50kg Display Device Receiving Channels Screen Size Screen pixels Audio o...

Page 20: ......

Reviews: