


9
First-Time Operation
DC IN
6V
OPEN
T
W
INST.
ZOOM
FOCUS
DATE/TITLE
DISPLAY
PLAY
F.F.
EDIT
SEARCH
STOP
REW
F
N
16X9
FADE
EIS
INST.
ZOOM
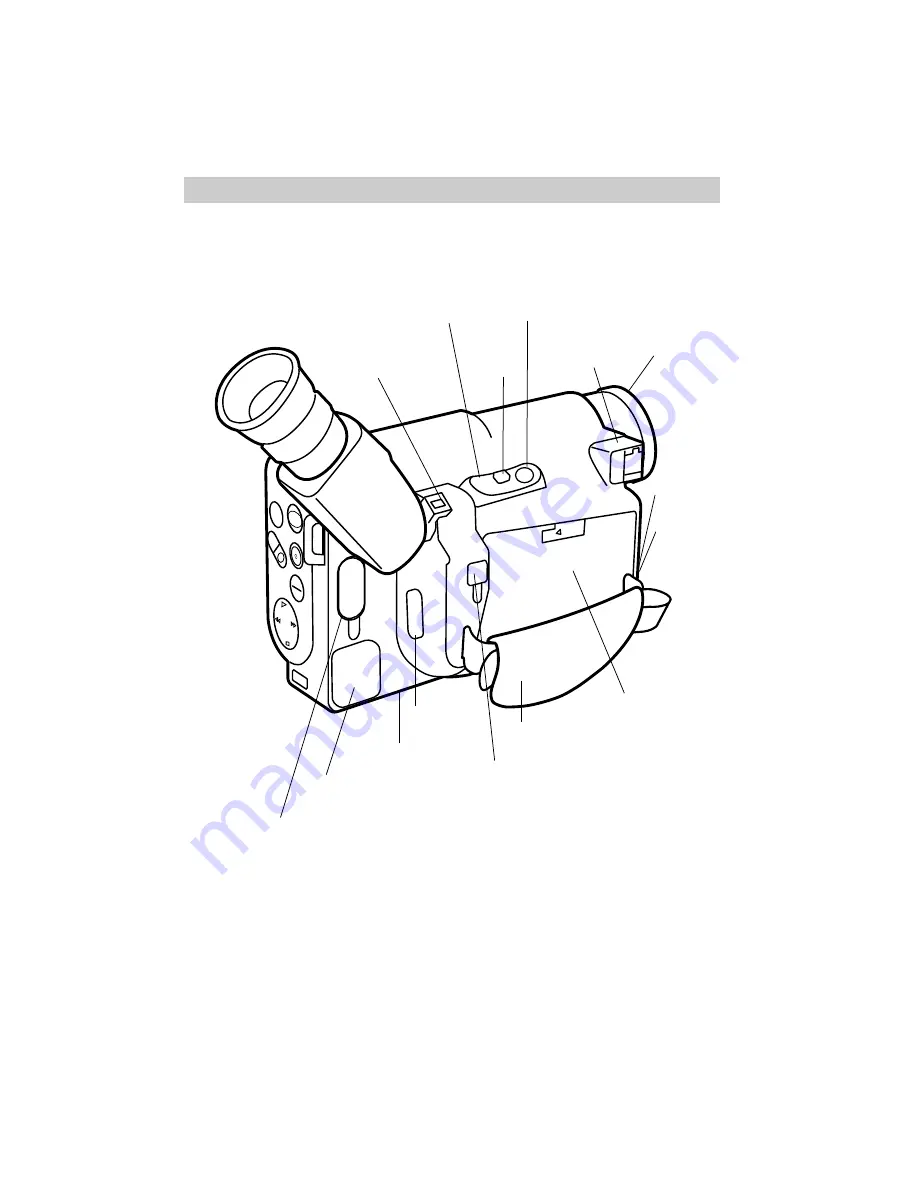
Button
Power Zoom Buttons
T = Telephoto
W = Wide Angle
Handstrap
Accessory
Shoe
Tally Light
(On Front)
Remote
Control
Sensor (On
Front)
Lens
Thumb
Trigger
DC IN 6V Jack Located
Behind Small Cover (Connect
Adapter/Charger Here)
Audio/Video In/Out Connector
(Located Behind Small Cover)
Audio/Video Out Jacks
(Located Behind Small Cover)
Install Charged
Battery or Six
Alkaline “AA”
Batteries
Clock Cell
Holder
CAM/OFF/VCR
Switch
9.
Review camcorder’s operating controls.


