background image

PRINTED IN JAPAN

MPRIME AU JAPON

© CANON INC. 2002

DY8-9020-106-000

PUB.DIE-171
0201A/Ni9.5

CANON INC.

Canon Europa N.V.

P.O. Box 2262, 1180 EG Amstelveen, the Netherlands

Canon UK Ltd.

Ribcon Way
Luton Bedfordshire LU4 9UR
Telephone 0870-241-2161

Canon Australia Pty. Ltd

1 Thomas Holt Drive, North Ryde, N.S.W. 2113, Australia
Telephone 805-2000, Fax 887-4484

Canon New Zealand Ltd

Fred Thomas Drive, Takapuna, P.O. Box 33-336, Auckland, New Zealand
Telephone 486-1570, Fax 486-6420

Canon Singapore Pte. Ltd

79 Anson Road #09-01/06, Singapore 079906
Telephone (65)-532-4400, Fax (65)-221-2939

Canon Hongkong Company Ltd

9/F, The Hong Kong Club Building, 3A Chater Road, Central, Hong Kong

Canon Latin America, Inc.

Sales & Enquiries: 703 Waterford Way Suite 400 Miami, FL 33126 USA

Mini

Digital
Video
Cassette

Printed on 100% reused paper.

PUB.DIE-171

PUB

.DIE-171

0027W378

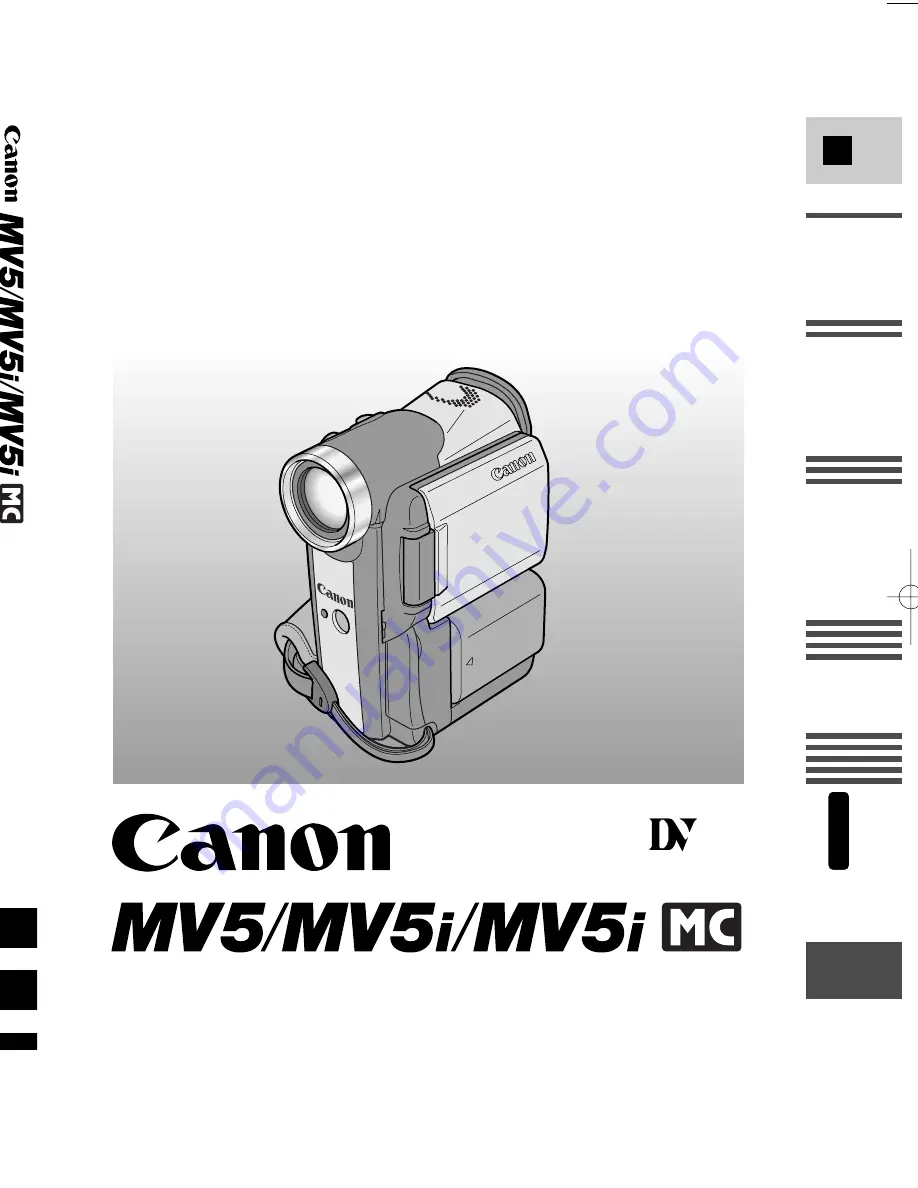
DIGITAL VIDEO CAMCORDER

Instruction Manual

This instruction book explains the use of the MV5, MV5i and MV5i MC 
camcorders. There are two main differences between these models. The 
models with an ‘i’ include DV Recording and Analog Line-in function. The MV5i 
MC has an additional Memory Card function. Please note that illustrations and 
explanations in this instruction book refer mainly to the MV5i MC model.

PAL

E

Intr

oduction

Mastering 

the Basics

Using the Full 

Rang

e of Features

Editing

Using a Memor

y

 Car

d

Ad
ditional

Inf
ormation

MV5i MC

#0_ MV5/MV5i/MV5i MC__E(cover)  02.4.17 7:12 PM  Page 1

Summary of Contents for MV5iMC

Page 1: ... differences between these models The models with an i include DV Recording and Analog Line in function The MV5i MC has an additional Memory Card function Please note that illustrations and explanations in this instruction book refer mainly to the MV5i MC model PAL E Introduction Mastering the Basics Using the Full Range of Features Editing Using a Memory Card Additional Information MV5i MC ...

Page 2: ...ws The wire which is coloured BLUE must be connected to the terminal which is marked with the letter N or coloured black The wire which is coloured BROWN must be connected to the terminal which is marked with the letter L or coloured red Neither Blue wire or Brown wire is to be connected to the Earth pin of a 3 pin plug THE SEVERED PLUG MUST BE DESTROYED IMMEDIATELY TO AVOID ANY POSSIBLE ELECTRIC ...

Page 3: ...e of Features Editing Using the Memory Card Digital Video Solution Disk Instruction Manual Installing the Software Connecting the Camcorder to a Computer Downloading Still Images Movies to a Computer Your camcorder is supplied with two manuals the Digital Video Camcorder MV5i MC Instruction Manual and the Digital Video Solution Disk Instruction Manual ...

Page 4: ...rams 57 Using Digital Effects 61 Using the Multi Image Screen 67 Audio Recording 69 Setting the Self Timer 71 When Making Manual Adjustments Adjusting AE Shift 73 Setting the Shutter Speed 74 Adjusting Focus Manually 76 Setting the White Balance 77 For Playback Enlarging the Image during Playback 79 Displaying Date Time and Camcorder Data Data Code 80 Searching the Tape Photo Search Date Search 83...

Page 5: ...amcorders 119 Recording Panoramic Images Stitch Assist 120 Playing Back a Memory Card 122 Settings of Still Images Movies 125 Preventing Accidental Erasure Protect 128 Marking a Still Image for Printing Print Mark 129 Erasing Still Images Movies 131 Using the Card Photo Printer CP 10 Optional 133 Combining Images and Recording Them to a Cassette Card Mix 140 Copying Still Images from Tape to Memor...

Page 6: ...switch CAMERA CAMERA TAPE PLAY VCR PLAY VCR TAPE CARD CAMERA CAMERA CARD CARD PLAY VCR PLAY VCR CARD MV5i MC MV5i MC MV5i MC Available functions vary depending on the operating mode It is indicated as follows Function can be used in this mode Function cannot be used in this mode CAMERA CAMERA ...

Page 7: ...horoughly there are many sophisticated features which will add to your recording enjoyment Getting started To get started we suggest that you master the basic operations of the camcorder first before moving on to use its full range of features When connecting the camcorder to your personal computer use the optional CV 150F or CV 250F DV cable When connecting the camcorder to your PC equipped with ...

Page 8: ...e Stabilizer High definition XGA size still images through processing with a 680 000 pixels CCD XGA Size Still Images MV5i MC You can merge separate images into one large panoramic scene using the supplied software PhotoStitch on a PC Panoramic Images MV5i MC Allows high speed transfer of memory card data to a PC with a built in USB port You can organize and edit still images movies on your PC usi...

Page 9: ...panel OPEN button p 25 D EFFECTS SELECT button p 65 D EFFECTS ON OFF button p 65 Card access indicator p 107 MV5i MC MV5i MC stop button p 28 INDEX SCREEN button p 124 MV5i MC play pause button p 28 Card Mix button p 140 MV5i MC REC SEARCH button p 38 fast forward button p 28 CARD button p 122 MV5i MC REC record SEARCH button p 38 Record review button p 38 rewind button p 28 CARD button p 122 MV5i...

Page 10: ...TAPE CARD switch p 18 Zoom controller p 23 PHOTO button p 54 112 POWER indicator p 18 Grip belt p 150 Cassette compartment p 16 Cassette compartment cover p 16 Viewfinder focusing lever p 150 Viewfinder p 150 POWER switch p 18 Start Stop button p 19 OPEN EJECT switch p 16 Selector dial p 31 40 MENU button p 40 Program selector p 57 Backup battery cover p 153 MV5i MC MV5i MC ...

Page 11: ...ons p 83 SEARCH SELECT button p 83 AUDIO MONITOR button p 103 AUDIO DUB button p 101 REMOTE SET button p 49 button p 29 button p 29 FF button p 28 PLAY button p 28 STOP button p 28 SLOW button p 29 REW button p 28 PAUSE button p 29 PHOTO button p 54 112 SLIDE SHOW button p 124 MV5i MC CARD buttons p 122 MV5i MC REC PAUSE button p 88 91 MV5i MC MV5i AV INSERT button p 94 MV5i MC MV5i Bottom view DC...

Page 12: ...ed product to the camcorder s DC terminal Likewise do not connect the power adapter to an unspecified product Connecting the camcorder to a household power socket 2 3 4 1 Use the power adapter to provide your camcorder with instant power from a household power socket Always turn the camcorder off before connecting removing the power source 1 Set the POWER switch to OFF 2 Connect the power adapter ...

Page 13: ...d output 7 4 V DC 2 0 A Operating temperature range 0 C 40 C 32 F 104 F Dimensions 112 29 45mm 4 3 8 1 1 8 1 3 4 in Weight 186g 6 1 2 oz without power cable Weight and dimensions are approximate Errors and omissions excepted Subject to change without notice CA PS700 Compact Power Adapter ...

Page 14: ...pack to the charger Align the front end of the battery pack with the guides on the charger then press and slide the battery pack into the charger to set it in place 3 Plug the AC plug into a household power socket The charge indicator lights in red and charging starts The indicator light changes to green when the battery pack is fully charged 4 Unplug the charger from the household power socket 5 ...

Page 15: ...oz without power cable Weight and dimensions are approximate Errors and omissions excepted Subject to change without notice CB 2LTE Battery Charger Attaching the battery pack 1 Turn the POWER switch to OFF 2 Align the front end of the battery pack with the line on the camcorder press lightly and slide the battery until it clicks into place 3 Remove the battery pack after use Press the BATT RELEASE...

Page 16: ...t for it to close 5 Click the cover back into place D is a trade mark Notes Do not interfere with the cassette compartment while it is opening or closing automatically and do not attempt to close the cover until the cassette compartment has fully retracted After loading a cassette use record search 38 to find the point where you want to start recording Be careful not to get your fingers caught in ...

Page 17: ...order To protect the tape heads transfer cassettes directly from the tape case to the camcorder do not open the tape protect cover or touch the tape itself Do not use cassettes where the tape has been damaged or spliced they may damage the camcorder Do not insert anything into the small holes on the cassette or cover them with cellophane tape Handle cassettes with care dropping them or exposing th...

Page 18: ...l button on the POWER switch and turn the POWER switch to CAMERA Make sure the TAPE CARD switch is set to TAPE The camcorder automatically sets to record pause mode PAUSE appears in the display If you haven t set the date and time display SET THE TIME ZONE DATE AND TIME appears in the display For setting the time zone see p 51 For setting the date and time see p 53 The camcorder power indicator li...

Page 19: ...rt recording as often as you like by pressing the start stop button Note After loading a cassette start recording when the tape counter has stopped Replace the lens cap Return the LCD screen flush to the camcorder body Unload the cassette Turn the POWER switch to OFF Disconnect the power source Notes To check that the camcorder is recording correctly make a test recording first Before making impor...

Page 20: ...sound distortion We recommend using the SP mode for important recordings If you record in both modes on the same tape the image may become distorted during playback and the time code may not be written correctly If you playback a tape recorded on another digital equipment on this camcorder or vice versa image and sound may become distorted It is not possible to dub audio or insert images AV insert...

Page 21: ...close the menu Notes 16 9 is shown in the display when you switch the 16 9 mode on You cannot use the 16 9 mode with the Easy Recording program You cannot use the multi image screen when setting the 16 9 mode on If you play back a recording made for 16 9 on a normal TV screen the image will appear to be vertically squashed compressed 16 9 OFF CAM SET UP 39 CAMERA PLAY VCR CARD CAMERA MV5i MC CARD ...

Page 22: ...emonstration of the camcorder s main features To see the demonstration do either of the following With no cassette or memory card inserted turn the DEMO MODE on in the TAPE CAMERA menu or CARD CAMERA menu and close the menu Leave the camcorder with no cassette or memory card inserted for five minutes after turning it on Demonstration mode DEMO MODE ON DISP SET UP 39 To turn the demonstration mode ...

Page 23: ... scene Move the zoom control towards W to zoom out to wide angle Move it towards T to zoom in to telephoto You can also control the speed of zooming Move the control slightly to zoom slowly Move it farther to zoom more quickly The farther you move the zoom control the faster the zoom speed The T and W buttons on the wireless controller adjust the picture angle but not the zoom speed 10 optical zoo...

Page 24: ...Image resolution is slightly lower when the magnification is greater than 10 You cannot use digital zoom in the Night recording program You cannot use digital zoom when the multi image screen is set The display becomes The zoom indicator appears for 4 seconds When the digital zoom is set to 40 the zoom indicator extends light blue When the digital zoom is set to 200 zoom the zoom indicator extends...

Page 25: ...pening and closing the LCD screen You can choose the angle of the screen that suits you best by opening and rotating the screen also you can rotate the LCD screen so that faces in the direction of the lens 27 Changing the angle of the LCD screen You can also push the panel flat against the camcorder until it is flush with the side with the screen facing outwards 90 180 90 Notes Avoid touching the ...

Page 26: ...a high precision product However small black dots or bright points of light red blue or green may appear constantly on the LCD screen This is not a malfunction of the LCD screen and they are not recorded on the tape Effective dots more than 99 99 Always rotate the LCD panel vertically into place before closing it or pushing it flat against the side of the camcorder Always fully close the LCD panel...

Page 27: ...ivated when the panel is in this position Adjust the viewfinder 150 You can choose the display style reversed mirror on or not mirror off The recording itself is unaffected regardless of which one you choose LCD MIRROR ON DISP SET UP 39 To turn the mirror mode off open the menu and select DISP SET UP Then select LCD MIRROR set it to OFF and close the menu No card Recording to a memory card CARD CA...

Page 28: ... on the cassette so that it exposes the hole the switch position is usually labelled SAVE or ERASE OFF 1 Attach a power source and turn the POWER switch to PLAY VCR Make sure the TAPE CARD switch is set to TAPE The power indicator lights up 2 Load the cassette 3 Press the e play button to start playback To end playback press the 3 stop button To wind the tape forwards stop playback and press the 1...

Page 29: ...d hold the rewind button during normal rewind Other playback modes Special playback Frame Advance To play back frame by frame press the ae button repeatedly during playback pause Press and hold to play back continuous frame advance Frame Reverse To play back in reverse frame by frame press the 4a button repeatedly during playback pause Press and hold to play back continuous frame reverse Slow Forw...

Page 30: ...playback Forward 2 Playback Press the 2 button during normal playback Press the PLAY e button to return to normal playback Reverse 2 Playback Press the 4a button and then the 2 button during normal playback Press the PLAY e button to return to normal playback Notes Mosaic like noise appears on the screen during some of the special playback modes There s no audio during special playback ...

Page 31: ...eadphones to AV 33 You can also use the headphones to monitor the sound track Change the setting of the AV headphones terminal through the menu 32 You can adjust the headphone volume separately from the built in speaker The levels you adjust for the built in speaker and headphones are memorized separately The camcorder remembers your levels even if you turn the camcorder off and back on again The ...

Page 32: ...ed to function as either the AV terminal or the headphone terminal Open the menu and select VCR SET UP Then select AV PHONES and set it to AV or PHONES and close the menu When the terminal is switched to PHONES PHONES appears in the display Using the headphones Make sure you switch the AV headphones terminal to PHONES before using headphones If the AV headphones terminal is not switched to PHONES ...

Page 33: ...ing the STV 250N Stereo Video Cable Connect the white plug to the white audio terminal L left Connect the red plug to the red audio terminal R right Connect the yellow plug to the yellow video terminal VIDEO If you are connecting the camcorder to a TV set the TV VIDEO selector on the television to VIDEO If you are connecting the camcorder to a VCR set the input selector on the VCR to LINE PC A10 S...

Page 34: ...minal R right Do not connect the yellow plug If you are connecting the camcorder to a TV set the TV VIDEO selector on the television to VIDEO If you are connecting the camcorder to a VCR set the input selector on the VCR to LINE If your TV or VCR has an S S1 video input terminal For higher picture quality we recommend playing back recordings on a TV with an S S1 terminal VIDEO S S1 VIDEO INPUT AUD...

Page 35: ...nnecting the camcorder to a TV set the TV VIDEO selector on the television to VIDEO If you are connecting the camcorder to a VCR set the input selector on the VCR to LINE Note If you are going to use the TV as a monitor while you are shooting remember to keep the TV volume turned down as long as the camcorder s audio terminals are connected If the sound from the TV speakers is picked up by the mic...

Page 36: ...to operate the controls by touch without taking your eye off the action To prevent any unwanted movement you can mount the camcorder on a tripod or any flat surface at a suitable height and operate it with the wireless controller When you are using a tripod be careful not to leave the viewfinder exposed to bright sunlight as it may melt The light is concentrated by the viewfinder lens Make sure th...

Page 37: ...cture angle should have a definite purpose Avoid unnecessary or half hearted movements Use pans to record a landscape or follow a moving subject Decide the area you want to cover and stand facing the end of your panning angle Without moving your feet turn your waist to the starting position Start recording and after a few seconds begin to turn slowly from the waist Hold the final image for a few s...

Page 38: ...hen you play the tape backwards When the camcorder is in record pause mode you can use record search to play the tape forwards or backwards to find the point where you want to start or resume recording This is useful when you want to add a new scene to a previously used cassette By using record search you can ensure a smooth noise free join between the new scene and the old one Record search Recor...

Page 39: ...enu 45 MV5i MC MV5i 2 CAM MENU 2 PLAY MENU VCR MENU 2 C CAM MENU 2 C PLAY MENU CARD PLAY VCR MV5i MC CARD CAMERA MV5i MC MV5i MC MV5i PLAY VCR CAMERA CAM MENU SEL SETSET MENUCLOSE CARD MIX CAM SET UP VCR SET UP DISP SET UP SYSTEM RETURN VCR MENU SEL SETSET MENUCLOSE VCR SET UP CARD SET UP CARD OPER DISP SET UP SYSTEM RETURN C CAM MENU SEL SETSET MENUCLOSE STITCH AST CAM SET UP CARD SET UP VCR SET ...

Page 40: ...function will be set if you skip to step 11 8 Press the SET button to select The function is set and you return to the submenu 9 Turn the selector dial and move the arrow to b RETURN 10 Press the SET button to select You return to the main menu 11 Press the MENU button The main menu disappears Notes Pressing the MENU button at any time closes the menu Selecting b RETURN takes you back one menu or ...

Page 41: ...nu t To system menu y Close main menu q Card mix submenu q Mix type 141 w Mix level 141 w Camera set up submenu e Shutter speed 74 r Digital zoom 23 t Image stabilizer 56 y 16 9 effect 21 u White balance 77 i Self Timer 71 o Return MV5i MC MV5i MC CAM MENU SEL SETSET MENUCLOSE CARD MIX CAM SET UP VCR SET UP DISP SET UP SYSTEM RETURN 1 3 5 2 4 6 List of Menus Pressing the start stop button or the P...

Page 42: ...bmenu 2 Wireless controller 48 3 Beep 22 4 Tally Lamp 19 5 Time zone Daylight saving time 51 6 Date time set 53 7 Return MV5i MC SYSTEM SEL SETSET MENUCLOSE WL REMOTE 1 BEEP ON TALLY LAMP ON T ZONE DST D TIME SET RETURN 2 4 6 3 5 7 2 PLAY MENU VCR MENU MV5i MC MV5i PLAY VCR PLAY MENU SEL SETSET MENUCLOSE VCR SET UP CARD SET UP CARD OPER DISP SET UP SYSTEM RETURN 1 3 5 2 4 6 q To VCR set up submenu...

Page 43: ...ness 27 6 Displays 165 7 6 second auto date 82 8 Data code 81 9 Date time select 80 0 Card access display 104 1 Return MV5i MC MV5i MC MV5i MC MV5i MV5i MC MV5i MV5i MC VCR SET UP SEL SETSET MENUCLOSE REC MODE SP OUTPUT CH L R AUDIO DUB AUDIO IN WIND SCREEN AUDIO MODE 12bit AV PHONES AV AV DV OUT OFF RETURN q e t u w r y i CARD SET UP SEL SETSET MENUCLOSE SI QUALITY FINE MOVIE SIZE 320 240 FILE NO...

Page 44: ...r Self timer 71 t Return e Card set up submenu y Still image quality 108 u Still image size 108 i Movie size 108 o File numbers 110 0 Shutter sound 111 1 Return CAM SET UP SEL SETSET MENUCLOSE SHUTTER AUTO D ZOOM OFF WHITE BAL AUTO SELF TIMER OFF RETURN q e t w r CARD SET UP SEL SETSET MENUCLOSE SI QUALITY FINE SI SIZE 1024 768 MOVIE SIZE 320 240 FILE NOS CONTINUOUS SHTR SOUND ON RETURN y i 0 u o ...

Page 45: ...aving time 51 4 Date time set 53 5 Return SYSTEM SEL SETSET MENUCLOSE WL REMOTE 1 TALLY LAMP ON BEEP ON T ZONE DST D TIME SET RETURN 0 2 4 1 3 5 q To card operations submenu w To VCR set up submenu e To display set up submenu r To system submenu t Close main menu DISP SET UP SEL SETSET MENUCLOSE BRIGHTNESS LCD MIRROR ON TV SCREEN ON D T DISPLAY OFF CARD ACCESS ON DEMO MODE ON RETURN 3 5 7 9 4 6 8 ...

Page 46: ... set up submenu o Recording mode 20 0 AV or headphones 32 1 Return e Display set up submenu 2 Brightness 26 3 Displays 165 4 Date time select 80 5 Card access display 109 6 Return DISP SET UP SEL SETSET MENUCLOSE BRIGHTNESS DISPLAYS ON D TIME SEL DATE TIME CARD ACCESS ON RETURN 2 4 6 3 5 VCR SET UP SEL SETSET MENUCLOSE REC MODE SP AV PHONES AV RETURN o 1 0 CARD OPER SEL SETSET MENUCLOSE PROTECT PR...

Page 47: ... zone Daylight saving time 51 1 Date time set 53 2 Return t Direct Printing Mode Card Photo Printer CP 10 SYSTEM SEL SETSET MENUCLOSE WL REMOTE 1 TALLY LAMP ON BEEP ON T ZONE DST D TIME SET RETURN 7 9 1 8 0 2 C PLAY MENU SEL SETSET MENUCLOSE CARD OPER VCR SET UP DISP SET UP SYSTEM PRINT RETURN 5 C PLAY MENU cont ...

Page 48: ...o set memory 84 Audio mix 103 Dubbing from a digital video equipment 86 Analog line in 90 AV insert 94 Audio dubbing 97 MV5i MV5i MC MV5i MV5i MC Insert two AA batteries following the and markings Be careful not to reverse the polarity of the batteries Inserting batteries Notes When using the wireless controller in brightly lit places or outdoors the effective range will be less The camcorder may ...

Page 49: ...e menu The selected mode will appear on the display for 4 seconds on the wireless controller Press and hold the REMOTE SET button on the wireless controller Simultaneously press the ZOOM W button for mode 1 or the ZOOM T button for mode 2 Continue to press simultaneously for over 2 seconds Be sure to set the wireless controller to the same mode as the camcorder A 1 Mode 1 A 2 Mode 2 OFFB Sensor of...

Page 50: ...n When you replace the batteries the wireless controller returns to mode 1 Change the mode again if necessary Turning off the tally lamp To turn the tally lamp off open the menu and select SYSTEM Then select TALLY LAMP set it to OFF and close the menu The tally lamp no longer flashes during recording but it will still light up when the camera receives a signal from the wireless controller and duri...

Page 51: ...select SYSTEM and press the SET button 2 Select T ZONE DST and press the SET button The time zone display appears on the screen Your camcorder s time zone is factory preset to Paris If you are at another time zone select your time zone first and daylight saving time DST setting if necessary 3 Move up or down the list of time zones with the selector dial Select the option that represents your time ...

Page 52: ...one No Notes After you have selected your time zone and set the date and time when you travel to another time zone there is no need to reset the date and time Just set the time zone to your destination and the camcorder s clock will automatically change to display the correct time for your destination The camcorder automatically accounts for the number of days in a month and leap year 1 24 1 2 3 4...

Page 53: ...menu and the clock starts If you press the SET button after setting the minutes you can set the date and time again from the start Setting the clock D TIME SET 1 JAN 2002 12 00 AM SYSTEM 39 Date and time display You can choose to display or hide the date and time display during recording When the date and time display is set to ON date and time are shown in the lower left hand corner of the displa...

Page 54: ...ully down and the still image will be taken immediately The camcorder takes the image immediately and then records the photo to the tape for approximately 6 seconds During this time the camcorder also records the sound and the display shows the still image A counter display appears and counts up as the camcorder records the image The camcorder returns to record pause mode 1 Press the PHOTO button ...

Page 55: ...tape for approximately 6 seconds During this time the camcorder also records the sound and the display shows the still image A counter display appears and counts up as the camcorder records the still image F disappears from the display The camcorder returns to record pause mode Notes The camcorder automatically returns to record pause mode after recording a still image for approximately 6 seconds ...

Page 56: ...he menu and select CAM SET UP Then select IMAGE S i set it to OFF and close the menu The i mark disappears from the display when the stabilizer is off The image stabilizer cannot be turned off when the program selector is set to the Easy Recording position Notes Keep the image stabilizer turned off when the camcorder is mounted on a tripod The image stabilizer is designed to deal with a normal deg...

Page 57: ...program selector to Q program AE mode Open the program menu and select AUTO 58 For various other recording conditions the camcorder has 6 more specialised AE auto exposure programs Availability of functions in each recording program h Available i Not available A Automatic function only You cannot use the multi image screen in the Night recording program MV5i MC Position of program selector Recordi...

Page 58: ...ppears constantly on the left of the display with the exception of Auto which is displayed and then disappears after 4 seconds Avoid changing programs during recording as the brightness of the image may change suddenly If you switch the camcorder from the program to the Q program the camcorder returns to the Auto mode When recording in dark places a bright light in the scene may cause a vertical l...

Page 59: ... Easy Recording program except that you now have the option of using any of the camcorder s manual functions AUTO Portrait Use this program outdoors to make subjects stand out from a softened foreground and background It works well for still lives and close ups The effect is most noticeable when the zoom position is between the middle range and the telephoto end Focus manually for maximum accuracy...

Page 60: ...long with a moving subject Image quality will not be as good as in normal lighting conditions and autofocus may not work as good as in other modes LOW LIGHT This program automatically adjusts the shutter speed according to the brightness of the subject even in dark places night time etc to shoot subjects brightly in colour It is useful when you record in locations with dark and light places such a...

Page 61: ...D EFFECT from the digital effects menu Press the D EFFECTS SELECT button to close the menu The camcorder remembers your chosen digital effect setting until you change it Digital effects can be selected but not operated on a blank blue screen appears in TAPE PLAY VCR mode The display continues to flash Digital effects operated during TAPE PLAY VCR mode are not recorded onto the original tape Digita...

Page 62: ...des of the screen The image gradually fades in The image gradually fades out Faders The image appears from the corners until it fills the whole screen The image is wiped off from the corners The image shrinks jumps from the centre to the left and disappears The image flips out of the screen Jump JUMP A small image appears from the left jumps into the centre and enlarges until it fills the whole sc...

Page 63: ...rs The image appears in zigzag from the top of the screen White stripes appear in zigzag from the bottom of the screen until they cover the whole image A yellow beam appears in the middle of the screen and expands until it covers the whole image The image disappears from both sides like tides Beam BEAM The screen turns yellow forms a beam and the full image appears Tide TIDE The image appears from...

Page 64: ...ve WAVE Both ends of the image sway in waves Colour Masking COLOR M The image becomes a rhombus through a masking frame that changes the colours Sepia SEPIA The image becomes monochrome with a brownish tint Mosaic MOSAIC The image is blurred through enlarging the size of some pixels Mirror Creates a symmetrical image as if there would be a mirror in the middle of the screen In CARD CAMERA mode onl...

Page 65: ...DER EFFECT and MULTI S appear 2 Select FADER The settings appear Select the setting by turning the selector dial 3 Select the desired setting You return to the digital effects menu 4 Press the D EFFECTS SELECT button to close the menu The name of your selected fader flashes in the display 5 Press the D EFFECTS ON OFF button The name of your selection stops flashing Each time you press the ON OFF b...

Page 66: ...AY VCR mode press the e play button 6 Press the D EFFECTS ON OFF button The name of your selection stops flashing and takes effect on the display Each time you press the D EFFECTS ON OFF button the chosen effect is activated or deactivated 1 Press the D EFFECTS SELECT button BLK WHT flashes in the display 2 Press the D EFFECTS ON OFF button The effect is activated and the image appears in black an...

Page 67: ...y operate the multi image screen in the following playback modes When M S SPEED is set to MANUAL Still image playback slow forward reverse playback When M S SPEED is set to FAST MODERATE or SLOW Still image playback Make sure the program selector is set to Q and any program other than the Night recording program 1 Press the D EFFECTS SELECT button to open the digital effects menu D EFFECT FADER EF...

Page 68: ...blue The frame disappears after the last image is captured Automatic The camcorder will capture the indicated number of images at the indicated speed 10 Press the start stop button to begin recording The multi image screen is recorded to the tape Notes You can operate the multi image screen from record or record pause mode After all the images have been captured press the D EFFECTS ON OFF button q...

Page 69: ...e camcorder MV5i MV5i MC External microphone Selecting the audio mode The comcorder can record sound in two audio modes 16 bit and 12 bit The 16 bit mode produces the higher sound quality slightly superior to CD while the 12 bit mode records on 2 channels stereo 1 leaving 2 channels free stereo 2 for you to add new sound at a later time AUDIO MODE 12bit VCR SET UP 39 For greater creative control o...

Page 70: ...he wind screen does not operate when an external microphone is connected to the MIC terminal Wind screen The camcorder has an automatic wind screen to prevent wind noise from interfering with the sound track Make sure it s off when you want the microphone to be as sensitive as possible Use the wind screen when recording in windy places such as the beach or near buildings WIND SCREEN OFF VCR SET UP...

Page 71: ...ins The tally lamp starts flashing 3 Press the start stop button to end recording 2 Press a PHOTO button on the camcorder body or the wireless controller The camcorder automatically adjusts the focus 2 seconds before the countdown is complete The F mark flashes white then turns green after the focus and exposure are set If you are using the wireless controller the F mark starts flashing immediatel...

Page 72: ... tape If you re in CARD CAMERA mode the image that has been recorded appears after recording onto a memory card Notes To cancel the self timer setting set the SELF TIMER to OFF through the menu or press the SELF TIMER button on the wireless controller To cancel the countdown of the self timer press the START STOP button when recording a movie or PHOTO button when recording a still image MV5i MC ...

Page 73: ...button eAE 0 appears light blue 3 Turn the selector dial to choose your desired level Levels are from 2 to 2 in 0 25 intervals excluding 1 75 and 1 75 The higher the setting the brighter the image Notes You cannot adjust the exposure without the e mark before AE in the display Press the EXP button so that e appears before AE Then you can adjust the exposure manually You cannot adjust the AE Shift ...

Page 74: ...ET button to select the desired shutter speed Only shutter speeds up to 1 250 are available when using a memory card 6 Close the menu MV5i MC SHUTTER AUTO CAM SET UP 39 Set the shutter speed manually to take stable shots of quickly moving subjects CARD AUTO 1 50 1 120 1 250 TAPE AUTO 1 50 1 120 1 250 1 500 1 1000 1 2000 slower faster MV5i MC Setting the Shutter Speed CAMERA PLAY VCR CARD CAMERA MV...

Page 75: ...People doing indoor sports such as basketball 1 1000 1 500 or 1 250 1 120 Notes You are unable to set the shutter speed in any recording program other than AUTO The image may not appear smooth when a high shutter speed is set The camcorder returns to the auto shutter setting when you slide the program selector to Easy Recording or change the recording program If you set the shutter speed to 1 500 ...

Page 76: ...g off the autofocus it may not stay in focus It is generally best to adjust the zoom first and then the focus Notes If the e icon is shown before AE the focus cannot be adjusted manually Press the focus button again to bring the e icon before M FOCUS The camcorder will return to autofocus when selecting the Easy Recording program Autofocus can not be turned off in Easy Recording program See Troubl...

Page 77: ...display flashes then remains lit Depending on the light source the flashing may at times continue The result will remain better than with the auto setting and you can continue recording 5 Close the menu The camcorder s auto white balance system compensates for a wide range of lighting conditions Although slight variations are unavoidable colours will appear natural in virtually every situation In ...

Page 78: ... and lighting conditions change reset the white balance Try to record with light from a single source Correct white balance cannot be obtained for two types of lighting at once You cannot set the white balance or choose the indoor outdoor mode when the program selector is set to the Easy Recording program The white balance returns to the AUTO setting when you slide the program selector to Easy Rec...

Page 79: ... the image to the right and left Turn the selector dial up to move the image to the left down to move the image to the right 3 Move the image up and down Press the SET button first Turn the selector dial up to move the image up and down to move the image down Pressing the SET button will switch the direction between right and left up and down 4 To cancel move the zoom lever toward W During Playbac...

Page 80: ...e and time the recording was made and other camcorder data shutter speed and exposure settings is automatically recorded on a special data section of the tape Only the date and time appear in the data code when using a memory card MV5i MC Displaying Date Time and Camcorder Data Data Code DATA CODE To change the date and time combination open the menu and select DISP SET UP Then select D TIME SEL s...

Page 81: ...back of a blank section of tape If the tape was recorded before entering the date and time in the camcorder s memory If the tape was recorded on a camcorder without a data code function If noise or tape damage prevents the data code from being read If a recording made on MV5 MV5i MV5i MC is played back on a different DV camcorder the data code may not be displayed correctly The data code will appe...

Page 82: ... have the data code turned off The 6 second auto date will adjust for any time zone changes you have indicated To turn the 6 second auto date on open the menu and select DISP SET UP Then select 6SEC DATE set it to ON and close the menu Note When 6SEC DATE is turned on but DISPLAYS 165 is turned off the six second auto date will still appear for 6 seconds 6SEC DATE OFF DISP SET UP 39 CAMERA PLAY VC...

Page 83: ... images or days PHOTO SEARCH DATE SEARCH appears in the middle of the display alongside the or mark and number to search through You can change direction easily by pressing the button for the opposite direction Notes Press 3 stop to stop mid search If you begin a search very close to the start of a recorded still image during photo search the camcorder may skip straight past it When you have set t...

Page 84: ...N1 or RTN appears in the display The tape counter with  indication disappears from the display and the time code reappears Notes The zero set memory may not function correctly where there is a break between recordings on the tape You can also use zero set memory to mark a position on a tape in TAPE CAMERA mode When you then play back the tape pressing rewind will take you back to the pre marked p...

Page 85: ... to play it back while you monitor the picture on the TV 3 Start recording on the VCR as soon as the section you want to copy appears on the screen 4 Pause the VCR at the end of the section you want to copy then stop playback on the camcorder 5 Repeat steps 1 to 4 until your edited recording is complete Note The quality of the edited tape will be slightly lower than that of the original By connect...

Page 86: ...corder s POWER switch to PLAY VCR and load a recorded cassette 1 Find a point on your recorded tape slightly before the section you want to dub 2 Press the camcorder s PLAY button Playback starts 3 Start recording on the other device as the section you want to copy appears on the screen 4 When you get to the point where you want to stop dubbing press the STOP button or the PAUSE button Notes Blank...

Page 87: ... signal is sent from the VCR the images recorded on the tape may also be anomalous although it may not appear so on the TV image or not recorded at all You are unable to dub tapes recorded with the copyright protective signal Side with arrow 1 Connect the camcorder and the other digital device Connect the Canon CV 150F DV cable optional with the sides of the plugs marked with the arrows facing as ...

Page 88: ...evice while you monitor the picture 4 Press the pause button Recording starts 5 When you get to the point where you want to stop recording press the stop button or the pause button Recording stops 6 Stop playback on the other device Notes Blanks between recordings on the playback tape are recorded as anomalous images on the tape that is being recorded to When dubbing to a Cassette with digital vid...

Page 89: ...right control signals for the protection of software COPYRIGHT PROTECTED PLAYBACK IS RESTRICTED appears in the display for a few seconds and then the camcorder displays a blank blue screen you cannot view the contents of the tape When recording If you try to record from software that contains copyright control signals for the protection of software COPYRIGHT PROTECTED DUBBING RESTRICTED appears in...

Page 90: ... from a VCR TV or Analog Camcorder Analog Line in MV5i MV5i MC You can record a video played on your VCR or analog camcorder for digital camcorders see p 86 or a TV program onto a tape in the MV5i MV5i MC if the TV or other device has audio video outputs If an anomalous signal is sent from the TV or VCR the images recorded on the tape may also be anomalous although it may not appear so on the TV i...

Page 91: ... terminals The camcorder enters record pause mode 3 Start playback on the other device or turn on the TV to see the desired program while you monitor the picture 4 Press the pause button Recording starts 5 When you get to the point where you want to stop recording press the stop button or the pause button Recording stops 6 Stop playback on the other device Note You can monitor the picture in the v...

Page 92: ... headphones during digital conversion Even if the AV headphone terminal is set to PHONES through the menu it will automatically be set to AV and PHONES will disappear from the display You are recommended to use power from a household power socket with the power adapter Do not operate with a cassette inserted to the camcorder Turn off the power of all equipment before performing connections Refer a...

Page 93: ... Cautions For normal use set AV DV OUT to OFF through the menu If it is set to ON you cannot input digital signals through the camcorder s DV terminal When connecting to a PC equipped with a DV terminal you may not be able to transfer converted signals to your PC depending on the software you are using and the specifications of your PC and its settings CAMERA PLAY VCR CARD CAMERA MV5i MC CARD PLAY...

Page 94: ...replaced with the new video and audio REW PLAY FF REMOTESET SEARCH SELECT ZERO SET MEMORY AUDIO DUB STOP AV INSERT PAUSE SLOW 2 Scene to be inserted Insert start point Insert end point The video and audio of the new scene replace that of the old The playback tape Before inserting After inserting The tape in the camcorder The tape in the camcorder Side with arrow OUTPUT VIDEO S S1 VIDEO AUDIO L R S...

Page 95: ...yback fast forward playback rewind playback or slow playback etc analog only TV You cannot insert AV from a TV program with anomalous synchronized signals such as when the program itself received poor signals 1 Connect the camcorder to the VCR 2 Prepare the VCR and TV Set the TV Video selector on the television to Video For further details see Connections for Playback on a TV Screen on p 33 Turn o...

Page 96: ... INSERT and 2a appear in the display 4 Play back the tape in the VCR 5 To start inserting press the PAUSE button on the camcorder 2a changes to 2 6 To stop inserting press the STOP button on the camcorder Inserting stops and AV INSERT disappears from the display The camcorder returns to stop mode If instead of pressing STOP you press PAUSE the camcorder returns to the AV insert pause mode If you s...

Page 97: ... 16 bit or 12 bit 4 channel sound It is not possible to dub audio onto a tape recorded with 12 bit and 16 bit sound intermingled To connect an external microphone Notes When you add sound using the built in microphone make sure not to connect any cables to the MIC terminal To use your TV to monitor video connect the S video terminal 34 or the AV terminal use only the video plug to your TV You can ...

Page 98: ...UB and appear on the display 3 Press the PAUSE button Audio dubbing starts Direct your voice into the microphone changes to 4 When you get to the point where you want to stop dubbing press the STOP button Audio dubbing stops and AUDIO DUB disappears from the display The camcorder returns to stop mode You can also set the zero set memory 84 at the place you want to stop audio dubbing then every tim...

Page 99: ...to adjust the audio mix 103 when playing back a tape with added sound There may be a loss of sound quality if you add sound to a tape recorded on a camcorder other than the MV5 After adding sound for 3 or more times to the same place on the tape there may be some loss in sound quality ...

Page 100: ...nel sound dubbing will stop If your tape hasn t been recorded in SP mode with 12 bit sound we recommend dubbing your original tape onto a blank tape using the MV5i MV5i MC s analog line in function then dubbing audio onto the new tape Make absolutely sure to set the audio mode of the new tape to 12 bit and the recording mode to SP To connect other audio equipment Notes Do not use the yellow video ...

Page 101: ...crophone make sure not to connect any cables to the MIC terminal To use your TV to monitor video connect the S video terminal 34 or the AV terminal use only the video plug to your TV You can monitor the sound with headphones only when using the S video terminal 32 CAMERA PLAY VCR CARD CAMERA MV5i MC CARD PLAY VCR MV5i MC 1 Open the menu and select VCR SET UP 2 Select AUDIO DUB 3 Select AUDIO IN or...

Page 102: ...amcorder returns to stop mode You can also set zero set memory 84 at the place you want to stop audio dubbing then every time you return to that position audio dubbing will stop If instead of pressing STOP you press PAUSE the camcorder will return to the playback pause mode Notes You cannot use the DV terminal while adding sound You might want to adjust the audio mix 103 when playing back a tape w...

Page 103: ...ler Starting with the last selected setting 4 settings appear as you push the button STEREO1 for just stereo 1 STEREO2 for just stereo 2 MIX FIXED for an equal mix of stereo 1 and 2 MIX VARI mix variable for when you want to mix the balance between stereo 1 and 2 To simply choose STEREO1 STEREO2 or MIX FIXED make sure your choice appears on the display If you choose MIX VARI you can go on to mix t...

Page 104: ...lect VCR SET UP Then select OUTPUT CH set it to the desired setting and close the menu Refer to the following list Selecting audio output channels OUTPUT CH L R VCR SET UP 39 CAMERA PLAY VCR CARD CAMERA MV5i MC CARD PLAY VCR MV5i MC OUTPUT CH setting Tape recorded with stereo sound Playback sound L R channels main sub L R L L L channel only main only R R R channel only sub only Tape recorded on mu...

Page 105: ...off the power of both the camcorder and the PC before connecting Optional software necessary For transferring still images and movies from a memory card to your PC using a USB cable see p 146 MV5i MC Notes Operation may not work correctly depending on the software you are using and the specifications of your PC and its settings See your PC instruction manual for details Caution Do not disconnect t...

Page 106: ...127 Preventing Accidental Erasure Protect 128 Marking a Still Image for Printing Print Mark 129 Erasing Still Images Movies 131 Using the Card Photo Printer CP 10 Optional 133 139 Combining Images and Recording Them to a Tape Card Mix 140 142 Copying Still Images to and from a Tape 143 144 Formatting a Memory Card 145 Utilizing Memory Card Still Images Movies on a PC 146 You can use most of the ca...

Page 107: ...hing the card in and letting it spring out 4 Close the cover When inserting the memory card do not attempt to close the cover forcefully without the memory card properly inserted Notes When you set the camcorder to CARD PLAY VCR mode the last image recorded appears If there are no images recorded on the memory card NO IMAGES appears in the display Do not touch the memory card terminals Do not atte...

Page 108: ...D SET UP Then select SI SIZE set it to 640 480 and close the menu 640 appears in the display To change the image size of a movie open the menu and select CARD SET UP Then select MOVIE SIZE set it to 160 120 and close the menu 160 appears in the display Movie Still Image Selecting the Image Size of Still Images and Movies CAMERA PLAY VCR CARD CAMERA MV5i MC CARD PLAY VCR MV5i MC SI SIZE 640 480 CAR...

Page 109: ... menu CAMERA PLAY VCR CARD CAMERA MV5i MC CARD PLAY VCR MV5i MC Notes Still images are compressed and recorded in the JPEG Joint Photographic Experts Group format and movies in the Motion JPEG format Refer to p 149 for memory card display The remaining number of images that can be recorded on the memory card may sometimes decrease by 2 images at once Card access display Image Size 1024 768 640 480...

Page 110: ... memory card Sample images have been pre recorded on the supplied SD Memory Card entering folder number 100 folder name is 100canon Set the image file numbers so that they reset each time a new memory card is inserted or so that they count up continuously 1 CONTINUOUS Numbering is continuous between cards so that the first file number assigned on a new memory card is 1 more than the last file numb...

Page 111: ... a shutter being released when a still image is recorded to a memory card SHTR SOUND ON CARD SET UP 39 To turn the shutter sound off open the menu and select CARD SET UP Then select SHTR SOUND set it to OFF and close the menu CAMERA PLAY VCR CARD CAMERA MV5i MC CARD PLAY VCR MV5i MC ...

Page 112: ...ot disconnect the power source or remove the memory card Doing so could result in data damage 1 Press and hold the small button on the POWER switch and turn the POWER switch to CAMERA 2 Move the TAPE CARD switch to CARD The number of images that can still be recorded on the memory card and other information appear in the display The camcorder will turn itself off if you are using a battery and do ...

Page 113: ...ear in the LCD display when LCD MIRROR is turned on on page 28 Notes To use the self timer 71 set the self timer before step 3 and then press the PHOTO button fully down The wireless controller s PHOTO button has no half way setting Press the button fully and the camcorder immediately takes the image The indicators that appear in the display when recording to a memory card 50 1024 320 FINE Image q...

Page 114: ...the PHOTO button halfway down and hold it The tape is set to playback pause mode and the number of images that can still be recorded on the memory card appears in the display 3 Press the PHOTO button fully down to record the still image to the memory card The card access indicator flashes Notes You can also set the tape to playback pause mode in step 1 and record the image with only 1 full press o...

Page 115: ...e is inserted make sure the cassette is in stop mode You can record images from a VCR or TV connected through the S terminal or AV terminal analog line in as well as images from other digital camcorders connected through the DV terminal onto the memory card as still images Refer to p 86 for connecting instructions The data code of the still image will reflect the date and time it has been recorded...

Page 116: ...rs in the display 3 Press the PHOTO button fully down to record the image to the memory card The card access indicator flashes Notes When dubbing to a tape via the DV terminal make sure that AVaDV is not displayed on the screen If so set AVaDV OUT to OFF in the menu 90 If you record an image onto a memory card that was originally recorded in the 16 9 mode for wide screen TV s the image will appear...

Page 117: ...nough memory available is inserted into the camcorder When you are using an SD Memory Card make sure the protect switch is set to allow recording While the card access indicator flashes do not disconnect the power source Doing so could result in data damage 1 Turn the POWER switch to CAMERA and the TAPE CARD switch to CARD 2 Press the START STOP button You can record up to 10 seconds in 320 240 an...

Page 118: ...rs in the display press the START STOP button You can record up to 10 seconds in 320 240 and 30 seconds in 160 120 Press the START STOP to end recording The camcorder starts to write the movie to the memory card when recording is finished You can also start recording during record pause mode by pressing the Start Stop button Note If you record a movie to a memory card that was originally recorded ...

Page 119: ...only record a movie onto the memory card If a cassette is inserted make sure the cassette is in stop mode 1 Start playback on the other device 2 When the image you want to record appears in the display press the START STOP button You can record up to 10 seconds in 320 240 and 30 seconds in 160 120 Press the START STOP to end recording The camcorder starts to write the movie to the memory card when...

Page 120: ...he subject If necessary set the focus manually and AE shift After the first image recording program zoom and AE shift cannot be changed 4 Press the PHOTO button to record the first image Direction and number of recorded images will be shown on the display 5 Orient the camcorder so that the second frame overlaps a small portion of the first image and press the PHOTO button to take the next image Do...

Page 121: ...0 to 50 of the frame Discrepancies above and below the frame can be automatically compensated if within 10 Make sure that no moving subject is included in the overlapping area Do not try to stitch images that include both distant and close items Objects may appear warped or doubled up ...

Page 122: ...mages on p 148 149 Still images movies that have been recorded with this camcorder but have subsequently been enhanced on a PC Still images movies whose image file names have been changed on a PC There are 3 ways to view still images movies Single still images movies Slide show One after the other automatically in order of recording Index screen Six still images movies at once When the camcorder i...

Page 123: ... image movie Movies Pressing e a plays back the movie and will show the last scene as a still image when playback ends Pressing e a during playback will stop the movie and the scene is shown as a still image Pressing e a again will restart the playback Card Search Function You can quickly search for still images movies while viewing thumbnails small images With a still image movie in the display p...

Page 124: ...ovie in the display press the INDEX SCREEN button Up to 6 images appear in the display 2 Move the frame to the still image movie you want to view Turn the selector dial downwards to go to the previous still image movie and upwards to go to the next still image movie Turning the dial upwards at the last still image movie will take you to the next index screen Turning the dial downwards at the first...

Page 125: ...d SD Memory Card are already protected There are 2 ways to protect still images movies including the ways to cancel the setting 1 File Operation menu 127 2 Card Operations submenu 128 Marking a still image for printing Print Mark A still image on a memory card must be marked before it can be printed The camcorder supports the DPOF Digital Print Order Format print format Still images can be automat...

Page 126: ... has been erased it cannot be restored There are 2 ways to erase a single still image movie To erase still images movies one at a time 1 File Operation menu 127 To erase still images movies one at a time or erase all still images movies on the memory card at once 2 Card Operations submenu 131 When playing back still images movies in CARD PLAY VCR mode When displaying an index screen in CARD PLAY V...

Page 127: ... Select PRINT MARK set the number of prints with the selector dial and press the SET button The print mark appears on the still image If you select RETURN the menu disappears from the display To cancel a print mark select PRINT MARK set the number of prints to 0 Zero with the selector dial and press the SET button disappears 2 Select IMAGE ERASE and press the SET button ERASE THIS IMAGE NO YES app...

Page 128: ...ted into the camcorder 1 With a still image movie in the display press the INDEX SCREEN button Up to 6 still images movies appear in the display Move the frame to the still image movie that you want to protect Index Screen 124 2 Open the menu and select CARD OPER 3 Select PROTECT 4 Press the SET button The protect mark appears on the still image movie Now you are unable to erase this still image m...

Page 129: ...ou can also mark a still image for printing through File Operation menu 127 Marking an a still image for printing while viewing an index screen Make sure a memory card that has a still image recorded on it has been inserted into the camcorder 1 With a still image in the display press the INDEX SCREEN button Up to 6 images appear in the display Move the frame to the still image that you want to mar...

Page 130: ... MARKS YES NO appears in the display 3 Select YES and press the SET button The print mark disappears from the still image 4 Close the menu CAMERA PLAY VCR CARD CAMERA MV5i MC CARD PLAY VCR MV5i MC Notes To cancel a print mark move the frame to the print marked a still image set the number of prints to 0 Zero with the selector dial and press the SET button The print mark disappears If there are a l...

Page 131: ...4 or card search function 123 if necessary and make sure the still image movie you want to erase fills the display If you use the index screen press the INDEX SCREEN button after selecting the still image movie The still image movie you selected fills the whole display 2 Open the menu and select CARD OPER 3 Select IMAGE ERASE CANCEL SINGLE and ALL settings appear To cancel erasing select CANCEL an...

Page 132: ... movie YES appears in purple and is unselectable If you select NO you return to step 4 6 Close the menu 1 Open the menu and select CARD OPER 2 Select IMAGE ERASE CANCEL SINGLE and ALL settings appear To cancel erasing select CANCEL and close the menu 3 Select ALL ERASE ALL IMAGES EXCEPT FOR IMAGES NO YES appears in the display 4 Select YES and press the SET button All still images movies except th...

Page 133: ...ected on the camcorder 125 The total number of copies that can be printed from one memory card is limited to 250 All prints exceeding the total number of 250 will not be printed Connecting the Card Photo Printer to the camcorder 1 Turn the POWER switch of the camcorder to OFF 2 Attach the printer s AC adapter to the printer and the power cable to the printer s AC adapter 3 Plug the power cable int...

Page 134: ...display will return to playback mode If you wish to continue printing select the next still image with the CARD or CARD button Printing Errors If an error occurs during printing error messages such as NO INK PAPER JAM or NO PAPER will display Select Stop or Restart with the selector dial and press the SET button The Restart setting may not appear with some error messages In that case select Stop ...

Page 135: ...the selector dial and specify the number of copies 3 Press the SET button Setting the print style 1 On the print dialog turn the selector dial select Style and press the SET button The dialog for selecting the style appears Image Standard Prints 1 still image per page Multiple Prints 8 copies of the same still image on one page Borders Bordered Prints with a border Borderless Prints right to the e...

Page 136: ... Press the Menu button Borders can only be selected when the image style is set to Standard Bordered cannot be selected when you have set the Printing Area 2 Turn the selector dial The dialog for selecting the Borders appears 3 Press the SET button Bordered and Borderless settings appear Selecting the Borders Bordered Borderless Selecting the Image Style Standard Multiple ...

Page 137: ... dialog select Printing Area and press the SET button 2 Turn the selector dial and select the printing area The printing area is for standard images and for multiple images 3 Press the SET button Notes Printing area setting is cancelled with the following operations When you set the printing area for another still image When you turn off the camcorder or detach the DIF 100 direct interface cable f...

Page 138: ... than 1 copy of a still image set the number of copies when you mark it for printing You cannot select the area setting with still images marked for printing You can select only the style Standard Multiple Bordered Borderless Printing is executed from the C PLAY MENU If you connect the Card Photo Printer and select PRINT without having marked a still image for printing Set print mark will be displ...

Page 139: ...annot be stopped Printing of the next still images will be cancelled and the display will return to playback mode Restarting Printing To restart printing select Restart on the print dialog display and press the SET button The remaining still images will be printed If you select OK on the print dialog printing will start from the 1st still image Printing cannot be restarted in the following circums...

Page 140: ...bine the image you are recording with a still image as a frame The image will be shown instead of the blue area of the still image When recording your own frame make sure that the area you wish the other image to appear is blue Adjustment of the MIX LEVEL blue area of the still image CARD LUMI Card luminance key Combine the image you are recording with illustrations or titles The image will be sho...

Page 141: ...select the still image to be combined Select Mix level The mix level bar appears Adjust the mix level using the and at the ends of the bar as guides CAM CHROMA Camera chroma key Combine the image you are recording with a still image as the background Shoot the subject in front of a blue background such as a blue curtain and the subjects not blue will be superimposed on the still image Adjustment o...

Page 142: ...e card MIX button your selection is activated display lights continuously or deactivated display flashes 1 Press the start stop button to start and stop recording The combined images are recorded onto the tape 1 Press the PHOTO button halfway down and hold it F flashes white in the display as the camcorder adjusts the focus and it is displayed continuously as a green mark when the camcorder is rea...

Page 143: ...ll be copied onto the memory card If you want to copy all the images on a tape rewind the cassette to the beginning 2 Open the menu and select CARD OPER 3 Select COPY CANCEL and EXECUTE settings appear 4 Select EXECUTE and press the SET button Select CANCEL to stop copying Tape and card information appear in the display and copying starts NOW COPYING appears in the display The camcorder automatica...

Page 144: ... 3 Open the menu and select CARD OPER 4 Select COPY and press the SET button CANCEL and EXECUTE settings appear 5 Select EXECUTE and press the SET button Select CANCEL to stop copying Tape and card information appear in the display and copying starts NOW COPYING appears in the display Each image is copied for about 6 seconds on the tape Copying stops when all the images have been copied or the tap...

Page 145: ...mages movies will be permanently erased If you use memory cards other than the supplied one make sure to format them with the camcorder not a PC or other device Make sure a memory card is inserted into the camcorder 1 Open the menu and select CARD OPER 2 Select FORMAT and press the SET button CANCEL and EXECUTE settings appear 3 Select EXECUTE and press the SET button Select CANCEL to cancel forma...

Page 146: ...corder s POWER switch to PLAY VCR and move the TAPE CARD switch to CARD PC CONNECT USB appears in the display to indicate that USB connection is being performed 4 Start the software and download still images movies from the memory card to the computer Cautions Do not disconnect the USB cable while data is being transferred while the camcorder s card access indicator is flashing Doing so may damage...

Page 147: ... the card mix sample images provided on the SD Memory Card they can be downloaded from the following home pages http www canon europa com products products html http www canon asia com http www canon com au If you are unable to connect the camcorder to a PC using a USB cable you will need a PC Card Adapter or USB Card Reader to be able to download to a memory card If you purchase additional memory...

Page 148: ...tic bag and letting it slowly adjust to temperature changes before removing it from the bag If condensation should occur maintain the memory card at a constant temperature and let the moisture evaporate naturally Do not touch the memory card s terminals or let dust or dirt come in contact with the terminals Store and carry memory cards in their case to protect the terminal area There is only one c...

Page 149: ...es on the supplied SD Memory Card are intended solely for the personal enjoyment gained from combining them with personal videos taken with this camcorder Do not use the pre recorded sample images for any other purpose PhotoEssentials Royalty Free Stock Photography The PhotoEssentials suite of royalty free images on CD ROM features premium quality assignment photography and is ideally suited for u...

Page 150: ...light or it will melt The light is concentrated by the viewfinder lens Do not direct the viewfinder to the sun Preparing the lens cap Attach the cord to the lens cap and pass the grip belt through the loop on the cord Hook the lens cap on to the grip belt while you are recording and place it over the lens when you have finished Fastening the grip belt Release the Velcro fastening and hold the camc...

Page 151: ...ts the battery pack can be warmed in your pocket or someplace and then used If the battery pack starts to give you much less operating time than usual at normal temperatures it has reached the end of its life and must be replaced These figures show how long you can view playback with the LCD after attaching a fully charged battery pack Playback time will be shortened at low temperatures Typical Re...

Page 152: ...ry pack for long periods of time charge it fully and discharge it fully in the camcorder at least once a year before returning it to storage When to recharge You can recharge a lithium ion battery pack whenever it is convenient Unlike a conventional battery pack it does not have to be fully discharged first However as the battery pack will naturally discharge itself over time it is best to charge ...

Page 153: ...hort circuit Wipe the battery with a clean dry cloth to ensure proper contact Keep the battery pack out of reach of children if it is swallowed contact a physician immediately as the battery case may break down and the battery fluids damage the stomach and intestines Do not disassemble heat or immerse the battery in water to avoid the risk of explosion Installing the backup battery Press the small...

Page 154: ...fields Do not use the camcorder close to TV transmitters portable communication devices or other sources of electric or magnetic radiation They may cause picture interference or permanently damage the camcorder Do not expose the camcorder to water Cover the camcorder when you are recording in rain or mist There is a risk of electric shock if water gets inside the camcorder contact qualified servic...

Page 155: ...picture the video heads may be dirty When the video heads are badly contaminated the camcorder may show a blank blue screen or a warning For the best picture possible after using the camcorder for approximately 20 hours clean the video heads using Canon s DVM CL Digital Video Head Cleaning Cassette If the noise remains repeat the cleaning up to maximum of 5 times Do not use a wet type cleaning cas...

Page 156: ...een your camcorder can only be connected to TVs which use its PAL system This TV system is used in the following countries Algeria Australia Austria Bangladesh Belgium Brunei China Denmark Finland Germany Hong Kong Iceland India Indonesia Ireland Italy Jordan Kenya Kuwait Liberia Malaysia Malta Mozambique the Netherlands New Zealand North Korea Norway Oman Pakistan Portugal Qatar Sierra Leone Sing...

Page 157: ...played for approximately four seconds Then the power indicator flashes and the h mark flashes in the display If there is a cassette in the camcorder it stops automatically and REMOVE THE CASSETTE is displayed for approximately 4 seconds and then v flashes in the display If you have the beep turned on it will sound The camcorder may not detect the condensation immediately the condensation warning m...

Page 158: ...k is exhausted or not properly attached 12 15 151 The function cannot be used in that recording program 57 The camcorder was in record pause mode for more than about 5 minutes 18 112 170 The battery pack is exhausted 14 15 151 The battery pack s power is exhausted Recharge or change to a new battery pack 14 15 The cassette is not loaded or is set for erasure prevention 16 17 The cassette has reach...

Page 159: ... different distances Behind glass Without much contrast e g a white wall Reflective surfaces e g shiny car surfaces Fast moving objects Dark subjects Night scenes Recording Playback Cont Cause and or what to do about it There are a number of restrictions on using the digital effects 61 66 The camcorder is not set to TAPE PLAY VCR mode 28 The cassette is not loaded 16 The cassette has reached the e...

Page 160: ...ght way and try inserting again Turn the camcorder s power off and back on again and remove and reinsert the card If the mark continues to flash format the memory card The camcorder is not set to CARD CAMERA or CARD PLAY VCR 112 122 mode The memory card is not inserted 107 You are using an SD Memory Card and it is set for erasure prevention Change the position of the protect switch The memory card...

Page 161: ... Problem The wireless controller doesn t work The power indicator is flashing The camcorder malfunctions The DV cable is connected correctly but there s nothing in the display The camcorder becomes warm during use The PHOTO button doesn t work The image cannot be erased The memory card is not loaded 107 You are using an SD Memory Card and it is set for erasure prevention Change the position of the...

Page 162: ...ice CV 150F DV Cable CV 150F CV 250F DV Cable NB 2L BP 2L12 Battery Pack STV 250N Stereo Video Cable S 150 S video Cable PC A10 SCART Adapter VCR PC Card Adapter FD Adapter Personal Computer TL 28 Tele converter WD 28 Wide converter FS 28U Filter Set BP 900 Series Battery Pack VL 10Li Battery Video Light Stereo Microphone commercially available IFC 300PCU USB Cable SD Memory Card or MultiMediaCard...

Page 163: ...BP 2L12 FS 28U Filter Set Neutral density and MC protector filters to help you take control of difficult lighting conditions VL 10Li Battery Video Light This compact yet powerful video light can be used for both indoor and outdoor shooting Use the BP 900 Series battery packs to power the light Approximate usage times are as follows BP 915 60 min BP 930 120 min BP 945 170 min Charge the BP 900 Seri...

Page 164: ...handy camcorder bag with padded compartments and plenty of space for accessories SA 1 Adapter Bracket Attaches a video light or microphone securely to the camera Zoom Remote Controller ZR 1000 When this product is plugged into the LANC m terminal of a Canon camcorder it is possible to control functions such as the start and stop of recording and the zoom and focusing functions while the camcorder ...

Page 165: ...warning caution displays when necessary and the data code appears in the display if it is set to ON When operating the camcorder the displays appear for 2 seconds However the displays do not disappear when displaying an index screen indicates a flashing display TV SCREEN ON DISP SET UP DISPLAYS ON DISP SET UP REC PAUSE Record pause mode 18 Recording 19 The backup battery is not properly installed ...

Page 166: ...the camcorder off Turn it on again and reload the cassette Recording mode 20 Playback is stopped 28 Normal playback 28 Fast forward 28 END 5m i n EJECT EJECT P S Rewind 28 Fast forward playback 28 Rewind playback 28 Frame advance playback 29 Frame reverse playback 29 Playback pause forward and reverse 29 Slow playback forward and reverse 29 2 playback forward and reverse 30 1 playback forward and ...

Page 167: ...R DISP SET UP SYSTEM RETURN 10s e c SELF T C CAM MENU SEL S MENU STITCH AST CAM SET UP CARD SET UP VCR SET UP DISP SET UP SYSTEM RETURN C PLAY MENU SEL S MENU CARD OPER VCR SET UP DISP SET UP SYSTEM RETURN Self timer countdown 71 Zero set memory 84 Audio mode 69 Data code 80 Photo mode 54 Setting the AF AE F mark flashes white AF AE locked F mark lights up green Timer Recording programs 57 AE Shif...

Page 168: ...K MIRROR MULTI S ST 1 ST 2 WSON AUDIO IN MIC IN STEREO1 STEREO2 MIX FIXED MIX VARI 16 9 The 16 9 mode the display flashes when the effect is being selected and appears steadily when it is activated 21 Digital effects The display flashes when the function is being selected and appears steadily when it is activated 62 The wind screen is turned on 70 Volume level 31 Speaker Headphones The AV headphon...

Page 169: ... 1 JAN 2002 9 99 99 Memory Card Displays MV5i MC No memory card is inserted 107 Still Image Size 113 Movie Size 113 Image quality 107 Standard Fine Super Fine Folder number File number 110 Slide show in progress 124 Recording to a memory card 113 STD 1024 320 S FINE FINE 101 0101 SLIDE SHOW 99 The number of still images that can still be recorded on the memory card 109 Green 6 or more images Yello...

Page 170: ... no longer than 10 seconds AUTO POWER OFF The camcorder will turn itself off if you leave it in record pause mode for more than about 5 minutes This display appears 20 seconds approx before the camcorder turns off Time Code This records counter information including hour minute second and frame number on a special data code area on the tape itself It is reset automatically when a new tape is loade...

Page 171: ...HE CASSETTE REC MODE CHECK THE CASSETTE AUDIO MODE CHECK THE CASSETTE BLANK COPYRIGHT PROTECTED DUBBING RESTRICTED Appears each time you turn the power on until you set the time zone date and time 51 Appears when the battery pack is exhausted 151 Appears when the tape has reached the end Refer to p 17 Appears when during DV dubbing the DV cable is disconnected or the power of the digital equipment...

Page 172: ...um file or folder number 110 The image has been recorded in an incompatible JPEG format or other format that the camcorder can not play back or the image data has been damaged Appears if you have tried to mark 100 or more images for printing or if a mark file cannot be edited 125 No memory card is inserted in the camcorder 107 There are no images recorded on the memory card You are using an SD Mem...

Page 173: ...8 in on maximum wide angle Maximum shutter speed 1 2 000 sec 1 250 sec when using a memory card Minimum illumination 2 4 lx using the Night program in TAPE CAMERA mode Recommended illumination More than 100 lx Filter diameter 28 mm Viewfinder 0 5 in TFT colour LCD approx 113 000 pixels LCD screen 2 in measured diagonally TFT colour approx 130 000 pixels Microphone Stereo electret condenser microph...

Page 174: ...ced output 10 dBV 47 kohm load less than 3 kohms unbalanced Video 1 Vp p 75 ohms unbalanced S video terminal 1 1 Vp p Y signal 0 3 Vp p C signal MIC terminal input ø 3 5 mm stereo minijack 57 dBV with 600 ohm mic at least 5 kohms LANC u terminal ø 2 5 mm mini minijack Operating temperature range 0 40 C 32 104 F Dimensions 55 111 89 mm 2 4 3 8 3 1 2 in Weight 380 g 13 3 8 oz Battery type Rechargeab...

Page 175: ...R 32 Copying from Memory Card to Tape 144 Copying from Tape to Memory Card 143 Î Data Code 80 Date and Time 53 Date Search 83 Demo mode 22 Digital Effects 61 Digital Zoom 23 DV Dubbing 86 Easy Recording 59 Editing to a VCR 85 Effects 64 Erasing Still Images 126 131 External Microphone 69 97 Ï Faders 62 Fast Forward 28 File Numbers 110 Focusing 76 Formatting a Memory Card 145 Ó Head Cleaning 155 He...

Page 176: ...ng Programs 57 Recording Still Image from a Tape 114 Recording Still Images from Other Devices 115 Recording Still Images onto a Memory Card 112 Recording Still Images onto a Tape 54 Remote Control 48 Remote Sensor 48 49 Rewind 28 Í S1 video terminal 34 Sample images 148 Sand Snow 60 Screen Displays 165 SD Memory Card 106 112 147 Self Timer 71 Shutter Sound 111 Shutter Speed 74 Slide Show 124 SP M...

Page 177: ...177 E Additional Information Û Zero Set Memory 84 Zooming 23 MV5i MC only MV5i MV5i MC only ...

Page 178: ...R Copy cassette to card CARD OPER Data code DISP SET UP DISP SET UP Date time set SYSTEM Date time display Date time select Card access display DISP SET UP Demo mode DISP SET UP AV headphones VCR SET UP AV DV out VCR SET UP Digital zoom CAM SET UP Card mix CARD MIX CAMERA PLAY VCR CARD CAMERA MV5i MC CARD PLAY VCR MV5i MC MV5i MV5i MC MV5i MC MV5i MC MV5i MC MV5i MC MV5i MC MV5i MC MV5i MC MV5i MC...

Page 179: ... OPER CARD SET UP CAM SET UP VCR SET UP SYSTEM CARD SET UP STITCH AST SYSTEM CARD MIX CARD MIX Shutter sound CARD SET UP Erase CARD OPER File numbers CARD SET UP Format CARD OPER Erase all print marks CARD OPER Image stabilizer CAM SET UP MV5i MV5i MC MV5i MC MV5i MC MV5i MC MV5i MC MV5i MC Movie Size CARD SET UP MV5i MC MV5i MC MV5i MC MV5i MC MV5i MC MV5i MC MV5i MC MV5i MC MV5i MC MV5i MC Self ...

Page 180: ... make sure the camera is set to Then select it from this submenu and set Time zone DST TV screen White balance Wind screen SYSTEM DISP SET UP CAM SET UP VCR SET UP MV5i MC MV5i MC MV5i MC CAMERA PLAY VCR CARD CAMERA MV5i MC CARD PLAY VCR MV5i MC ...

Page 181: ...S W 2113 Australia Telephone 805 2000 Fax 887 4484 Canon New Zealand Ltd Fred Thomas Drive Takapuna P O Box 33 336 Auckland New Zealand Telephone 486 1570 Fax 486 6420 Canon Singapore Pte Ltd 79 Anson Road 09 01 06 Singapore 079906 Telephone 65 532 4400 Fax 65 221 2939 Canon Hongkong Company Ltd 9 F The Hong Kong Club Building 3A Chater Road Central Hong Kong Canon Latin America Inc Sales Enquirie...

Reviews: