background image

62

Chapter 5: Using the TV's Features

Chapter 5

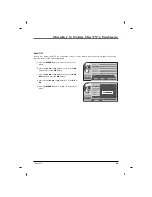
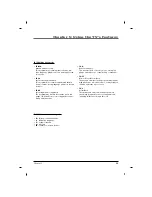
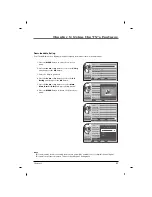
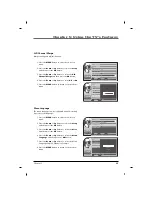
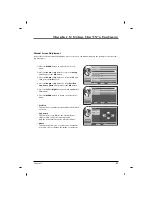
SI Vender Select

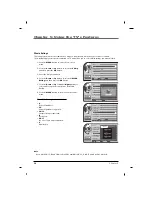
1. Press the 

MENU

button to enter the on-screen

menu.

2. Press the 

Down

or 

Up

button to select the 

Setup

and then press the 

OK

button.

3. Press the 

Down 

or 

Up

button to select the 

SI

Vender Select 

and then press the 

OK

button.

4. Press the 

Down 

or 

Up

button to select SI Vender

Select to choose the service provider.

5. Press the 

MENU

button to return to the previous

menu.

This setting selects the content delivery method of the service provider. Select FTG(Free to Guest) if you are
using the television in stand alone mode-no pay per view(PPV). Select PPV if you are using the television on a
pay per view system. Select off if you are not using a HD Pro:Idiom.

11:20 PM

Sep.11,2010

Adjust

Back

Menu

Time

V-Chip

PC

SI Vender Select

Firmware Upgrade

Power on Channel

A/D Channel Merge

More

LODGENET

D

D

E

E

Setup Menus

11:20 PM

Sep.11,2010

Move

Select

OK

Back

Menu

Time

V-Chip

PC

SI Vender Select

Firmware Upgrade

Power on Channel

A/D Channel Merge

More

FTG

Last

On

G

G

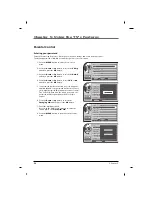
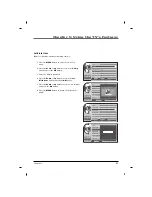
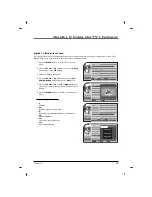
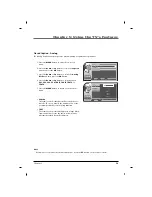
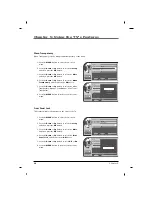
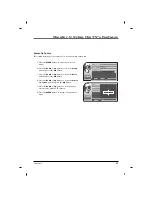
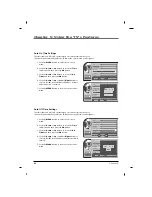
Power On Channel

1. Press the 

MENU

button to enter the on-screen

menu.

2. Press the 

Down

or 

Up

button to select the 

Setup

and then press the 

OK

button.

3. Press the 

Down 

or 

Up

button to select the 

Power

On Channel 

and then press the 

OK

button.

4. Press the 

Down 

or 

Up

button to select your pre-

ferred channel with the TV turns on.
The TV will return to the last channel viewed when

Last

is selected.

5. Press the 

MENU

button to return to the previous

menu.

Determines the first channel the TV will tune when turned On.

11:20 PM

Sep.11,2010

Adjust

Back

Menu

Time

V-Chip

PC

SI Vender Select

Firmware Upgrade

Power on Channel

A/D Channel Merge

More

Last

D

D

E

E

11:20 PM

Sep.11,2010

Move

Select

OK

Back

Menu

Time

V-Chip

PC

SI Vender Select

Firmware Upgrade

Power on Channel

A/D Channel Merge

More

FTG

Last

On

G

G

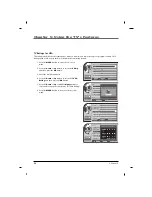
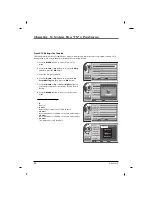
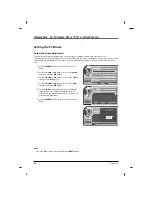
Note

- This setting configures how the Pro:Idiom encryp-

tion system decodes the digital signal. Setting this to
the wrong setting will prevent the proper decoding
of a Pro:Idiom encrypted signal.

Summary of Contents for J32LED750

Page 1: ...LED Television User s Guide Pro Idiom MPEG4 Lodging Television J32LED750 J42L750 Changing Entertainment Again ...

Page 2: ...ODUCT TO RAIN OR MOISTURE WARNING Please fill out the product registration card packed separately and return it immediately For US customers Your RCA Consumer Electronics product may also be registered at http www rcacommercialtv com Registering this product allows us to contact you if needed Product Registration This reminder is provided to call the CATV system installer s attention to Article 82...

Page 3: ...D TO DO SO CAUTION Apparatus shall not be exposed to dripping or splashing and no objects filled with liquids such as vases shall not be placed on the apparatus WARNING When used outside of U S other power supply cords may be used if the cord is approved by the local regu lating agency CAUTION Clean the exterior of this television by removing dust with a lint free cloth CAUTION To avoid damage to ...

Page 4: ...quipment has been tested and found to comply with the limits for a Class B digital device pursuant to Part 15 of the FCC Rules These limits are designed to provide reasonable protection against harmful interference when the equipment is operated in a residential installation This equipment generates uses and can radiate radio frequency energy and if not installed and used in accordance with the in...

Page 5: ...2 Use only with the cart stand tri pod bracket or table specified by the manufacturer or sold with the apparatus When a cart is used use caution when moving the cart apparatus combination to avoid injury from tip over 13 Unplug this apparatus during lightning storms or when unused for long periods of time 14 Refer all servicing to qualified service personnel Servicing is required when the apparatu...

Page 6: ... List 30 Fine Tune 31 Digital Signal Strength 31 Remapped Channel 32 Picture Controls 33 Adjusting The Picture Controls 33 Manual Picture Controls 34 Color Temperature 35 Screen Format 36 Noise Reduction 37 Film Mode 37 Sound Controls 38 Adjusting The Sound Controls 38 Manual Sound Controls 38 Balance 39 Digital Output 40 Internal Speakers 41 Surround 41 Auto Volume 42 Analog Audio Settings 42 Dig...

Page 7: ...jack If you place devices above the TV route all cables down the side of the back of the TV instead of straight down the middle If your antenna uses 300 ohm twin lead cables do not coil the cables Also keep the twin lead cables away from audio video cables Use shielded interface cables with ferrite cores to maintain compliance for this product Position Cables Properly to Avoid Audio Interference D...

Page 8: ...usts sound level and menu settings 2 CH CH Select a channel 3 SOURCE Selects the TV AV COMPONENT HDMI1 HDMI2 or PC mode 4 MENU Display on screen menus 5 POWER Switches the set on or off 6 Power Indicator Illuminates to bright blue when the TV is on When the TV is powered off this LED is also off Remote control sensor Accepts the IR signal of remote controller ...

Page 9: ...PC 8 RGB IN PC Connect to the video output jack on your PC 9 DIGITAL AUDIO OUT COAXIAL Connect digital audio to various types of equip ment 10 COMPONENT IN YPbPr Video Audio inputs for Component 11 ANTENNA CABLE IN Connect to your antenna or cable box for TV sig nal 12 USB IN SERVICE ONLY Used for software updates 13 AV Connects to your Audio Video devices using a composite Yellow Red White cable ...

Page 10: ...ble from your dealer refer to the optional Wall Mounting Bracket Installation and Setup Guide Wall Mount Sold Separately Note This Television should be installed by a Qualified Service Personnel Desktop Pedestal Installation 4 inches 4 inches 4 inches 4 inches The set can be mounted on a desk as shown above For proper ventilation allow a clearance of 4 inches on each side from the wall Detailed in...

Page 11: ...Chapter 1 Chapter 1 Connections and Setup 11 Parts for stand assembly TV Stand Body Stand Base 4 A type bolts 4 B type bolts ...

Page 12: ...s shown 3 Remove the included stand cover from the product 5 Install the 4 bolts securely in the back of the product in the holes provided 4 Assemble the product stand with the product as shown Stand body Stand base Stand Installation Note Image shown may differ from your TV When mounting TV on the wall install the included Stand Cover over the hole for the stand Press the Stand Cover into the TV ...

Page 13: ...lled in a forward backward direction potentially causing injury or damaging the product Screws M5 x L Table depth 8 10 mm ex table depth 15mm Screws M5 x 25 1 Screw not provided as parts of the product Desk Stand Stand Desk 4 Screws not provided as parts of the product WARNING To prevent TV from falling over the TV should be securely attached to the floor wall per installation instructions Tipping...

Page 14: ...perly contact your dealer for assistance ANTENNA CABLE IN VIDEO Y Pb Pr L R AUDIO COMPONENT IN DIGITAL AUDIO OUT COAXIAL Rear panel of the set Multi family Dwellings Apartments Connect to wall antenna socket Single family Dwellings Houses Connect to wall jack for outdoor antenna Wall Antenna Socket Outdoor Antenna RF Coaxial Wire 75 ohm Turn clockwise to tighten Be careful not to bend the bronze w...

Page 15: ...he VCR manual for operating instruc tions VCR Rear panel of the set To avoid picture noise interference leave an adequate distance between the TV and the VCR A A When connecting with an RCA cable USB IN AV VIDEO L AUDIO R ANT IN ANT OUT S VIDEO IN OUT L AUDIO R VIDEO OUTPUT SWITCH 1 Connect the AUDIO VIDEO port between TV and VCR Match the jack colors Video yellow Audio Left white and Audio Right ...

Page 16: ...layer insert a DVD 4 Select COMPONENT source using the INPUT but ton on the remote control 5 Refer to the DVD player s manual for operating instructions DVD Rear panel of the set DVD Connection A A When connecting with a HDMI cable AUDIO IN RGB DVI SERVICE HDMI DVI IN 1 HDMI IN 2 SERVICE AV MTI HDMI DVD OUTPUT 1 Connect the HDMI output of the DVD to the HDMI IN1 or HDMI IN2 port on the set 2 Selec...

Page 17: ...O IN RGB DVI port on the set 3 Turn on the digital set top box 4 Select PC input source using the INPUT button on the remote control 5 Refer to the digital set top box manual for oper ating instructions Digital Set top Box Rear panel of the set A A When connecting with a HDMI to DVI cable AUDIO IN RGB DVI RGB IN PC HDMI DVI IN 1 HDMI IN 2 SERVICE AV DVI DTV OUTPUT R AUDIO L 1 Connect the DVI outpu...

Page 18: ...x 4 Select COMPONENT source using the INPUT but ton on the remote control 5 Refer to the digital set top box manual for oper ating instructions Digital Set top Box Rear panel of the set A A When connecting with a HDMI cable HDMI DTV OUTPUT AUDIO IN RGB DVI SERVICE HDMI DVI IN 1 HDMI IN 2 SERVICE AV MTI 1 Connect the HDMI output of the digital set top box to the HDMI IN1 or HDMI IN2 port on the set...

Page 19: ...quipment 4 Refer to the external equipment manual for oper ating instructions Camcorder Video game set External A V Source Side panel of the set Digital Audio Out ANTENNA CABLE IN VIDEO Y Pb Pr L R AUDIO COMPONENT IN DIGITAL AUDIO OUT COAXIAL DIGITAL AUDIO IN COAXIAL 1 Connect one end of the optical cable to the TV s DIGITAL AUDIO OUT COAXIAL port 2 Connect the other end of the coaxial cable to th...

Page 20: ...h the PC and TV 4 Select PC input source using the INPUT button on the remote control PC Rear panel of the set PC Connection A A When connecting with a HDMI to DVI cable AUDIO OUT AUDIO IN RGB DVI RGB IN PC HDMI DVI IN 1 HDMI IN 2 SERVICE AV DVI DTV OUTPUT 1 Connect the DVI Output on the PC to the HDMI DVI IN1 Input port on the TV 2 Connect the PC Audio Output to the AUDIO IN RGB DVI jack on the T...

Page 21: ...y kHz Vertical Frequency Hz 640 x 480 800 x 600 1024 x 768 Resolution A A PC 60 000 60 000 60 000 60 000 Vertical Frequency Hz 480 60P 720 60P 1080 60I 1080 60P Resolution A A HDMI Resolution Note a The synchronization input form is separate b If the resolution is not supported No Signal message will be displayed ...

Page 22: ...nd level CH CH Select a channel MUTE Switches the sound on or off 11 INPUT Selects the TV AV COMPONENT HDMI1 HDMI2 or PC mode 12 ANTENNA Unused 13 MENU Displays Basic on screen menu There are 2 remotes for this TV R130K1 user Remote This remote displays a basic user menu when the menu key is pressed R130K2 installer Remote This remote displays an installer menu when the menu key is pressed 14 Navi...

Page 23: ...K2 installer Remote This remote displays an installer menu when the menu key is pressed 14 Navigational Controls Adjusts menu settings Selects menu item 15 OK Accepts your selection 16 INFO Display the current channel information 17 CLEAR Exit from any OSD 1 2 3 4 5 6 7 8 9 0 SYSTEM GUIDE SLEEP SKIP CC GO BACK ANTENNA INPUT RESET MENU OK INFO CLEAR MUTE CH VOL VOL CH ON OFF R130K2 MASTER Remove th...

Page 24: ...o TV Information G G Back Next Adjust Save Settings to USB Source Model DM 931KA File Name Edit J 3 2 Back No Yes Save Settings to USB Save Settings from TV to J32LED tdf file in USB Back Save Settings to USB Settings saved from TV to J32LED tdf file in USB Chapter 3 Configuring your memory stick 1 Press the MENU button to enter the on screen menu 2 Press the Down or Up button to select the Setup ...

Page 25: ...f file in USB TV will restart in a few seconds G G Chapter 3 1 Press the MENU button to enter the on screen menu 2 Press the Down or Up button to select the Setup sub menu and then press the OK button 3 Press the Down or Up button to select the Firmware Upgrade sub menu and then press the OK button 4 Press the Right button to choose Restore Settings to TV and then press the OK button 5 Select the ...

Page 26: ... the remote control Turn on the TV This function automatically finds all channels available through the Antenna or Cable and stores them in memory on the channel list Auto Memorizing You can select a channel number with the CH CH button or NUMBER buttons Channel Selection Press the VOL VOL button to adjust the sound level Volume Adjustment Press the MUTE button The sound is switched off and the mu...

Page 27: ...t the More and then press the OK button 4 Press the Down or Up button to select the Menu Language and then press the OK button 5 Press the Down or Up button to select your desired language English Español or Français 6 Press the MENU button to return to the previous menu The menus can be shown on the screen in multiple languages First select your language 11 20 PM Sep 11 2010 Select Back Menu Back...

Page 28: ...e Tune Signal Strength Remapped Channel 11 20 PM Sep 11 2010 Move Select OK Exit Menu Mode Color Temperature Screen Format Noise Reduction Film Mode Standard Cool 16 9 Off Off 11 20 PM Sep 11 2010 Move Select OK Exit Menu Mode Balance Digital Output Internal Speaker Surround Auto Volume Multi Track More Standard Dolby Digital Off Off Off Stereo 11 20 PM Sep 11 2010 Move Select OK Exit Menu Time V ...

Page 29: ...ss the Left or Right button to select Yes to start the auto search After finding all available channels a display appears briefly showing the number of analog and digital channels found 8 Press the MENU button to return to the previous menu 11 20 PM Sep 11 2010 Move Select OK Back Menu Antenna Auto Memorizing Channel List Fine Tune Signal Strength Remapped Channel G G 11 20 PM Sep 11 2010 Move Sel...

Page 30: ...tton toggles the check mark on and off If the check mark appears next to the channel num ber the channel appears in the channel scan 5 Press the MENU button to return to the previous menu 11 20 PM Sep 11 2010 Move Select OK Back Menu Antenna Auto Memorizing Channel List Fine Tune Signal Strength Remapped Channel G G 11 20 PM Sep 11 2010 Move Add Del Fav View OK Back Menu Channel List 1 3 ADD FAV A...

Page 31: ...pears the screen is unstable therefore try channel adjustments This is only available for analog broadcasting Digital Signal Strength 1 Press the MENU button to enter the on screen menu 2 Press the Down or Up button to select the Channel sub menu and then press the OK button 3 Press the Down or Up button to select the Signal Strength and then press the OK button 4 View the on screen signal strengt...

Page 32: ...utton to select channel to edit name 8 Press the Left or Right button to select an item for editing sub name of channel and then press the OK button 9 Press the Up or Down button to enter the digit or character When finished press the OK button 10 Press the MENU button to return to the previous menu 11 20 PM Sep 11 2010 Move Select OK Back Menu Antenna Auto Memorizing Channel List Fine Tune Signal...

Page 33: ...select between Standard Dynamic Mild When finished press the OK button 5 Press the MENU button to return to the previous menu The various Picture Modes allow you to adjust the display to your viewing preference Picture Controls 11 20 PM Sep 11 2010 Move Select OK Back Menu Mode Color Temperature Screen Format Noise Reduction Film Mode Standard Cool 16 9 Off Off G G 11 20 PM Sep 11 2010 Move Select...

Page 34: ... levels 11 20 PM Sep 11 2010 Move Select OK Back Menu Mode Color Temperature Screen Format Noise Reduction Film Mode Standard Cool 16 9 Off Off G G 11 20 PM Sep 11 2010 Move Select Back Menu Mode Color Temperature Screen Format Noise Reduction Film Mode Manual Contrast Brightness Sharpness Color Tint G G 1 Press the MENU button to enter the on screen menu 2 Press the Down or Up button to select th...

Page 35: ...en press the OK button 4 Press the Down or Up button to choose Normal Cool or Warm When finished press the OK button 5 Press the MENU button to return to the previous menu Choose one of three automatic color adjustment 11 20 PM Sep 11 2010 Move Select OK Back Menu Mode Color Temperature Screen Format Noise Reduction Film Mode Standard Cool 16 9 Off Off G G 11 20 PM Sep 11 2010 Select Back Menu Mod...

Page 36: ...ture will be cropped Zoom2 Choose Zoom 2 when you wish the picture to be altered both horizontally extended and vertically cropped The picture adopting a compromise between alteration and screen coverage 4 3 Following selection will lead you to view a picture with an original 4 3 aspect ratio with black bars appearing at both the left and right sides Screen Format 1 Press the MENU button to enter ...

Page 37: ...press the OK button 3 Press the Down or Up button to select the Film Mode and then press the OK button 4 Press the Down or Up button to select Off or On 5 Press the MENU button to return to the previous menu The user can watch movies with a more realistic picture on analog channels Turn Film Mode On to view movies with optimum preset picture settings 11 20 PM Sep 11 2010 Move Select OK Back Menu M...

Page 38: ...ternal Speaker Surround Auto Volume Multi Track More 80Hz 220Hz 470Hz 1kHz 2 2kHz 4 7kHz 12kHz Standard G G 11 20 PM Sep 11 2010 Move Select Back Menu Mode Balance Digital Output Internal Speaker Surround Auto Volume Multi Track More 80Hz 220Hz 470Hz 1kHz 2 2kHz 4 7kHz 12kHz Manual G G 11 20 PM Sep 11 2010 Move Select OK Back Menu Mode Balance Digital Output Internal Speaker Surround Auto Volume M...

Page 39: ... or Right button to move the sound more to the left or right 5 Press the MENU button to return to the previous menu Adjust the speaker balance for optimum sound quality 11 20 PM Sep 11 2010 Move Select OK Back Menu Mode Balance Digital Output Internal Speaker Surround Auto Volume Multi Track More Standard Dolby Digital Off Off Off Stereo G G 11 20 PM Sep 11 2010 Adjust Back Menu Mode Balance Digit...

Page 40: ...t between Dolby Digital or PCM 5 Press the MENU button to return to the previous menu This option activates the Digital Audio Output This is recommended for use with other devices capable of receiving digital audio signals This mode is set to Off by default Dolby Digital Television will output a digital audio signal PCM Pulse code modulation This mode creates a digital representation of an analog ...

Page 41: ...ton to return to the previous menu Internal speaker can be turned On or Off using this setting Use this feature when connecting external audio equipment to this TV 11 20 PM Sep 11 2010 Move Select OK Back Menu Mode Balance Digital Output Internal Speaker Surround Auto Volume Multi Track More Standard Dolby Digital Off Off Off Stereo G G Surround 1 Press the MENU button to enter the on screen menu ...

Page 42: ...r Surround Auto Volume Multi Track More Off On 11 20 PM Sep 11 2010 Move Select OK Back Menu Mode Balance Digital Output Internal Speaker Surround Auto Volume Multi Track More Standard Dolby Digital Off Off Off Stereo G G 11 20 PM Sep 11 2010 Select Back Menu Mode Balance Digital Output Internal Speaker Surround Auto Volume Multi Track More Mono Stereo SAP Analog Audio Settings 1 Press the MENU bu...

Page 43: ...ish or French 5 Press the MENU button to return to the previous menu Other languages may be available if a digital signal is provided by the broadcasting station 11 20 PM Sep 11 2010 Move Select OK Back Menu Back Minimum Volume Maximum Volume Power On Volume 0 100 Last G G 11 20 PM Sep 11 2010 Adjust Back Menu Back Minimum Volume Maximum Volume Power On Volume 0 Minimum Volume 1 Press the MENU but...

Page 44: ...ume allowed 6 Press the MENU button to return to the previous menu Sets the maximum volume level the TV can reach 11 20 PM Sep 11 2010 Move Select OK Back Menu Back Minimum Volume Maximum Volume Power On Volume 0 100 Last G G 11 20 PM Sep 11 2010 Adjust Back Menu Back Minimum Volume Maximum Volume Power On Volume Last Power On Volume 1 Press the MENU button to enter the on screen menu 2 Press the ...

Page 45: ...m an available digital channel The digital channel signal includes information for the current time provided by the broadcasting station Note Some digital channels may change the time incorrectly using the Automatic Clock Set feature In this event the Alarm may not function as intended and the TV may not turn on at the expected time If the end user will have access to the Alarm it may be best to u...

Page 46: ...reen menu 2 Press the Down or Up button to select the Time sub menu and then press the OK button 3 Press the Down or Up button to select the Clock and then press the OK button 4 Press the Down or Up button to select the Manual and then press the OK button 5 Press the Down or Up button to select the Manual Clock and then press the OK button 6 Press the Down or Up or Left or Right buttons to set the...

Page 47: ...er Off Timer Auto Off No Yes Select Back Menu Clock Manual Clock Daylight Saving Time Zone On Timer Off Timer Auto Off Easten Time Zone Settings 1 Press the MENU button to enter the on screen menu 2 Press the Down or Up button to select the Time sub menu and then press the OK button 3 Press the Down or Up button to select the Time Zone and then press the OK button 4 Press the Left or Right button ...

Page 48: ...function will only operate when the current time has been set This function automatically turns the TV On at the specific time you designate Auto Off Time Settings 1 Press the MENU button to enter the on screen menu 2 Press the Down or Up button to select the Time sub menu and then press the OK button 3 Press the Down or Up button to select the Off Timer and then press the OK button 4 Press the Do...

Page 49: ...p button to select Off or On 5 Press the MENU button to return to the previous menu If there is no signal on the TV for 15 minutes or more or if no button is pressed for more than 3 hours this function turns off the TV automatically 11 20 PM Sep 11 2010 Move Select OK Back Menu Clock Manual Clock Daylight Saving Time Zone On Timer Off Timer Auto Off Auto Yes Off Off Off G G 11 20 PM Sep 11 2010 Se...

Page 50: ...d As soon as the 4 digits are entered re enter the same 4 digits on the Confirm PIN 8 Press the MENU button to return to the previous menu Parental Control can be used to block specific channels ratings and other viewing sources The default password of 0 0 0 0 is required to gain access to this menu Parental Control 11 20 PM Sep 11 2010 Move Select OK Back Menu On Off Changing PIN Set Block Hour T...

Page 51: ...enu Enables or disables a parental blocking scheme 11 20 PM Sep 11 2010 Move Select OK Back Menu On Off Changing PIN Set Block Hour TVPG Rating MPAA Rating Can English Rating Can French Rating D L Rating On 12 G G 11 20 PM Sep 11 2010 Select Back Menu On Off Changing PIN Set Block Hour TVPG Rating MPAA Rating Can English Rating Can French Rating D L Rating 11 20 PM Sep 11 2010 Back Menu Number 0 9...

Page 52: ...programs viewed on TV Ratings with a lock next to them will be blocked from being viewed 11 20 PM Sep 11 2010 Move Select OK Back Menu On Off Changing PIN Set Block Hour TVPG Rating MPAA Rating Can English Rating Can French Rating D L Rating On 12 G G 11 20 PM Sep 11 2010 Move Select OK Back Menu Allow All TV TV Y TV Y7 TV G TV PG TV 14 TV MA FV D L S V Block All On Off Changing PIN Set Block Hour...

Page 53: ...ted violence some suggestive sexual dialog and situations TV G General audience This contains little or no violence no strong lan guage and little or no sexual dialog or situations TV Y7 Directed for older children Themes and elements in this program may include mild physical or comedic violence or may frighten children under the age of seven TV Y All children The themes and elements in this progr...

Page 54: ...em Movies G General Audience PG Parental guidance suggested PG 13 Parents strongly cautioned R Restricted NC 17 No one 17 and under admitted X Adults only Note If you block PG 13 G and PG movies will be available PG 13 R NC 17 and X will be blocked 11 20 PM Sep 11 2010 Move Select OK Back Menu On Off Changing PIN Set Block Hour TVPG Rating MPAA Rating Can English Rating Can French Rating D L Ratin...

Page 55: ...press the OK button 5 Press the Down or Up or Left or Right buttons to select and set up the menu options for Can English Rating 6 Press the MENU button to return to the previous menu This rating system has been established to help you monitor and block the types of programs viewed on TV Ratings with a lock next to them will be blocked from being viewed Canadian English Ratings C Children C8 Child...

Page 56: ...ench Ratings G General 8 ans General Not convenient for little children 13 ans Not convenient for children of 13 years and younger 16 ans Not convenient for children of 16 years and younger 18 ans This programs is only for adult 11 20 PM Sep 11 2010 Move Select OK Back Menu On Off Changing PIN Set Block Hour TVPG Rating MPAA Rating Can English Rating Can French Rating D L Rating On 12 G G 11 20 PM...

Page 57: ... select the D L Rating and then press the OK button 5 Press the Down or Up buttons to select Dim0 Dim1 Dim2 or Dim3 and press the OK button 6 Press the MENU button to return to the previous menu Your TV s OSD On Screen Display may differ slightly from what is shown in this manual Note This function may become available in the future and will be available only for digital channel signal This functi...

Page 58: ...Up button to select the Caption and then press the OK button 3 Press the Down or Up button to select the On Off and then press the OK button 4 Press the Down or Up button to select Off or On 5 Press the MENU button to return to the previous menu 11 20 PM Sep 11 2010 Move Select OK Back Menu On Off Analog Mode Digital Mode Digital Font Option Off G G 11 20 PM Sep 11 2010 Select Back Menu On Off Ana...

Page 59: ...when watching a regular analog channel Caption The term for the words that scroll across the botto mof the TV screen usually the audio portion of the program provided for the hearing impaired TEXT The term for the words that appear in a large black frame and almost cover the entire screen usually messages provided by the broadcaster Note If you want to select directly the Closed Captions press the...

Page 60: ...on 4 Press the Down or Up button to select between Service1 Service2 Service3 Service4 Service5 or Service6 5 Press the MENU button to return to the previous menu The Digital Caption function only operates on digital channels 11 20 PM Sep 11 2010 Move Select OK Back Menu On Off Analog Mode Digital Mode Digital Font Option Off CC1 Service1 G G 11 20 PM Sep 11 2010 Select Back Menu On Off Analog Mod...

Page 61: ...r Up button to select the Caption and then press the OK button 3 Press the Down or Up button to select the Digital Font Option and then press the OK button 4 Press the Down or Up button to select desired cap tion option you wish to change Select between Font Size Font Style Foreground Color Background Color Edge Color Foreground Opacity Background Opacity Edge Style 5 Press the OK button and then ...

Page 62: ... Back Menu Time V Chip PC SI Vender Select Firmware Upgrade Power on Channel A D Channel Merge More FTG Last On G G Power On Channel 1 Press the MENU button to enter the on screen menu 2 Press the Down or Up button to select the Setup and then press the OK button 3 Press the Down or Up button to select the Power On Channel and then press the OK button 4 Press the Down or Up button to select your p...

Page 63: ...nnel A D Channel Merge More FTG Last On G G Off On Menu Language 1 Press the MENU button to enter the on screen menu 2 Press the Down or Up button to select the Setup and then press the OK button 3 Press the Down or Up button to select the More and then press the OK button 4 Press the Down or Up button to select the Menu Language and then press the OK button 5 Press the Down or Up button to select...

Page 64: ...Semi Opaque Off TV G G 11 20 PM Sep 11 2010 Select Back Menu Back Menu Language Menu Transparency Front Panel Lock Power on Source Opaque Semi Opaque Semi Trans Transparent Front Panel Lock 1 Press the MENU button to enter the on screen menu 2 Press the Down or Up button to select the Setup and then press the OK button 3 Press the Down or Up button to select the More and then press the OK button 4...

Page 65: ... Power on Source and then press the OK button 5 Press the Down or Up button to select your pre ferred source with the TV turns on 6 Press the MENU button to return to the previous menu This setting determines the source the TV will tune when turned On 11 20 PM Sep 11 2010 Move Select OK Back Menu Back Menu Language Menu Transparency Front Panel Lock Power on Source English Semi Opaque Off TV G G 1...

Page 66: ...urn to the previous menu This function automatically adjusts the screen position frequency phase and scale in pc mode The displayed image will disappear for a few seconds while the auto configuration is in progress If the result of the automatic adjustment is not correct you can manually adjust the settings to fit your viewing prefer ence Setting the PC Mode Note Select the PC mode by pressing eit...

Page 67: ...tton 3 Press the Down or Up button to select the PC and then press the OK button 4 Press the Down or Up button to select Position Frequency Phase and then press the OK button 5 Press the Left or Right button to make appropriate adjustment 6 Press the MENU button to return to the previous menu If the result of the automatic adjustment is not correct you can manually adjust the settings to fit your ...

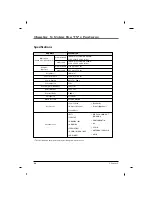
Page 68: ...N1 HDMI IN2 SERVICE AV AUDIO IN RGB DVI RGB IN PC DIGITAL AUDIO OUT COAXIAL COMPONENT IN AV USB IN ANTENNA CABLE IN AC IN Power Cord Owner s Manual Stand Base Stand Body Remote Optional Dimension Width x Height x Depth Weight kg lbs without stand with stand without stand with stand 794 5mm x 512 0mm x 99 5mm 31 28 x 20 16 x 3 92 inches 794 5mm x 573 0mm x 228mm 31 28 x 22 56 x 8 98 inches 11 0 kg ...

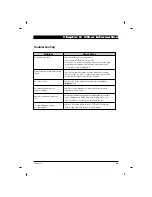
Page 69: ...d press the Left or Right button Check for local interference such as a nearby electrical appliance or power tool A change in ambient humidity or temperature may result in an unusual noise at the time of switching off or on of the set and does not indicate a fault with the set Ensure SI Vender Select is set to FTG for Free to Guest system types Or PPV for pay per view system No picture on screen P...

Page 70: ...L OR PUNITIVE DAMAGES OF ANY NATURE INCLUDING WITH OUT LIMITATION LOST PROFITS LOST OR CORRUPTED PROGRAMMING OR DATA OR ANY OTHER DAMAGE WHETHER BASED IN CONTRACT TORT OR OTHERWISE Some states do not allow the exclusion or limitation of incidental or consequential damages or limitations on how long an implied warranty lasts so the above exclusion or limitation may not apply to you This warranty gi...

Page 71: ...damage failure loss or personal injury due to misuse abuse negligence improper maintenance or storage or to acts of nature or other causes beyond our control Causes beyond our control include but are not limited to lightning strike power surges power outages and water dam age Image burn in Repair or replacement of warranted parts by anyone other than an authorized service centers Units purchased o...

Page 72: ......

Page 73: ...MEMO 73 ...

Page 74: ...MEMO 74 ...

Page 75: ......

Page 76: ...ercialtv com Please do not send any products to the Indianapolis address listed in this manual or on the carton This will only add delays in service for your product DTI Services LLC 5350 Lakeview Parkway S Dr Indianapolis In 46268 1 800 RCA 2161 ...

Reviews: