background image

8

Programmable Memory

This unit can play JPEG files recorded on a CD-R or CD-ROM disc (CD-RW 
is not recommended).

Viewing JPEG Files 

1.  Press the 

OPEN

 knob to open 

the disc door.

2.   Hold a JPEG file disc by its edges 

and  gently  push  it  onto  the 
spindle with the label side facing 
up until you hear a “click”.

3.  Close the disc door. The JPEG 

files on the disc will be displayed 
one by one automatically. If the disc does not play automatically, 
press the   

PLAY 

button on the remote control or   button on the 

unit.

4.  Press the 

MENU

 or   

STOP

 button to display a folder list. Press the   

/   button to highlight a JPEG file to play. Press the   

PLAY

 button 

on the remote control or   button on the unit to start playback.

Viewing JPEG Files

Viewing JPEG Files

Customizing the Function Settings

Language Setup

1.  Press the 

SETUP

 button on the 

remote control or 

MENU

 button 

on the unit in stop mode (when 
disc is not playing).

2.  Press  the    button  to  select 

Language Menu.

3.  Press the   /   button to select 

the option (Player Menu, Audio, Subtitle or Disc Menu), then press 
the   button. 

4.  Press the   /   button to select your preferred language, then press 

the 

ENTER

 button to confirm.

5.  Repeat steps 3 and 4 to adjust other options. Press the   button to 

return to the previous menu.

6.  Press the 

SETUP

 or 

RETURN

 button to exit the menu.

Notes: 

•  Some DVDs may not play in the audio language you selected. A 

prior language may be programmed on the disc.

•  Some DVDs may be set to display subtitles in a language other 

than the one you selected. A prior subtitle language may be 
programmed on the disc.

•  Some DVDs allow you to change subtitle selections using the disc 

menu only. If this is the case, press the 

MENU

 button and choose 

the appropriate subtitle language from the selection on the disc 
menu.

•  Some DVDs may not include your pre-selected language. In this 

case, the DVD player automatically displays disc menus consistent 
with the disc’s initial language setting.

Video Setup

1.  Press the 

SETUP

 button on the 

remote control or 

MENU

 button 

on the unit in stop mode (when 
disc is not playing).

2.  Press the   /   button to select 

Video Menu.

3.  Press the   /   button to select 

the option (Brightness or Contrast), then press the   button. 

4.  Press the   /   button to adjust the setting, then press the 

ENTER


button to confirm.

5.  Repeat steps 3 and 4 to adjust other options. Press the   button to 

return to the previous menu.

6.  Press the 

SETUP

 or 

RETURN

 button to exit the menu.

System Setup

1.  Press the 

SETUP

 button on the remote control or 

MENU

 button on 

the unit in stop mode (when disc is not playing).

2.  Press the   /   button to select System Menu.
3.  Press the   /   button to select the option (TV Display or Default), 

then press the   button. 

Go To Language Menu

- - Language Menu - -

System

Language

Video

Player Menu
Audio
Subtitle
Disc Menu

Eng
Eng
Off
Eng

Brightness
Contrast

To

- -

- -

Language

00
00

System

Video

Go To Video Menu

Video Menu

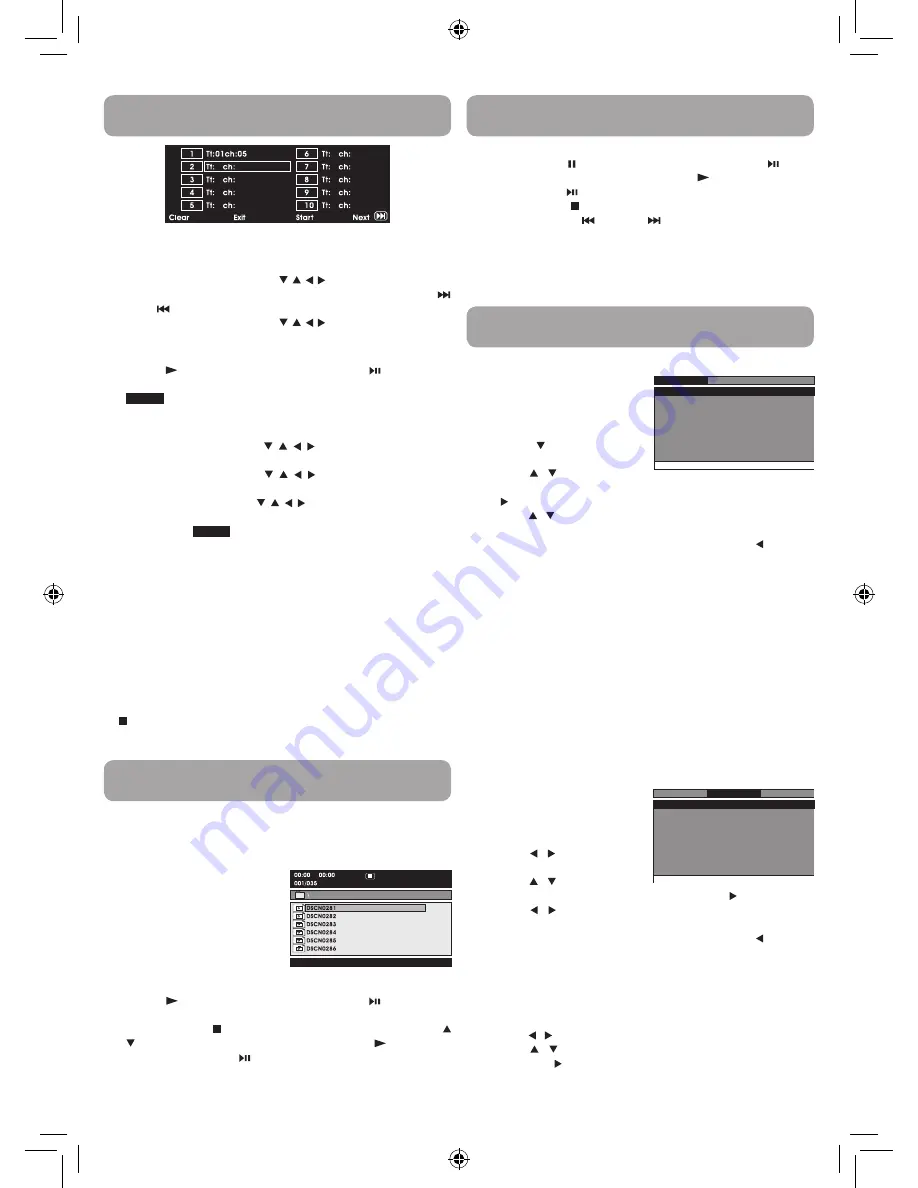
2.  Input the title (2 digits) and chapter (2 digits) by pressing the 

number buttons (for example: 01 02, 02 05, 02 11). It will move to 
the next item automatically. 

•  You can use the Cursor buttons ( ,  ,  ,


) to move the highlighted 

bar to any item, and re-enter the title and chapter. Press the 


NEXT

 / 

 PREV

 to move to the next / previous setup page. 

•  You can use the Cursor buttons ( ,  ,  ,


) to move the highlighted 

bar to “Clear”, “Exit”, “Start” or “Next / Prev”, and press the 

ENTER


button to confirm.

3.  Press the   

PLAY

 button on the remote control or   button on the 

unit to start memory playback. 

     (“ 

Program

Program

 ” appears on the screen).

4.  To resume normal playback from memory playback

1). Press the 

MEMORY

 button to display the memory menu.

2). Use the Cursor buttons ( ,  ,  ,  ) to move the highlighted 

bar to “Stop”. Press the 

ENTER

 button to confirm “Stop”.

3). Use the Cursor buttons ( ,  ,  ,  ) to highlight “Clear”, and 

then press the 

ENTER

 button to confirm.

4). Use the Cursor buttons ( ,  ,  ,  ) to highlight “Exit”, and then 

press the 

ENTER

 button to confirm. It will return to normal 

playback (“ 

Program

Program

 ” disappears from the screen).

Notes:

•  If the title or chapter number entered is not permitted by the DVD, 

it will disappear. you should re-enter correct number.

•  You should input items one by one following the 1, 2, 3 ... sequence.
•  If the DVD contains only one title, you can only arrange order for 

chapters.

•  Some discs may not permit memory playback operation.
•  If you select repeat during memory playback, the DVD player 

repeats the current memory playback.

•  If you press the 

MEMORY

 button while the display appears on the 

TV screen, the display disappears.

•  The programmed selections will be cleared when you press the 


STOP

 button two times, open the disc tray or turn off the DVD 

player.

Notes:

•  You can press the   

PAUSE

 button on the remote control or   button 

on the unit to freeze the picture. Press the   

PLAY

 button on the 

remote control or   button on the unit to resume picture slide show.

•  You can press the   

STOP

 button to quit playback.

•  You can press the 


PREV

 or 


NEXT

 button to change the 

picture.

•  You can press the 

ANGLE

 button to rotate direction of the picture 

by 90°.

•  Some discs may not permit this operation.

RCA DRC99392_Eng & Spa IB_MTK A5_17-3-2011.indd   8

3/28/2011   10:31:05 AM

Summary of Contents for DRC99392

Page 1: ...re using your new product for the first time Es importante leer este manual antes de usar por vez primera su equipo DRC99392 user manual manual de usuario EN ES RCA DRC99392_Eng Spa IB_MTK A5_17 3 2011 indd 1 3 28 2011 10 31 02 AM ...

Page 2: ...on inside the unit the unit may not function normally Let the unit stand for 1 to 2 hours before turning the power on or gradu ally heat the room and allow the unit to dry before use Ventilation Warning Do not block the ventilation openings or holes If the ventilation openings or holes are blocked by a newspaper or cloth etc the heat may not be able to get out Do not operate the unit in a confined...

Page 3: ... at plugs convenience receptacles and the point where they exit from the apparatus 11 Only use attachments accessories specified by the manufacturer 12 Use only with a cart stand tripod bracket or table specified by the manufacturer or sold with the apparatus When a cart is used use caution when moving the cart apparatus combination to avoid injury from tip over 13 Unplug this apparatus during lig...

Page 4: ...verse playback SEARCH Fast forward playback 4 GOTO button Skip directly to a location on a CD DVD 5 Cursor buttons Move between selections on a menu screen and adjust certain settings ENTER button Confirm selections on a menu screen 6 MEMORY button Set titles chapters in a favorite order 7 Number 0 9 buttons Use when creating programs or locating a title chapter track or specific time 8 REPEAT A B...

Page 5: ...e or the like Note When the built in battery power is low Battery Low will display on the screen and the unit will stop playing Recharge the built in battery when you are ready to use it again While using the built in battery the environmental temperature should be 41 F 5 C to 95 F 35 C To get the longest service life of the built in battery charge at indoor temperature The built in battery in thi...

Page 6: ...track number Audio Selection On some DVDs the sound is recorded in two or more formats Follow the directions below to select the preferred language and sound system 1 While a disc is playing press the AUDIO button to show the current audio format number Audio 1 3 Dolby D 2ch English Audio 1 3 Dolby D 2ch English 2 Press the AUDIO button repeatedly to select the desired audio format Notes If only o...

Page 7: ...he chapter title number entered is not permitted by the DVD Input invalid Input invalid will display Repeat steps 1 and 2 to re enter the correct number Some discs may not respond to this process This method of locating a chapter title is available only on a DVD that contains chapter title numbers Locating a Specific Time You can move to a specific location by entering its corresponding time hours...

Page 8: ... 1 Press the SETUP button on the remote control or MENU button on the unit in stop mode when disc is not playing 2 Press the button to select System Menu 3 Press the button to select the option TV Display or Default then press the button Go To Language Menu Language Menu System Language Video Player Menu Audio Subtitle Disc Menu Eng Eng Off Eng Brightness Contrast To Language 00 00 System Video Go...

Page 9: ...f the surfaces are extremely dirty wipe clean with a cloth that has been dipped in a weak soap and water solution and wrung out thoroughly then wipe with a dry cloth Never use alcohol benzine thinner cleaning fluid or other chemicals Do NOT use compressed air to remove dust Important Note Before transporting the unit remove the disc from the disc compartment Sound System Dolby Digital Dolby Digita...

Page 10: ...fitness for a particular purpose are expressly limited to the duration of the limited warranties set forth above With the exception of any warranties implied by state law as hereby limited the foregoing warranty is exclusive and in lieu of all other warranties guarantees agreements and similar obligations of manufacturer or seller with respect to the repair or replacement of any parts In no event ...

Page 11: ...ndensación Si deja la unidad en un lugar caluroso y húmedo es posible que en el interior del reproductor la unidad se formen pequeñas gotas o que se forme condensación Si existe condensación Si existe condensación en el interior del aparato es posible que la unidad no funcione de manera normal Deje que la unidad esté en reposo por 1 ó 2 horas antes de encenderla o bien gradualmente entibie la habi...

Page 12: ...rucciones 5 No use este aparato cerca del agua 6 Limpie solo con un paño seco 7 No bloquee ninguna de las aberturas de ventilación Instale de acuerdo a las instrucciones del fabricante 8 No instale cerca ninguna fuentes de calor tales como radiadores registros de calor estufas u otros aparatos incluyendo amplificadores que producen calor 9 No anule el propósito de seguridad del enchufe de tipo pol...

Page 13: ...e DVD en caso que ésta característica se encuentre disponible Botón RETURN Regresa al funcionamiento normal luego de usar el menú de programación de un disco de DVD Guía de referencia para los controles Guía de referencia para los controles 1 Pantalla de LCD 2 Enchufe DC IN 9V 12V 3 Enchufes AUDIO VIDEO OUT 4 CHARGE STANDBY ON carga apagado encendido 5 Control VOLUME Ajusta el volumen 6 Enchufe pa...

Page 14: ...a a calor por encima de los 212 F 100 C o incinere La unidad no deberá exponerse al calor excesivo tal como el de la luz solar incendio o similares Cuando deseche la unidad deberán considerarse los problemas ambientales y las reglas y leyes locales que rijan la eliminación de tales productos deberán seguirse de manera estricta C Cómo usar la batería integrada La unidad tiene una batería integrada ...

Page 15: ... variar dependiendo del disco Saltear hacia delante hacia atrás Presione el botón NEXT para avanzar a títulos capítulos pistas siguientes Presione el botón PREV para retroceder a títulos capítulos pistas anteriores En el caso de los discos compactos de audio use los botones numéricos del control remoto para ir directamente al número de pista deseado Selección de audio En el caso de algunos discos ...

Page 16: ...produciendo un DVD con diferentes ángulos grabados presione el botón ANGLE para ver el número de ángulos disponibles 2 Presione el botón ANGLE repetidas veces para cambiar la escena al siguiente ángulo grabado Alrededor de dos segundos después la reproducción continuará en el nuevo ángulo seleccionado Si no presiona ningún botón dentro de 10 segundos la reproducción continúa sin cambiar el ángulo ...

Page 17: ...dio Subtitle Disc Menu Eng Eng Off Eng 2 Presione las teclas numericas correspondientes 5 digitos X XX XX por ejemplo 0 30 05 1 08 23 1 22 56 para el punto de fijacion que desea 3 Playback se inicia desde la seccion seleccionada Notas Si el horario ingresado no esta permitido por el DVD aparecera Input invalid Input invalid Debera re ingresar el horaro correcto Algunos discos pueden no responder a...

Page 18: ... imagen de reproducción de algunos discos de video de DVD no concuerde con el tamaño de la imagen que haya selecionado Cuando usted reproduce discos de video de DVD que estén grabados sólo en un tamaño de imagen de 4 3 la imagen de reproducción siempre aparecerá en un tamaño de imagen de 4 3 sin importar la programación del Pantalla de Televisión Seleccione Pantalla ancha Wide Screen para ajustar ...

Page 19: ...e ayuda en internet http www RCAav com Mantenimiento Limpieza del disco Si pone en el equipo un disco defectuoso o sucio esto puede provocar irregularidadesen el sonido durante la reproducción Al tomar el disco hágalo sosteniendo so borde interior y exterior NO toque la superficie del lado del disco que no tiene escritura NO pegue papeles ni cinta adhesiva en la superficie del disco NO exponga el ...

Page 20: ...strucciones que acompañan este producto o de haber modificado o alterado el producto sin la autorización de AVC o de haber quitado o cambiado el número de serie de las piezas o del producto Fuera de la Garantía En caso que su producto necesite ser reparado y que el período de garantía ya haya expirado sírvase contactarse con el Centro de Ayuda al Cliente en el fono 1 800 506 5746 1 877 252 6873 o ...

Reviews: