background image

Graphics contained within this publication are for representation only.

28

Chapter 2: Recording and Playback

VCR Basics

The VCR part of your DVD/VCR has all the basic functions of other VCRs. The basic concepts are explained below.

Basic Playback

1.


Tune the TV to your DVD/VCR viewing channel (03, 04, or the Video Input Channel).

2.


Insert a tape in the DVD/VCR.

3.


Press PLAY to play the tape.

• 

Press SKIP F. (forward) or SKIP R.(reverse) to cue the tape to the desired position during Play mode.

• 

Press PAUSE to stop action. For slow-motion playback, press SLOW (while picture is paused). To move one frame at a time, press PAUSE on the 
remote (while paused)—each time you press PAUSE, the video moves forward one frame.

• 

Press the TRK+/– buttons to remove any streaks from the picture, if necessary.

• 

Press STOP to stop playback.

Tape Eject

Press the STOP/EJECT button when stopped to eject the tape. You can also press the OPEN•CLOSE button on the remote control to eject the tape.

Basic Recording

1.


If necessary, change the tape speed (SP or SLP) by pressing the SP/SLP button.

2.


If you’re watching TV, press the RECORD button on the front of the DVD/VCR (the VCR’s 
RECORD button that is next to the STANDBY/ON button turns on) to begin recording.

3.


Press the STOP button to halt recording.

If you just want to pause the recording for a short time (like during a commercial), press PAUSE 
instead of STOP. To resume recording, press the RECORD button on the remote control.

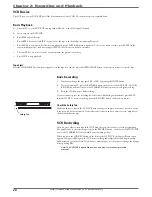
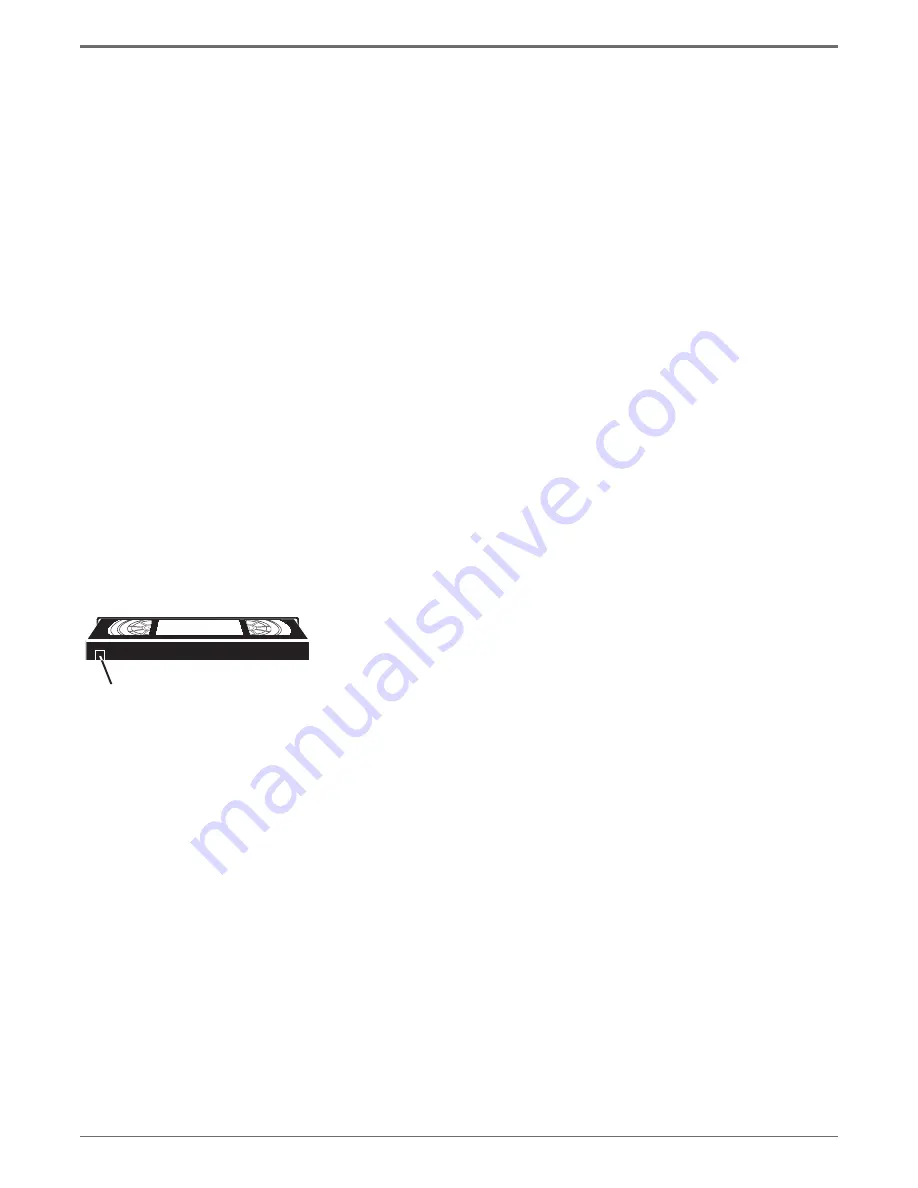
Check the Safety Tab

Make sure there is a tape in the DVD/VCR with its safety tab in place. You cannot record on a tape 
if the safety tab has been removed. If the safety tab is removed and you want to record, simply cover 
the hole with adhesive tape.

VCR Recording

After you put a videocassette tape in the VCR deck, there are several ways to record programming. 
The quickest way to start recording is to press the RECORD button (on the front of the DVD/VCR 
next to the STANDBY/ON button) while you’re watching a show. 

When you press the VCR REC button on the front of the DVD/VCR, the Express Record screen 
appears. If you press REC again, the VCR starts recording and accepts the default length, quality, 
and destination set on the screen. If you want to make changes, use the remote to change the settings 
before pressing REC.

Note: The DVD/VCR supports Macrovision and won’t record copy-protected 
material.

Safety Tab

Summary of Contents for DRC8320N

Page 1: ...Changing Entertainment Again DVD Recorder VCR Combo User s Guide DRC8320N ...

Page 2: ...parts and service and for proof of purchase Attach it here and record the serial and model numbers in case you need them The numbers are located on the back of the DVD Recorder Model No __________________________ Serial No __________________________ Purchase Date ___________________________________________________________ Dealer Address Phone ____________________________________________________ Th...

Page 3: ...to a DVD disc 26 Recording from a DV Camcorder 26 DVD Playback 26 Editing DVD Discs 27 VCR Basics 28 Basic Playback 28 Tape Eject 28 Basic Recording 28 VCR Recording 28 Express Recording 29 Watching one channel while you record another channel cable with no cable box or antenna only 29 Timer Recordings 29 Regional Coding 30 Types of discs you can play 30 How to Load and Play Discs 30 Using Differe...

Page 4: ...ssion CDs Video CD VCD Like DVD video discs VCDs contain picture and sound content The difference is the amount of information that can be stored on the disc VCDs typically have lower picture and sound quality than DVD discs You must use DVD R or DVD RW discs to record on your DVD recorder not VCDs Things to consider before you connect Protect components from overheating Don t block ventilation ho...

Page 5: ...t of audio video cables RF Coaxial cable Connection Pictures Audio video cables are usually bundled together For better visibility the connection pictures in this book show each cable separately audio left audio right and video Graphics contained within this publication are for representation only Unpack the Box Your DVD VCR came with the following items ...

Page 6: ...deo TV cable box page 12 Coaxial Audio video S Video ComponentVideo TV satellite receiver page 14 To achieve enhanced picture quality use an S Video cable or component video cables to connect your DVD VCR recorder to your TV if your TV has corresponding jacks available TV Coaxial Audio video S Video Digital Audio ComponentVideo TV cable box audio receiver Cable Box page 16 Audio Receiver DVD VCR S...

Page 7: ...e color part of the picture separate from the black and white part of the picture If your TV has an S VIDEO jack connect the DVD recorder to the TV with an S Video cable for a better quality picture Note Remember to connect the left and right audio cables because the S Video cable carries only the picture signal not the sound Audio Video Jacks and Cables RCA type Video The basic Video jack usually...

Page 8: ...e source to the DVD VCR RF OUT Connect an RF coaxial cable provided to this jack and to the Cable Antenna Input jack on your TV It is important to connect this cable so that your TV receives programming even when the DVD VCR is turned off INPUT These jacks receive audio and video from a compatible component such as a satellite receiver Another set of Input Jacks INPUT 2 are on the front of the DVD...

Page 9: ... cable to the CABLE ANTENNA OUTPUT jack the yellow cable to the VIDEO Output jack or an S Video cable to the S VIDEO OUT jack because you can only use Component Video for DVD Playback You ll need to have another Video Output connected for playback of VCR tapes VIDEO Color coded yellow the video cable you use with this jack provides better quality than an RF coaxial cable but isn t as good as S Vid...

Page 10: ...uld press the SOURCE button until FAV Front audio video jacks appears DVD Buttons CH SKP channel down skip reverse Goes to the previous channel in the channel list when you re watching TV When playing a disc goes to the beginning of the current chapter or track unless you re within the first minute of a chapter or the first 15 seconds of a track then you ll skip to the beginning of the preceding cha...

Page 11: ...rack Chapter 5 Start stop time 6 AM PM 7 Month Day Date 8 INtro Digest mode 9 Audio stereo and left right channel 10 Program mode 11 Random play 12 Multi angle 13 Zoom 14 Mute 15 Lock 16 Repeat A B 17 Weekly Daily Weekday 18 Repeat mode 19 Playing information Time Counter or message 20 Recording activation 21 Pause 22 Play 23 VCD play back control 24 Dolby Digial content ...

Page 12: ...ress RECORD Use the buttons on the TV or the TV s remote control to tune the TV to the channel you want to watch For example change the channel on the TV to channel 8 to watch a program on channel 8 To play a disc or tape Tune the TV to its Input 1 channel or Vid 1 channel If you need help finding your TV s various Video Input Channels go to page 22 Details about the different kinds of cables used...

Page 13: ...deo cables was packed with your DVD recorder Connect the audio cables to the AUDIO OUTPUT L left white and R right red jacks on the back of your DVD recorder and to the corresponding Audio Input jacks on your TV sometimes labeled AUDIO IN L and R 2c Connect the video cable The cables you use for the video determine the quality of the picture you ll see on your TV when you re playing DVDs For more ...

Page 14: ...nnection diagram Normally ANALOG cable boxes are used so that the cable company can scramble the signal for premium channel programming like movie channels The cable box will descramble the signal if you are a premium channel subscriber In some cases your cable company may not scramble the signal for basic channels and the signal could be passed through the cable box so that you could receive the ...

Page 15: ...2b Connect the audio cables A set of audio video cables was packed with your DVD recorder Connect the audio cables to the AUDIO OUTPUT L left white and R right red jacks on the back of your DVD recorder and to the corresponding Audio Input jacks on your TV sometimes labeled AUDIO IN L and R 2c Connect the video cable The cables you use for the video determine the quality of the picture you ll see ...

Page 16: ...l press the SOURCE button on the remote Tune the satellite receiver to the channel you want to watch Tune the TV to its Input 1 channel or Vid 1 channel To watch TV satellite programming with the DVD recorder turned off Tune the TV to its CABLE ANTENNA INPUT channel usually channel 2 3 or 4 Tune the satellite receiver to the channel you want to watch To play a disc Important You can t watch one sa...

Page 17: ... cable to the DVD recorder s RF OUT jack and to the TV s Antenna Input jack sometimes labeled CABLE ANTENNA It is important to make this connection so you can watch satellite programs when the DVD recorder is off 3b Connect the audio cables A set of audio video cables was packed with your DVD recorder Connect the audio cables to the AUDIO OUTPUT L left white and R right red jacks on the back of yo...

Page 18: ...ot scramble the signal for basic channels and the signal could be passed through the cable box so that you could receive the signal with the DVD recorder There are also DIGITAL cable boxes that are relatively new and are used with digital cable service Even with digital cable service analog signals are often carried on the same cable Using the connection diagram above you won t be able to watch on...

Page 19: ...n order to see the content from the DVD recorder whether it s a TV program or a disc you re playing 2a Use the RF coaxial cable that was packed with your DVD recorder and connect one end to the RF OUT jack on the DVD recorder Connect the other end to the Cable Antenna Input jack on the back of your TV sometimes labeled CABLE ANTENNA 2b Connect the video cable The cables you use for the video deter...

Page 20: ... Connections and Setup Notes If your TV is capable of progressive scan connect the DVD recorder to the TV using the COMPONENT VIDEO OUT jacks and press the PSCAN button on the remote to toggle between progressive scan and interlace 4 Plug the power cord into an AC outlet Go to page 19 ...

Page 21: ...nent you want to operate so the signal isn t blocked Turn on the TV and DVD VCR 1 Turn on the DVD VCR press the ON button on the remote 2 Turn on the TV and tune it to the correct Video Input Channel if you don t know how to access the Video Input Channel on your TV go to page 22 for help If you used coaxial cable to connect to your TV tune your TV to channel 3 or 4 You ll know you are on the righ...

Page 22: ...o go back to the previous screen highlight and select BACK Notes If you ve connected a cable box or satellite receiver to the RF IN jack turn on the cable box or satellite receiver before completing this step If you ve connected a satellite receiver to the RF IN jack choose Antenna for this step CATV cable service Antenna no cable service just off air antenna Searching for Channels The DVD VCR aut...

Page 23: ...ut to the TV Discs for Recording Recording to DVD discs is new to many people There are several different formats of DVD discs For your DVD recorder only DVD R 2 4x 4x 8x or 16x and DVD RW 2 4x and 4x type discs can be used for recording A DVD RW disc is rewritable which means you can use the disc over and over again similar to how you use VCR tapes to record Additionally DVD RW discs have many di...

Page 24: ...n the TV s remote control sometimes the Video Input Channel is stored in your TV s channel list Next Steps This chapter is dedicated to connecting your DVD recorder and information on the remote control Choose what you want to do next and go to the appropriate chapter for instructions Chapter 2 Recording and Playback page 25 This chapter tells you how to record and playback programs how to use spe...

Page 25: ... available output modes for high definition resolution 480i 480p 720p and 1080i SETUP Brings up the DVD VCR s main menu SOURCE Toggles the Input jacks on the Recorder Tuner cable antenna Front AV and Front SV S video Rear AV Rear SV S video and DV Mini DV TRK Tracking Adjusts the tracking for the tape DISC OPER This button has no function for this product DISPLAY Displays the on screen Info Display...

Page 26: ... brings up the disc edit menu Also turns on Play Back Control for Video CDs ZOOM Enlarges the image on the screen so you can zoom in on details To pan and scan after you ve zoomed in on an image use the arrow buttons The Zoom feature isn t available on all discs Typically it works with DVD discs and CD Rs with JPEG files Using the Remote s Features Understanding the SOURCE button Another important ...

Page 27: ... recorded DVD discs and many pre recorded VHS tapes Express Recording When you press the RECORD button on the remote or on the front of the DVD recorder the Express Recording screen appears Here you can choose the duration of the recording For the duration each time you press RECORD the recording time increases by 30 minutes up to the maximum limit The DVD recorder will record for the amount of ti...

Page 28: ...ming via a satellite receiver or digital cable box this feature isn t available you can t record one satellite or digital cable program and watch another satellite or digital cable program Copying a video cassette tape to a DVD disc 1 Put a DVD R or DVD RW disc into the disc tray if it s a blank disc you ll need to wait for the DVD VCR to initialize the disc 2 Put the tape you want to transfer to ...

Page 29: ... Selects the currently highlighted title Rename Renames the selected title Chapter Edit From this menu you can add delete hide and show chapters Index This feature allows you to choose what image frame of the title you want to use as the thumbnail image for the disc When selected the title starts playing Press RECORD when the frame you want is displayed Divide You can divide a title into two separ...

Page 30: ... press the RECORD button on the front of the DVD VCR the VCR s RECORD button that is next to the STANDBY ON button turns on to begin recording 3 Press the STOP button to halt recording If you just want to pause the recording for a short time like during a commercial press PAUSE instead of STOP To resume recording press the RECORD button on the remote control Check the Safety Tab Make sure there is...

Page 31: ...ou re recording you need to make sure you ve connected the DVD VCR to the TV properly both audio video cables and an RF coaxial cable need to be connected 1 Make sure the DVD VCR and the TV are on Tune the TV to the appropriate Video Input Channel if you need help go to page 22 2 Put a tape with its safety tab intact into the VCR deck 3 Using the DVD VCR s channel buttons tune to the program you w...

Page 32: ...You can t play the following types of discs Laserdiscs CD I CD ROM computer only discs discs recorded using other broadcast standards i e PAL or SECAM or DVD RAM discs Note Some discs may not be compatible due to laser pickup and disc design How to Load and Play Discs Turn on the TV and your DVD recorder press ON OFF on the remote or press the STANDBY ON button on the DVD recorder 1 Make sure the ...

Page 33: ...ions Picture Scan To search a disc during playback use the SKIP F forward or SKIP R reverse button Each time you press SKIP F or SKIP R your DVD recorder scans the disc faster until you reach the fastest scan speed To resume normal playback press PLAY Note Many DVD titles are programmed to prohibit skipping of warnings or credits in the beginning so that you can t fast forward through them Freeze ...

Page 34: ...to chapters To select a title via the Info Display highlight the Title icon with the right arrow button on the remote control Press the up or down arrow button to go to the next title When you re playing a VCD or an Audio CD use these instructions to go to a different Track Notes You can also use the number buttons on the remote to enter the title track number Many discs only have one title Some D...

Page 35: ...e you selected the disc will play in the default language When you choose an audio language during disc playback you only override the audio language setting in the DVD VCR s Language menu temporarily Some discs are programmed to only allow the audio setting to be changed via the disc s menu If changing audio option via the Info Display doesn t work as described above press DVD MENU and change the...

Page 36: ...u re playing a disc press DISPLAY the Info Display appears 2 Press the left or right arrow button to highlight the Random icon 3 Press the down arrow button until On appears the chapter tracks start playing in random order To switch back to turn off random play highlight the Random icon highlight Off and press ENTER Note The player defaults to Standard Playback whenever you put a new CD into the D...

Page 37: ... other types of converted mp3 files WMA Windows Media Audio is another audio file format developed by Microsoft JPEG files are image files Make sure that they have a resolution of less than 5 megapixels approximately 2MB Note The time taken for the contents of the disc to be displayed varies according to the size and number of JPEG files actually on the disc If nothing is displayed after a few minut...

Page 38: ...s press ENTER the playback options appear Use the up and down arrow buttons to scroll through the options and press ENTER when the desired option appears mp3 file if you press play when a file is highlighted the player begins by playing the selected file then all the files and subfolders contained in the same folder The player then plays the contents of the folders at the same level as the folder cont...

Page 39: ...s HQ High Quality Best quality approx 1 hour recording time per disc SP Standard Play High quality approx 2 hour recording time per disc LP Long Play Good quality approx 3 hours recording time per disc EP Extended Play Normal quality approx 4 hours recording time per disc SLP Super Long Play Basic quality approx 6 hours recording time per disc SEP Super Extended Play Low quality approx 8 hours rec...

Page 40: ... fill the entire screen of your TV This might mean that parts of the picture the left and right edges won t be seen Most discs produced in a widescreen format can t be cropped in this fashion This means the black bars will appear at the top and the bottom of the screen The Audio Video menu DRC Auto TV Display PS Scan Mode Interlace Guardian DRC Auto TV Display PS Scan Mode Interlace Guardian Normal...

Page 41: ...to be enforced the DVD recorder must be locked and the disc you re playing must contain a movie or a title that is rated Unrated Titles Some discs contain titles or movies that don t have a rating assigned to them Sometimes movies you might find the most explicit are unrated However much of the new programming on discs such as interviews with actors and directors is also unrated Additionally the di...

Page 42: ...udio and displays more appropriate profanity free phrases The TVGuardian technology also offers various levels of filtering and adjustable with simple on screen menus TVGuardian Mode Off No filtering Tolerant Filters only the most offensive foul language Moderate Increased standards for language filtering Strict Filters out all common offensive language Word Subset Filtering In addition to the main T...

Page 43: ...d caption decoder If the TV does not have a closed caption decoder replaced phrases may not be displayed Regardless TVG will mute the filtered language TV Menu You can scan all available channels and edit them in the TV menu TV Signal Choose the type of signal you have antenna or cable Automatic Search The unit searches for all available channels CH Skip Channel Skip To add or remove channels from...

Page 44: ... Disc won t eject When you put a disc into the player the player may take up to 15 seconds to read the disc and determine the disc type You won t be able to eject the disc during this time Wait 15 seconds and try again Turn the unit off and on and try it again Try unplugging the AC power cord and plugging it back in Disc won t play Many problems encountered when playing or recording a disc are rel...

Page 45: ...ation and credits at the beginning of a movie you won t be able to This part of the movie is often programmed to prohibit skipping through it Desired angle cannot be changed Most discs don t have the multi camera angle system and some discs only have multiple angles during certain parts of the movie Picture is too tall and thin Change the TV Display in the menu system Go to page 38 for more inform...

Page 46: ... Press PAUSE or PLAY to return to normal playback Time counter disappears during searching This is normal if the tape reaches a section where there is nothing recorded on it Try ejecting the tape and reinserting it Tape won t record Make sure there is a recordable tape in the DVD VCR Make sure the tape s safety tab is intact and has not been removed Timer Recordings Make sure the clock is set and ...

Page 47: ...e sure to remove the disc and turn off the player after use Maintenance of Cabinet For safety reasons when cleaning the cabinet be sure to disconnect the AC power cord from the AC outlet Do not use benzene thinner or other solvents for cleaning Wipe the cabinet with a soft cloth Formation of Condensation Due to sharp changes in temperature and humidity condensation may form if warm air comes in co...

Page 48: ... misuse or neglect A unit that has been modified or incorporated into other products or is used for institutional or other commercial purposes Batteries Units purchased or serviced outside the U S A Product Registration Please complete the online Product Registration on RCA com or complete and mail the Product Registration Card packed with your unit It will make it easier to contact you should it e...

Page 49: ...tion of incidental or consequential damages or limitations on how long an implied warranty lasts so the above limitations or exclusions may not apply to you This warranty gives you specific legal rights and you also may have other rights that vary from state to state If you purchased your product outside the United States This warranty does not apply See your dealer for warranty information ...

Page 50: ...y to which the merchandise is being sent For more information about accessories go on line to www rca com Digital Coaxial Audio cable for Coaxial Audio connection to a compatible receiver 3 feet price 15 95 6 feet price 19 95 Surge Protector part number PS83202C2 price 34 95 Remote Control RCR197DA1 How to Order To place an order by phone have your Visa MasterCard or Discover Card ready and call t...

Page 51: ......

Page 52: ...manual or on the carton This will only add delays in service for your product Thomson Inc 10330 North Meridian Street Indianapolis IN 46290 2006 Thomson Inc Trademark s Registered Marca s Registrada s Printed in China TOCOM 16661010 Visit the RCA website at www rca com THOMSON ...

Reviews: