background image


Changing a Stored Number


Repeat the storage  sequence under 

“Storing a Name and Number in Memory”, 

and use the 

delete 

button to delete the old number before entering the new 

number.


Erasing a Stored Number


1.   Press the 

store 

button.


2.  

Press  the  memory  location  (0-9,  A, B, C) to be  erased.


3.   Press the 

delete 

button

.


Copying Caller ID Memories to User Memory


1.   Press the 

review 


or  


buttons to view the caller number and name 

you want to copy.


2.   Press the 

store 

button.


3.  

Press  the  memory l oc a ti on   (0-9,  A,B,C).  The  number fla sh es   if  there is  a


number already stored in the memory location.


4

.   Press  the 

store 

button to enter the edit mode, and then press  the 

store


button again to edit the name.


NOTE:  You  may  select  a  different  memory  location  by  pressing 

review


or  


buttons  to scroll through  the memories  or press  a 

number key (0-9, A, B, C).


5.   Press the 

store 

button to  confirm  and  save,  and  wait  for three seconds to


exit.


NOTE:  If  the  name  you  want  to  enter  is  longer  than  12  characters, 
only the first 12 characters  will be copied  into memory.


Storing a Redial Number  to Memory


1.   Press the 

store 

button.


2.  

Press  any  key (0-9, or quick call buttons A, B, or C) for the  memory  location.


If there is a number already stored in the memory location it will appear on 
the display. Use the 

review 


or 


button to select a different location.


3.   Press the 

store 

button  again  to confirm.


4

.   Press the 

redial 

button, and then press the 

store 

button again.


5.   Enter name, if necessary, and then press the 

store 

button  to confirm.


NOTE:  If  you  want  to  edit  the  number,  press  the  store  button  again 
within  three  seconds.   When  you  are  finished,  wait  three  seconds to  
exit.


Summary of Contents for 1113

Page 1: ...Call Waiting Caller ID Speakerphone User s Guide Please readthis manual before operating product for the first time Visit the RCA web site at www rca4phones com Model 1113 ...

Page 2: ...al telephone company A plug and jack used to connect this equipment to the premises wiring and telephone network must comply with the applicable FCC Part 68 rules and requirements adopted by the ACTA A compliant telephone cord and modular plug is provided with this product It is designed to be connected to a compatible modular jack that is also compliant See installation instructions for details N...

Page 3: ...low you to maintain uninterrupted service Interference Information This device complies with Part 15 of the FCC Rules Operation is subject to the following two conditions 1 This device may not cause harmful interference and 2 This device must accept any interference received including interference that may cause undesired operation This equipment has been tested and found to comply with the limits...

Page 4: ...le from the U S Government Printing Office Washington D C 20402 Please specify stock number 004 000 00345 4 when ordering copies Notice The changes or modifications not expressly approved by the party responsible for compliance could void the user s authority to operate the equipment Hearing Aid Compatibility HAC This telephone system meets FCC standards for Hearing Aid Compatibility FCC RF Radiat...

Page 5: ...2 Flash 12 Temporary Tone Dialing 12 Speakerphone Basics 12 Location 12 Speakerphone Use 13 Caller ID CID Features 13 CID Summary Screen 13 Receiving and Storing CID Calls 14 Reviewing CID Records 14 Deleting CID Records 14 Dialing Back 14 Setting Up the Caller ID Menu 15 Display Language 16 Contrast 16 Local Area Code 16 Dialing Mode 16 Memory 17 Storing a Name and Number in Memory 17 Changing a ...

Page 6: ...à la norme NMB 003 du Canada IMPORTANT SAFETY INSTRUCTIONS When using your telephone equipment basic safety precautions should always be followed to reduce the risk of fire electric shock and injury to persons including the following 1 Do not use this product near water for example near a bath tub wash bowl kitchen sink laundry tub in a wet basement or near a swimming pool 2 Avoid using a telephon...

Page 7: ...Modular telephone line jack Wall plate Important Installation Information CAUTION Disconnect the phone cord from the wall outlet before installing or replacing the batteries Never install telephone wiring during a lightning storm Never touch uninsulated telephone wires or terminals unless the telephone line has been disconnected at the network interface Use caution when installing or modifying tel...

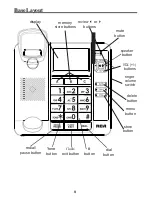
Page 8: ...isplay memory store buttons review or buttons mute button speaker button VOL buttons ringer volume switch delete button menu button store button redial pause button tone button flash exit button button dial button ...

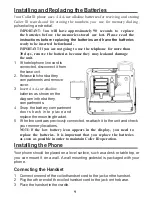
Page 9: ...y compartments and remove cover 3 Insert 4 AA size alkaline batteries as shown on the diagram in the battery compartments 4 Snap the battery compartment doors back into place and replace the mounting bracket 5 If the line cord was previously connected re attach it to the unit and check your memory locations NOTE If the low battery icon appears in the display you need to replace the batteries It is...

Page 10: ... properly installed if you pick up the handset and hear the dial tone Otherwise recheck all installation steps Wall Mounting Your speakerphone can also be mounted on a wall plate not included NOTE To prevent the handset from falling out of the cradle while the phone is hanging on the wall you must rotate the handset hook 180 located on the base See diagram below To detach the desktop pedestal Atta...

Page 11: ...the handset or press the speaker button Wait for a dial tone 2 Dial the telephone number you want to call 3 Replace the handset in the cradle or press the speaker button to hang up Volume You may adjust the handset and speakerphone volume independently with the VOL or buttons Both handset receiver volume level and speakerphone volume level are saved in memory Adjusting the Handset Receiver Volume ...

Page 12: ...such as call waiting Temporary Tone Dialing If you have pulse rotary service and want to access customer calling services such as telebanking and long distance services that require tone dialing you can use this feature to temporarily change from pulse to tone service After dialing the telephone number and connecting to the customer calling service 1 Press and release the tone button 2 When you ha...

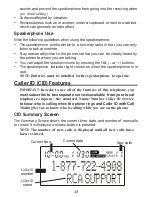
Page 13: ...peakerphone indicator light comes on when the speakerphone is in use NOTE Batteries must be installed for the speakerphone to operate Caller ID CID Features IMPORTANT In order to use all of the features of this telephone you must subscribe to two separate services available from your local telephone company the standard Name Number Caller ID Service to know who is calling when the phone rings and ...

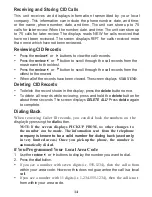
Page 14: ...T END Deleting CID Records To delete the record shown in the display press the delete button once To delete all records while reviewing press and hold the delete button for about three seconds The screen displays DELETE ALL Press delete again to complete Dialing Back When reviewing Caller ID records you can dial back the numbers on the display by pressing the dial button NOTE If the screen display...

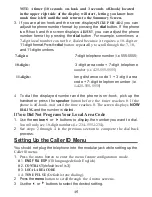
Page 15: ...ode 1 3 digit area code 7 digit telephone number i e 1 425 555 5555 4 To dial the displayed number and the phone is on hook pick up the handset or press the speaker button before the timer reaches 0 If the phone is off hook wait until the time reaches 0 The screen displays NOW DIALING and the number is dialed If You Did Not Program Your Local Area Code 1 Use the review or buttons to display the nu...

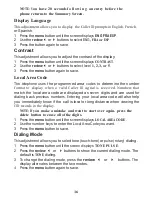
Page 16: ...ved Numbers that match the local area code are displayed as seven digits and are used for dialing back previous numbers Entering your local area code will also help you immediately know if the call is local or long distance when viewing the CID records in the display NOTE If you make a mistake and want to start over again press the delete button to erase all of the digits 1 Press the menu button u...

Page 17: ...d press the store button to save The unit will not dial a phone number in this mode The cursor automatically moves to the text line for name entry 5 Use the number keys to enter the name of the person associated with the telephone number you just entered More than one letter is stored in each of the number keys For example to enter the name BILL SMITH press the 2 key twice for the letter B Press t...

Page 18: ...ent memory location by pressing review or buttons to scroll through the memories or press a number key 0 9 A B C 5 Press the store button to confirm and save and wait for three seconds to exit NOTE If the name you want to enter is longer than 12 characters only the first 12 characters will be copied into memory Storing a Redial Number to Memory 1 Press the store button 2 Press any key 0 9 or quick...

Page 19: ...of numbers such as with frequent calls via a telephone company long distance provider For example Memory location Local access number of long distance company 6 Authorization code ID 7 Long distance phone number 8 1 Pick up the handset or press speaker 2 Press dial button then press number 6 for the memory location 3 Press dial button then press number 7 for the memory location 4 Press dial button...

Page 20: ...n is withheld CALL WAITING Indicates a call is waiting on the line Battery power level is low NO CALLS The caller memory is empty START END You are at the beginning or the end of the Caller ID memory log UNKNOWN CALLER The incoming call does not have Caller ID service or their service area is not linked to yours If the screen displays UNKNOWN CALLER along with a calling number the name information...

Page 21: ...nes are used at once Check the handset receiver or speaker volume Memory Dialing Make sure you entered the numbers correctly into memory General Product Care To keep your phone working and looking good follow these guidelines Avoid putting it near heating appliances and devices that generate electrical noise for example motors or fluorescent lamps DO NOT expose to direct sunlight or moisture Avoid...

Page 22: ...written communication only If the equipment is causing harm to the telephone network the telephone company may require that you disconnect the equipment until the problem is resolved LimitedWarranty What your limited warranty covers Defects in materials or workmanship For how long after your purchase One year from date of purchase Please retain your sales receipt as that will act as your proof of ...

Page 23: ...same or similar model This exchange unit will be shipped to you at no cost What your limited warranty does not cover Customer Instruction Your Owner s Manual provides information regarding operating and install instructions Additional information may be obtained by contacting the retailer Installation and set up service adjustments Batteries Damage from misuse neglect unauthorized repair Products ...

Page 24: ...uential damages or limitations on how long an implied warranty lasts so the above limitations or exclusions may not apply to you This warranty gives you specific legal rights and you also may have other rights that vary from state to state If you purchased your product outside the USA or Canada This warranty does not apply Contact your dealer for warranty information Product Registration Please co...

Reviews: