INSTALLATION, OPERATION AND MAINTENANCE INSTRUCTIONS
SYDNEY
|
MELBOURNE
|
BRISBANE
|
PERTH
|
AUCKLAND
Australia
1300 788 778 www.rba.com.au
|
New Zealand
0800 722 111 www.rbagroup.co.nz
8
RBA1882-100-005
Dual Flush Valve Incl Small Black Mounting Plate
1
x RBA1882-100
'
Nautilus' Flush Valve Assembly
1
x RBA8012-999-003
T2 Controller [2019 version]
1
x RBA8010-999-005
24V AC 2AMP Plug Pack Transformer
2
x RBA8010-999-003
Piezo (3m tail)
1
x RBA1880-999-001
Large Flush Valve Plate
1
x RBA1880-999-002
Recess Kit for Large Flush Valve Plate
6
x RBA1880-999-011
Counter Sink Screws (90° angle m4x25 (0.7) Pitch
Post Torx, Bit Tx15 H:3.1
INSTALLATION, OPERATION AND MAINTENANCE INSTRUCTIONS
SYDNEY
|
MELBOURNE
|
BRISBANE
|
PERTH
|
AUCKLAND
Australia
1300 788 778 www.rba.com.au
|
New Zealand
0800 722 111 www.rbagroup.co.nz
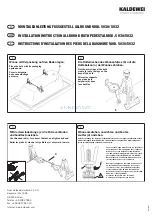
RBA1882-100-003 & -005 Installation
Rough Wall Opening for plate:
85mm W x 38mm H x 25mm D
Note:
When mounting fl ush valve assembly in the ceiling or restricted space, vacuum
breaker must be installed in the vertical plane and consult RBA or a qualifi ed
hydraulic consultant for advice.
•
Fit the fl ush valve in the required position maintaining a minimum 700mm
distance between the outlet of the vacuum breaker and the centre line of the
fl ush pipe connected to the WC pan inlet.
•
Assemble Piezo buttons on to mounting plate. Ensure all components are se-
curely fastened.
•
Mount Piezo plate on the wall with silicone.
FFL
Mi
n
. 70
0
33
5
FFL
40mm
FLUSH PIPE
Mi
n
. 70
0
33
5
73
17


