


23
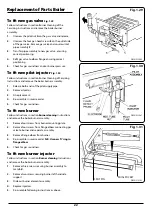
To fit new boiler thermostat
Fig. 1.27 &
Fig. 1.31
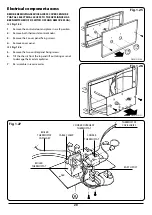
Follow instructions in section
Electrical component access
1.
Remove four screws securing control box.
2.
Remove split pin securing thermostat phials in location.
3.
Remove phials from heat exchanger phial pocket.
4.
Remove electrical leads from thermostat noting
positions.
5.
Remove spindle locknut, from control chassis and
extract thermostat.
6.
Fit replacement.
7.
Re-assemble in reverse order.
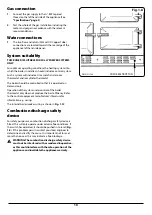
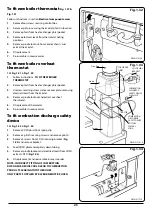
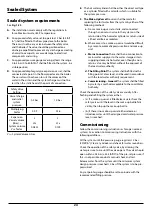
To fit new boiler overheat
thermostat
SEE
Fig. 1.31
&
Fig. 1.32
1.
Follow instructions -
TO FIT NEW BOILER
THERMOSTAT
.
2.
Remove phials from heat exchanger phial pocket.
3.
Unscrew retaining screw I, release cover plate, removing
electrical leads from thermostat.
4.
Remove spindle locknut and extract overheat
thermostat.
5.
Fit replacement thermostat.
6.
Re-assemble in reverse order.
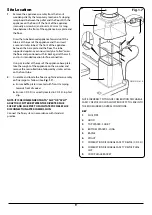
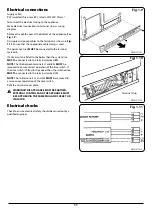
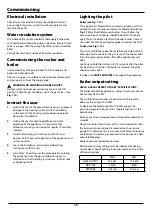
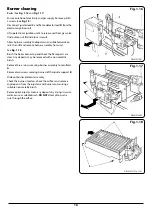
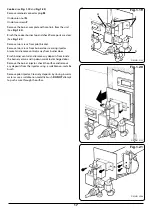
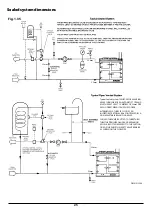
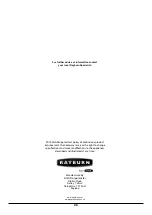
To fit combustion discharge safety
device
SEE
Fig. 1.33
&
Fig. 1.34
1.
Remove CDSD phial from spring clip.
2.
Remove 3 plinth securing screws and remove plinth.
3.
Remove 2 screws from CDSD retaining bracket (
Fig.
1.34
) and remove bracket.
4.
Feed CDSD phial and capillary down tubing.
5.
Remove spindle lockout and electrical leads from CDSD,
extract CDSD (
Fig. 1.34
).
6.
Fit replacement and reassemble in reverse order.
NOTE: INCORRECT FITTING OF COMBUSTION
DISCHARGE DEVICE COULD LEAD TO COMBUSTION
PRODUCTS LEAKING INTO THE ROOM.
ONLY PARTS SUPPLIED BY RAYBURN MUST BE USED.
DESN 512136
DESN 512141 A
Fig. 1.32
Fig. 1.33
Flue Pipe
Hood
Spigot
BOTTOM
SPACERS
LONG
COMBUSTION
DISCHARGE
SAFETY DEVICE
COMBUSTION
DISCHARGE
SAFETY DEVICE
PHIAL CLIP
BAFFLE
CDSD PHIAL
BRACKET
TOP SPACER
SHORT
DESN 511774
Fig. 1.34


