22
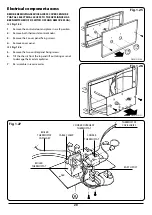
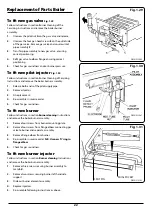
To fit new gas valve
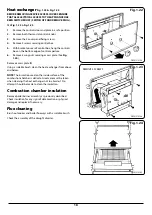
Fig. 1.29
Follow instructions in section Burner Cleaning of the
Servicing Instructions and remove the boiler burner
assembly.
1.
Unscrew the pilot nut
A
on the gas valve and release.
2.
Unscrew the four pan head screws
E
on the outlet side
of the gas valve. Remove gas valve and unscrew inlet
pipe assembly
F
.
3.
Transfer pipe assembly to new gas valve, ensuring
correct positioning.
4.
Refit gas valve to elbow flange ensuring correct
positioning.
5.
Check for gas soundness and set burner pressure
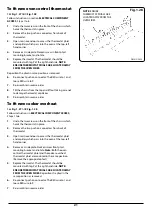
To fit new pilot injector
Fig. 1.30
Follow instructions in section Burner Cleaning of Servicing
Instructions and remove the boiler burner assembly.
1.
Release both ends of the pilot supply pipe.
2.
Remove injector.
3.
Fit replacement.
4.
Re-assemble in reverse order.
5.
Check for gas soundness.
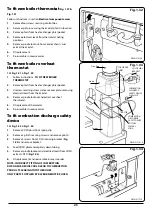
To fit new burner
Follow instructions in section
Burner cleaning
Instructions
and remove the boiler burner assembly.
1.
Remove four screws from burner mounting plate.
2.
Remove four screws from flange elbow connecting gas
valve to burner and separate assembly.
3.
Remove flange elbow from burner.
4.
Re-assemble in reverse order.
N.B. Use new ‘O’ ring in
flange elbow.
5.
Check for gas soundness.
To fit new burner injector
Follow instructions in section
Burner cleaning
Instructions
and remove the boiler burner assembly.
1.
Remove three screws securing burner assembly to
manifold.
2.
Remove two screws securing burner left handside
support.
3.
Slide out burner element assembly.
4.
Replace injectors.
5.
Re-assemble following instructions as above.
Replacement of Parts Boiler
DESN 512963
DESN 512143
DESN 512967
Fig. 1.29
Fig. 1.31
Fig. 1.30
SPLIT PIN
PHIAL POCKET

