pg. 2
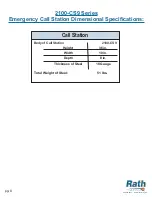
2100-CS9 Series
Parts Listing Provided by Rath:
1. Strobe
2. Solar Panel
3. Battery
4. Rath SmartPhone Emergency Phone
5. Nema electrical box mounted inside call station
6. Voltage regulator
7. 900 MHz transmitter and receiver
8. Torx bit (to loosen security screws)
9. Cable ties
Call Station Installation:
1. Remove 12 security screws from the sides of unit.
2. Remove top cap from unit.
3. Pull front assembly away from back unit.
4. Disconnect the gray Wago connector that connects front plate to Nema Box.
5. If wall mount, mount to wall.
6. If pole mount, attach unit to pole using a secure mounting fastener.
7. Install battery in bottomof call station.
8. Connect the power cables to the battery. Red to positive and black to negative.
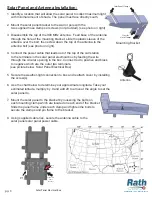
9. Slide the Photocell cover to the proper position on the photocell in
order for the blue light to be lit at the proper time (See drawing below).
10. Reconnect the Wago connectors that attach the front plate to the NEMA box. Secure the front
assembly to the back panel, install the top cap, and reinstall the 12 screws to the sides of the unit.
C O M M U N I C A T I O N S
E M E R G E N C Y
866-850-8854 www.rathsecurity.com
Rath recommends that the call station be mounted so that the push button is less than 48 inches above
the ground to comply with the Americans with Disabilities (ADA) requirements. For ease of installation,
two people should perform the install.
Photocell
Photocell
Cover

