background image

Page 9

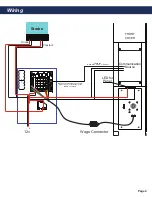
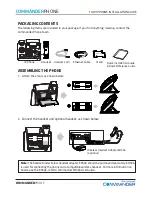
Wiring

Strobe

Phone line

1
4 5
7 8

0

9

6

3

2

Enter

Record

Play / Pause

Stop

*

#

Constant

Strobe

to 900 MHz, Radio, or Cellular 

yr

ett

a

B

Communication

Source

LED for

 Panel

FRON

COVER

Note

:

 If using landline phone, cable 

will just run out of the bottom of the 

NEMA 4 enclousre

-

12v

+

Wago Connector

Summary of Contents for 2100-CLC

Page 1: ...ns com RP8500CL Ver 7 04 21 36 Emergency Call Station Installation Operations Manual 36 Emergency Call Station 2100 CLL Landline 12v Call Station 2100 CLC Cellular 12v Call Station 2100 CLV VoIP 12v Call Station 2100 CLW Wi Fi VoIP 12v Call Station Made in the USA 2 Year Warranty ...

Page 2: ... to remotely assist with site preparation installation and maintenance It is our sincere hope that your experience with us has and will continue to surpass your expectations Thank you for your business The RATH Team N56W24720 N Corporate Circle Sussex WI 53089 800 451 1460 www rathcommunications com Table of Contents Description Safety Guidelines Items Needed Installation Communication Phone Progr...

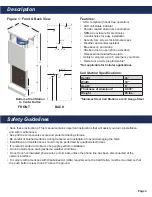
Page 3: ... during installation and with maintenance Keep all the components secure and protected during storage Be careful of finished surfaces during transport and installation to avoid damaging the finish Installation and maintenance should only be performed by qualified electricians It is recommended a minimum of 2 people perform installation Do not install phone during extreme weather conditions Do not ...

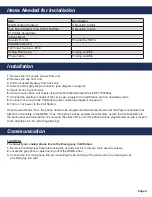
Page 4: ...the front assembly to the back panel and reinstall the 12 screws to the sides of the unit If the phone will be programmed on site proceed to the directions for On Site Programming Installation Communication Page 4 Items Needed for Installation Item Description Wall Mounting Hardware If Mounting to Wall Pole Mount Bracket Part RP7700098A If Mounting to Pole 1 Phillips Screwdriver Voltage Meter Secu...

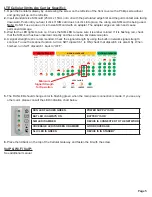
Page 5: ...rectly and has an active 4G data voice plan 4 A signal strength test is recommended Check the signal strength by using the built in network signal strength scanner To use the scanner function turn on SW1 dipswitch 1 to ON check that dipswitch 4 is also ON When finished turn SW1 dipswitch 1 back to OFF 5 The RUN LED should change color to flashing green when the main power connection is made If you...

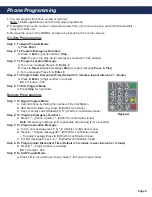
Page 6: ...terval is 1 minute A Press 8 Enter 3 digit number in minutes Ex 2 minutes 002 Step 5 To Exit Program Mode A Press Stop for 3 seconds Step 1 To Begin Program Mode A Call into phone by dialing the number of the Call Station B After first simulated ring Press Wait for 4 tones C Key in security code Default is 1111 Wait for confirmation tones Step 2 To Program Emergency Numbers A Press 1 Phone number ...

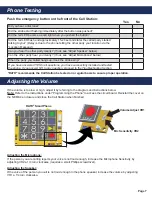
Page 7: ...proceed to the Troubleshooting Section Push the emergency button on the front of the Call Station Yes No RATH recommends the Call Station be tested on a regular basis to ensure proper operation Adjusting the Volume Volume Adjust VR1 Mic Sensitivity VR2 If the volume is too low or high adjust it by referring to the diagram and instructions below Note Refer to the instructions under Programming the ...

Page 8: ...em is not providing a disconnect signal Contact the appropriate party to make sure the disconnect signal is provided When the called party hangs up busy signal is heard through speaker Phone company or phone system is not providing a disconnect signal Operator needs to press to disconnect the call Disconnect time on phone needs to be lowered see page 6 Call Station appears non functional Strobe do...

Page 9: ... 3 2 Enter Record Play Pause Stop Constant Strobe to 900 MHz Radio or Cellular y r e t t a B Communication Source LED for Panel FRONT COVER Note If using landline phone cable will just run out of the bottom of the NEMA 4 enclousre 12v Wago Connector ...

Reviews: