58
NB!
When configuring the MyFire app you will need the
SSID key and access code for the wireless network
(Wi-fi).
***
There are more detailed configuration and guid-
ance instructions at www.myfireapp.com
***
START-UP CONFIGURATION
1.
Download the MyFire app from the Apple App Store
or Google Play Store.
2.
Touch the screen to start configuration of the app.
3.
Choose language, temperature (C° or F°) and time
format (12 or 24 hours).
REGISTRATION
NOTE:
You must register the appliance before you can
log in. Registration is a one-off procedure.
1.
Complete data and accept our Privacy Policy.
2.
Touch "OK" in the pop-up message.
3.
Press on the link to confirm verification of the e-mail
address.
4.
Now you will be shown a message that the MyFire
app is registered.
5.
Go back to the app.
LOGIN
1.
Complete the access code for registration.
2.
Accept ”Terms and Conditions”.
3.
Press the ”Login” button
CONNECT THE SMART UNIT TO THE NEW MYFIRE
WI-FI BOX
1.
Touch the icon
2.
A message tells you that you need to enter the Wi-Fi
settings for the SMART unit.
3.
Touch myfire_Wifi-Box_<number>.
4.
Enter the access code ”MYFIREPLACE”
CONNECT THE MYFIRE WI-FI BOX TO THE WI-FI
ROUTER
NOTE:
The connection process can take between
1-10 minutes. Once the connection has been made,
a pop-up message will tell you to enter the Wi-Fi
settings for the SMART unit.
1.
Select a name for your stove.
2.
Write the name (SSID) on your Wi-Fi router.
3.
Write the access code for your Wi-Fi router.
4.
Press the "Connect" button.
CONFIGURATION OF THE MYFIRE APP
NB!
In order to connect the MyFire Wi-Fi box to the Wi-Fi
router (home network) you need to ensure:
•
That a home network is available.
•
That the name and access code of the home
network are correct.
•
That the Wi-Fi router's SSID key is not hidden.
•
That the home network's signal is within range.
•
That the Wi-Fi router supports the UDP protocol
(User Datagram Protocol).
CONFIRM THE SETTINGS FOR THE FIREPLACE
1.
After confirming the settings for fireplace, touch the
"Finish" button.
A LIST OF CONNECTED MYFIRE WI-FI BOXES IS
DISPLAYED
1.
Touch the "Start App" button to finish the installa-
tion and configuration process.
The start screen is displayed and the MyFire app is
ready to use.
NB!
Once the MyFire Wi-Fi box and MyFire app have
been configured, the time should be configured in
the settings in the MyFire app.
NB!
The active unit (Symax handset or SMART unit) is
the last one used. The exception is however if the
non-active unit is used to change the light, ventilator
or AUX. The non-active unit makes the changes but
the active unit remains unchanged if it is in Thermo-
static, Program or Eco Mode. If a Profile contains a
Thermostatic program or Eco setting, this will also
contribute to the active unit remaining active.
NB!
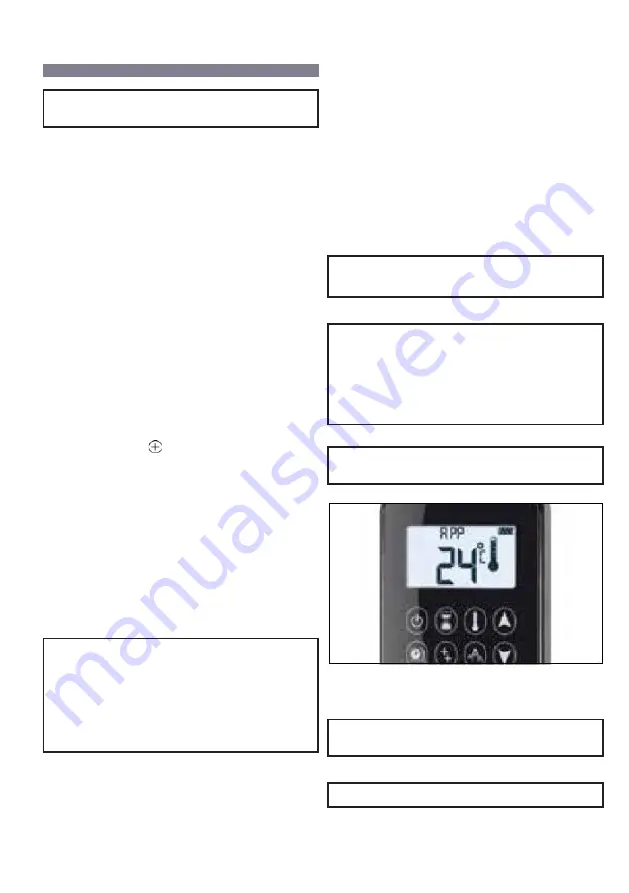
If Thermostatic, Program or Eco mode are activated
using the app, the corresponding icon and "APP" are
displayed on the handset (see figure 25)
Figure 25: The app is connected (in Thermostatic
mode)
NB!
When the motor is running, no information is
exchanged between sender and receiver. Synchroni-
sation takes place once the motor has stopped.
NB!
Room temperature data is transferred by the handset
during synchronisation.
CONNECT SMART UNIT TO MYFIRE WI-FI BOX
NOTE:
Once the connection has been made a pop-up
message will tell you to enter the Wi-Fi settings for
the SMART unit.
1.
Touch the "OK" button if this is correct.
UK
Summary of Contents for NEXO 100 Classic Gas
Page 1: ...1 POSITIV N E X O G A S GB UK ...
Page 34: ...34 ceramic Logs Log 1 Log 2 Log 3 Log 4 Log 6 Log A Log B UK Log 5 ...
Page 36: ...36 4 3 5 Log 3 Log 4 Log 5 UK ...
Page 37: ...37 6 A B Log 6 Log A Log B UK ...
Page 50: ...50 UK ...
Page 51: ...51 UK ...
Page 56: ...56 UK ...
Page 85: ...1 2 3 4 5 NEXO Gas 100 120 140 160 185 ...
Page 86: ...86 1 2 3 4 5 8 6 9 8 7 10 NEXO G Gas 100 120 140 160 185 ...
Page 87: ...87 ...


