


89
ESP-LXME Controller
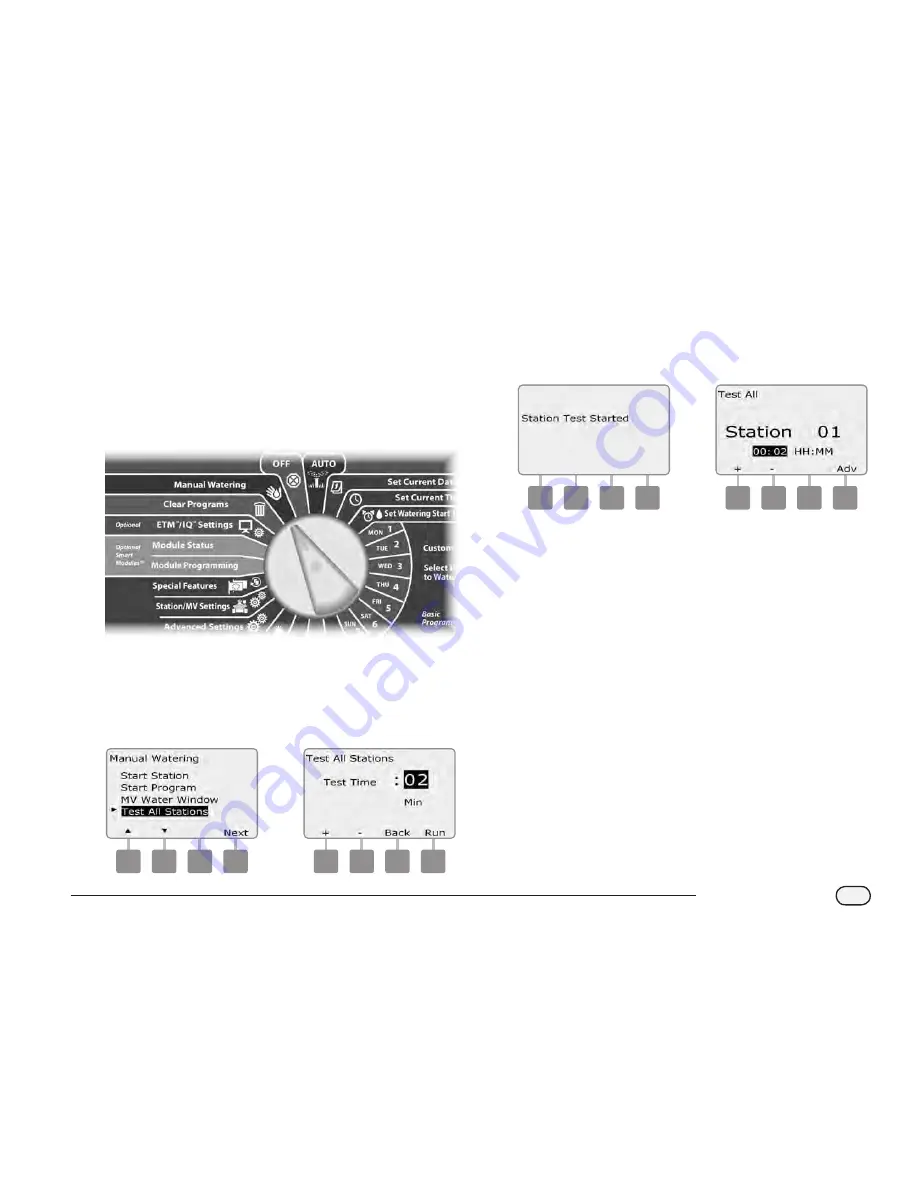
Test All Stations
You can test all stations connected to your controller by running each
of them in sequence.
Sometimes this is useful after installation, for general maintenance or
as a first step in troubleshooting your system.
b
b
NOTE:
Only stations with programmed run times are included in
the Test All Stations operation.
b
g
Turn the controller dial to Manual Watering.
A
The Manual Watering screen appears. Press the Down Arrow
button to select Test All Stations; then press Next.
B
The Test All Stations screen appears. Press the + and – buttons to
adjust the Test Run Time (adjustable from 1 to 10 minutes) per
station; then press Run.
1
2
C
A confirmation screen appears.
D
Once Run is pressed, stations can be monitored and advanced by
turning the dial to the AUTO position and using the Adv button.
Press the + and – buttons to increase or decrease Run Time
minutes for the current station.
3
4
Summary of Contents for ESP-LXME
Page 1: ...ESP LXME Controller Installation Programming Operation Guide...
Page 6: ...this page intentionally left blank...
Page 18: ...12 ESP LXME Controller this page intentionally left blank...
Page 36: ...30 ESP LXME Controller this page intentionally left blank...
Page 82: ...76 ESP LXME Controller this page intentionally left blank...
Page 98: ...92 ESP LXME Controller this page intentionally left blank...