background image

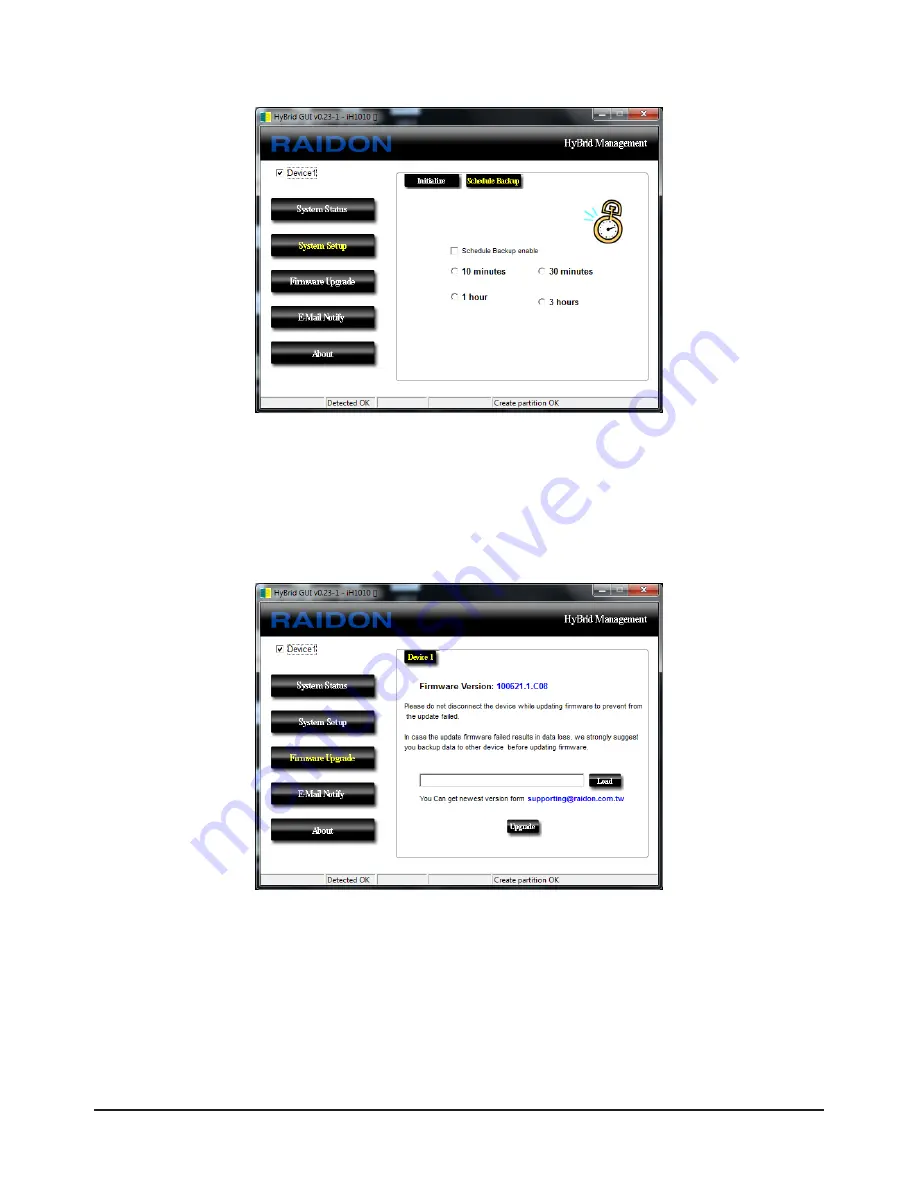
2. Schedule Backup: Three manual options for scheduled backup time which can be set to 10 minutes,  

    30 minutes, 1 hour, or 3 hours. The default is set as “real-time” backup.

3.3 Firmware Upgrade

If necessary, the upgrades will be made through this option, upgrading firmware without technical 

support confirmation may cause your system unable to operate normally or malfunction. If the system 

operates in normal condition, we are strongly suggesting that not to upgrade the existing firmware. For 

any questions on firmware upgrades, please first contact the staff of technical support from 

Raidon Technology Inc.

 or e-mail us at: 

[email protected]

.

GUI Function Introduction (Windows Only)

  13

Summary of Contents for InTANK HyBrid RunneR iH1010-2S-S2

Page 1: ...InTANK Series HyBrid RunneR iH1010 2S S2 User Manual v 1 0 July 2010 ...

Page 2: ...fication or update of related information If you have any questions on RAIDON products or need the latest product information user manual or firmware please contact us at supporting raidon com tw and we will get back to you as soon as possible NOTE RAIDON Technology Inc only provides technical support and service to RAIDON direct customers For end users or non direct customers please contact your ...

Page 3: ...p of iH1010 and Drive Device 6 1 5 Precautions before Usage 8 Chapter 2 HyBrid Function Introduction 9 2 1 With Performance of SSD and Capacity of HDD 9 2 2 Removable SSD Design 10 2 3 Recover to New SSD 10 Chapter 3 GUI Function Introduction Windows Only 12 3 1 System Status 12 3 2 System Setup 12 3 3 Firmware Upgrade 13 3 4 E mail Notify 14 3 5 About 14 ...

Page 4: ...sure that the following items are contained in the package Item Qty iH1010 2S S2 Device 1 Quick Installation Guide 1 CD 1 Accessory Kit 1 Please make sure related accessories and product body are not missing or damaged For any questions please contact local distributor or retailer from your purchase for further assistance 1 2 LED Instruction Status LED LED Status Power on Power LED Blue Lights On ...

Page 5: ...before closing the front panels 3 Set the function mode to Clear Mode and connect DC cable SATA 15 Pin Then power on iH1010 to create new partition and wait for 30 seconds the partition will be ready when the LED of both SSD and HDD blink in blue red alternately finally power off the iH1010 4 Set the function mode to Hybrid Mode and Install device into one of the CD ROM bays with screws from the a...

Page 6: ... installation completed Insert the product CD from the package into your CD ROM and locate HyBird GUI exe file from the CD then double click to execute GUI program After login to GUI click on System Setup Initialize Setting to initial the drives Once the message Auto partition completed appears please re booting your computer The initialize setting is not necessary when you already finished the pa...

Page 7: ... and you should find the newly added drives 3 Enter Disk Management and initialize the newly added drives then proceed with format to each drives with desired file system type and device will be ready to use upon the format is completed Product Introduction 7 ...

Page 8: ...nneR iH1010 Drive letters may vary from different system configurations please refer to your system settings accordingly 1 5 Precautions Before Usage 1 Please make sure the capacity of HDD is bigger than SSD s 2 Before exchanging or replacing the existing SSD HDD please confirm the capacity of the replacement drive is equivalent or bigger than the original drive 3 For normal operation of iH1010 pl...

Page 9: ... and Capacity of HDD NOTE 1 Please make sure the capacity of HDD is bigger than SSD 2 How to calculate the capacity of disk volumes Eg Capacity of SSD 80GB Capacity of HDD 120GB Capacity of Disk A 80GB Capacity of Disk B 120GB 80GB 40GB HyBrid Function Introduction 9 ...

Page 10: ...nserted 2 3 Recover to New SSD In the event of SSD failure simply replace with a new SSD to iH1010 to recover from the backup sector of HDD to a new SSD via GUI 1 In the event of SSD failure GUI will indicate with light gray text as the diagram below At this time data access will proceed through HDD in order to retain the performance of SSD please replace failed SSD with a new one 2 After replacin...

Page 11: ...o rebuild the data in the new SSD if you click OK HDD will recover from the saved data of backup sector to the new SSD Before proceeding please make sure that the capacity of new SSD is bigger than the original one HyBrid Function Introduction 11 ...

Page 12: ...ndition of SSD HDD 3 2 System Setup 1 Initialize Click on Setting to proceed with auto partitions please reboot once the partitions is done for further access of the new partitions This function will erase all data stored in the SSD HDD Caution this function is used only for resetting the HyBrid all of the existing data will be erased when the partition setting is done 12 GUI Function Introduction...

Page 13: ...ption upgrading firmware without technical support confirmation may cause your system unable to operate normally or malfunction If the system operates in normal condition we are strongly suggesting that not to upgrade the existing firmware For any questions on firmware upgrades please first contact the staff of technical support from Raidon Technology Inc or e mail us at supporting raidon com tw G...

Page 14: ...is function allows notification of SSD HDD failure SSD HDD movement and other information via e mail regularly 3 5 About Indicates the version of GUI and other related information 14 GUI Function Introduction Windows Only ...

Reviews: