31
7.
Battery
Always make sure the batteries are fully charged before using the MultiRAE. Three battery options are
available for the MultiRAE (PGM 62x6/62x8):
1.
Standard duration rechargeable Li-ion battery (PN: M01-3051-000)
2.
Extended-duration rechargeable Li-ion battery delivering 50% more runtime than the standard
battery (PN: M01-3056-000)
3.
Alkaline battery pack for four standard AA-sized batteries (PN: M01-3052-000)
Its standard or extended-duration batteries are charged inside the instrument by placing the MultiRAE in
its cradle or using the Travel Charger. Contacts on the bottom of the instrument meet the cradle’s contact
pins, transferring power.
Note:
Before setting the MultiRAE into its MultiRAE Desktop Cradle or attaching its Travel Charger,
visually inspect the contacts to make sure they are clean. If they are not, wipe them with a soft, dry cloth.
Do not use solvents or cleaners.
WARNING
To reduce the risk of ignition of hazardous atmospheres, recharge, remove or replace the battery
only in an area known to be non-hazardous
!
Do not mix old and new batteries or batteries from
different manufacturers.
6.3 Charging With The MultiRAE Desktop Cradle
Follow this procedure to charge the MultiRAE:
1. Plug the AC/DC adapter into the MultiRAE’s Desktop Cradle.
2. Plug the AC/DC adapter into the wall outlet.
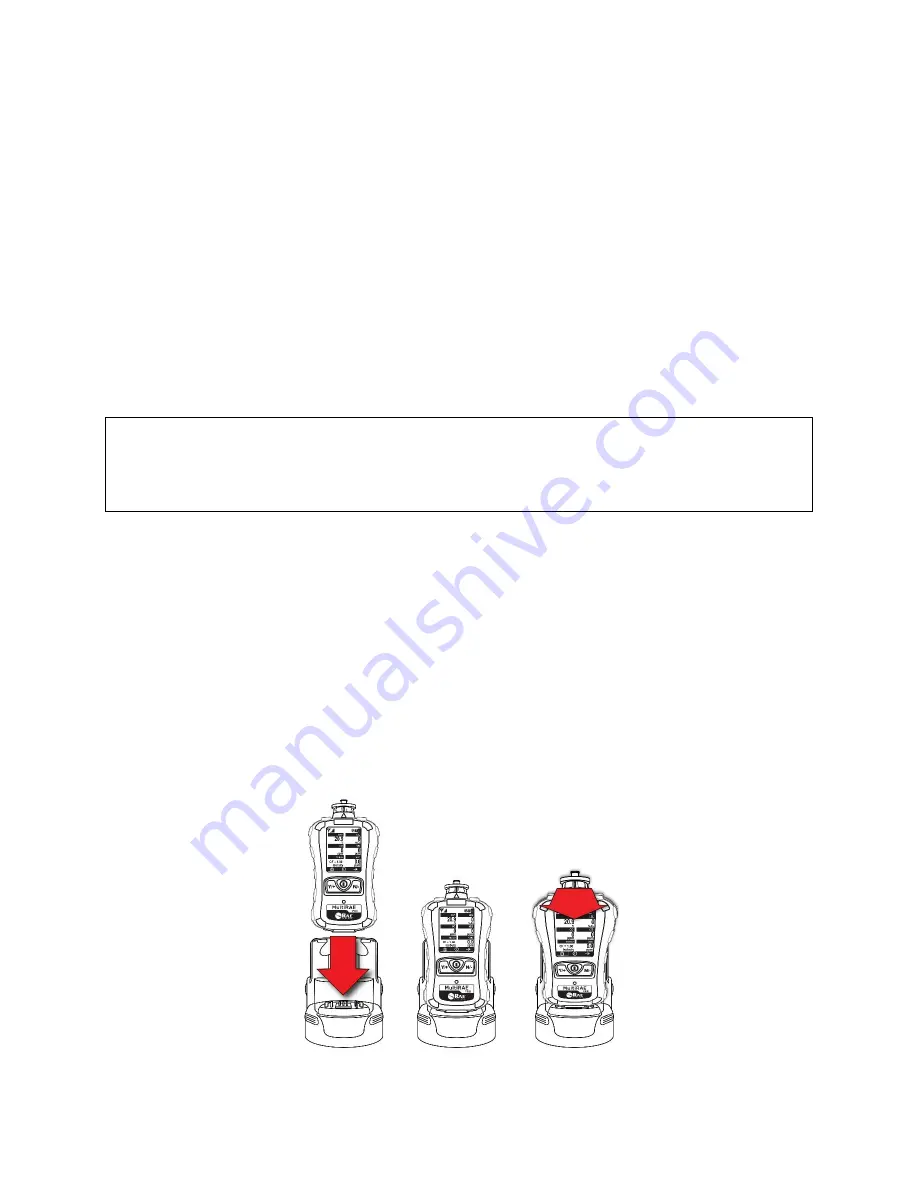
3. Place the MultiRAE into the cradle (make sure the bottom of the instrument and the alignment
pins on the cradle mate properly) and press down until it is locked in place.
The MultiRAE begins charging automatically. The LED in the cradle should glow red to indicate
charging. When charging is complete, the LED in the cradle glows green.
To remove the MultiRAE from the Desktop Cradle, tilt it toward you until it releases, and then lift it up.
Next, put the plug from the power supply into the jack on the side of the Desktop Cradle:
Press down until
MultiRAE is seated
firmly in the cradle
Release the
MultiRAE by
tilting it forward
and lifting


