


Configuring Radiant POS terminals
9
Configuring the P1515/P1520 Payment Guard MSR
If you are setting up a P1515 or a P1520 POS terminal with a Payment Guard MSR
(available as of July 1, 2010), follow these steps to configure the MSR:
1. Download
the
RadUSerialMSR1-0-0-1.zip
file from the Support area of the CounterPoint
Web site (
archive to a temporary directory.
2. Browse to the directory to which you extracted the
RadUSerialMSR1-0-0-1.zip
archive
and double-click
Setup.exe
to install the Payment Guard MSR driver.
3. In the directory to which you extracted the
RadUSerialMSR1-0-0-1.zip
archive, double-
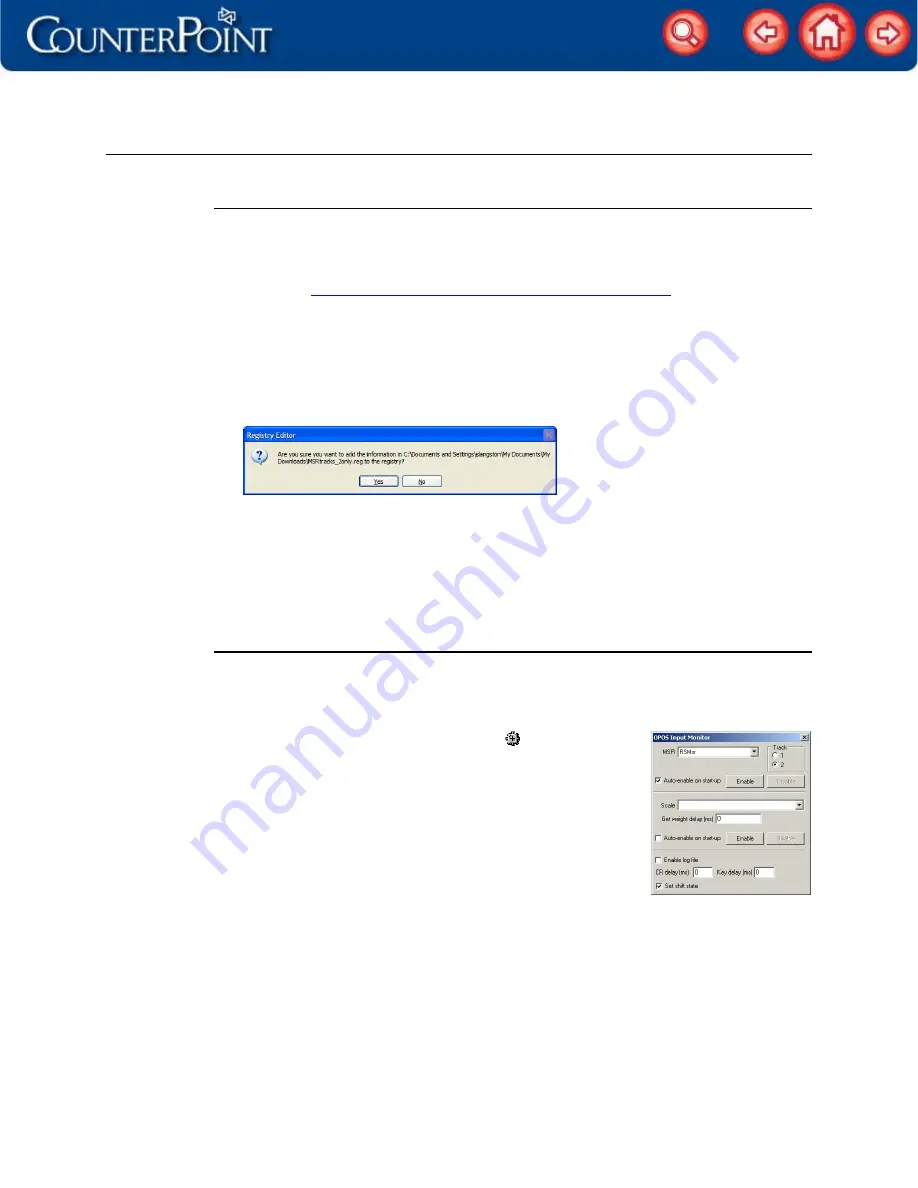
click the
MSRtracks_2only.reg
file, and then click
Yes
on the
Registry Editor
dialog to
update the Windows registry with the track settings for the Payment Guard MSR.
4. Click
OK
to close the
Registry Editor
dialog.
5. In CounterPoint, select
Setup > Point of Sale > Registers
, specify the
Register number
for
your POS terminal, and then proceed to the third
Registers
screen.
6. Enter
1520
in the
Device code
field for the
Card reader
device and enter COM5 in the
corresponding Device ID field.
Configuring the P1520 keyboard-transparent MSR
If you are setting up a P1520 POS terminal with a keyboard-transparent MSR (available
before July 1, 2010), follow these steps to configure the MSR:
1. Double-click
OPOSim.exe
in the
Startup
directory to start the OPOS Input Manager.
2. Right-click
the
OPOS Input Manager
icon (
) in the Windows
system tray and select
Options
to display the
OPOS Input
Manager
window.
3. Select
RSMsr
from the
MSR
list, and then select the
Track
you want to read.
NOTE:
If you are processing debit cards, select track
2
.
4. Select
the
Auto-enable on start-up
check box, and then click
the
Enable
button.
5. Close
the
OPOS Input Manager
window.
6. In CounterPoint, select
Setup > Point of Sale > Registers
, specify the
Register number
for
your POS terminal, and then proceed to the third
Registers
screen.
7. Enter
1520
in the
Device code
field for the
Card reader
device.
NOTE:
Do not specify a
Device ID
for the
Card reader
device.
Your POS terminal is ready to use! Start
Ticket Entry
or
Touchscreen Ticket Entry
and enter
some sample tickets to try out each device. If you encounter any problems with your
devices, test each device in
Setup / Point of Sale / Device codes
.


