background image

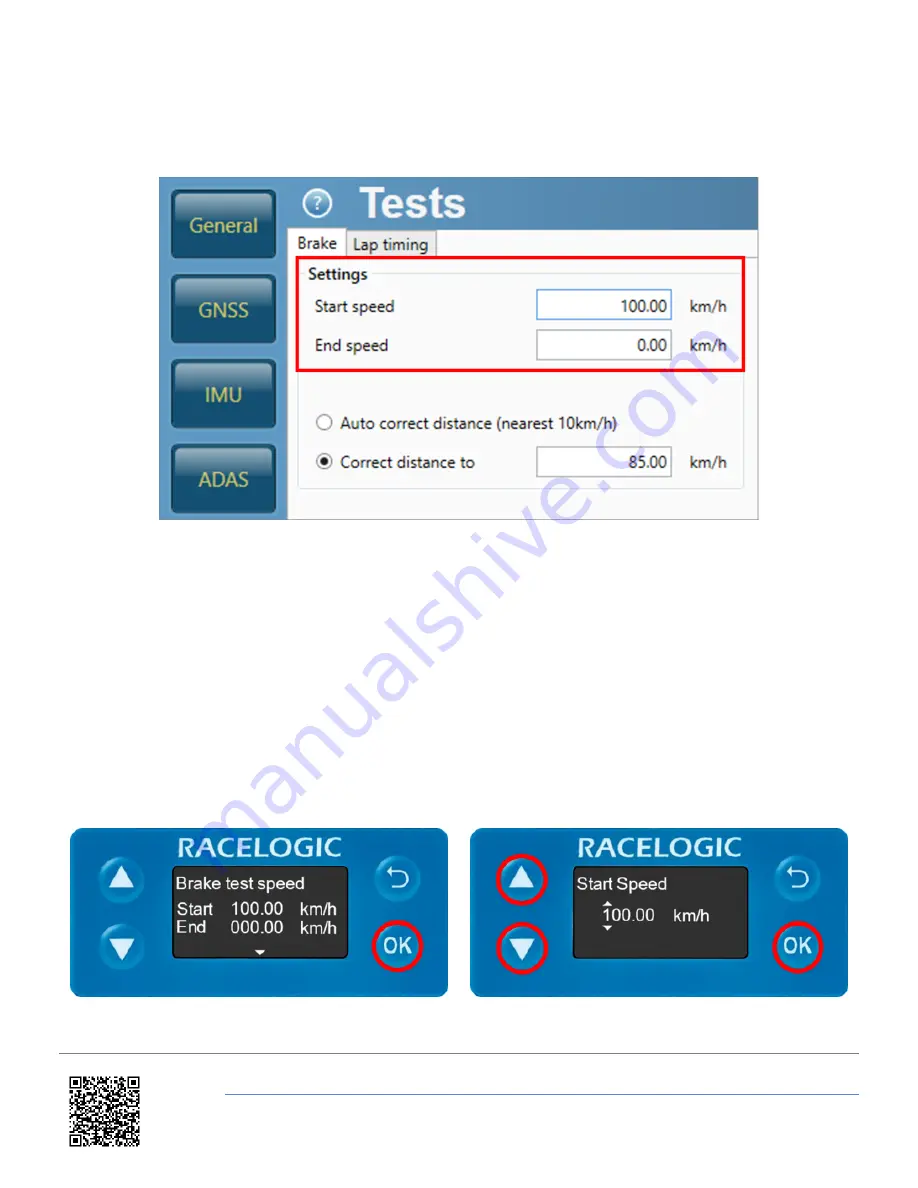
4. Select the '

Tests

' menu and then the '

Brake

' tab.

5. Choose a braking speed range by setting a '

Start speed

' and '

End speed

' (set as 100 km/h and 0 km/h by

default).

6. Select '

Write to unit'

to save the settings.

Front Panel

1. Press the '

OK

' button to enter the menu, navigate to '

Tests

' using the '

Down

' arrow and then press the '

OK

'

button.

2. Press the '

OK

' button again to enter the '

Brake test speed

' menu.

3. Use a combination of the '

Up

' and '

Down

' arrows and the '

OK

' button to enter the Start and End speeds (set

as 100 km/h and 0 km/h by default).

https://en.racelogic.support//Product_Info/Sensors/VBOX_3iS/Knowledge_Base/Using_VB3iS_for_Brake_Stop_Testing

2

Summary of Contents for VB3iS

Page 1: ...o ensure VB3iS is optimally configured for brake stop testing please follow the instructions below Brake Stop Test Setup Before stop testing commences ensure that the VB3iS unit is correctly configure...

Page 2: ...Press the OK button to enter the menu navigate to Tests using the Down arrow and then press the OK button 2 Press the OK button again to enter the Brake test speed menu 3 Use a combination of the Up a...

Page 3: ...computer using the supplied loom connect an RLCAB001 cable to the CONFIG lead and connect the serial plug to the computers serial port this can be done via a serial USB convertor if required 3 Open V...

Page 4: ...o Digital I O using the Down arrow and then press the OK button 2 It will display whichever mode has been previously set 3 To change the setting press the OK button then select Brake Trigger using the...

Page 5: ...ult in an incorrect braking distance Wheel speed input can be Disabled via the VBOX Setup Software the Front Panel of the unit or using the VBOX Manager VBOX Setup Software 1 Ensure VB3iS is powered 2...

Page 6: ...e via the VBOX Setup Software the Front Panel of the unit or using the VBOX Manager More information on Dynamic Modes is available here VBOX Setup Software 1 Ensure VB3iS is powered 2 Connect VB3iS to...

Page 7: ...NSS and press the OK button 2 Navigate to Dynamic Mode using the Up and Down arrows It will display whichever mode has been previously set 3 To change the setting press the OK button then select High...

Page 8: ...ware 1 Ensure VB3iS is powered 2 Connect VB3iS to a computer using the supplied loom connect an RLCAB001 cable to the CONFIG lead and connect the serial plug to the computers serial port this can be d...

Page 9: ...d correctly 9 Select Write to unit to save the settings Front Panel 1 Press the OK button to enter the menu navigate to IMU using the Down arrow and then press the OK button 2 Press the OK button agai...

Page 10: ...enter the menu Use a combination of the Up and Down arrows and the OK button to enter the measured ahead behind right left and above below offset values more information on this is available here 6 If...

Reviews: