background image


race result AG  


Joseph-von-Fraunhofer-Straße 11, 76327 Pfinztal  


   Germany 

+49 (721) 961 409 01    


[email protected] 

Cleaning instructions 


The rubber rollers inside the Chip2Go can collect dust over time which in return can 
lead to feeding issues. In this case the machine can be easily cleaned. For this 
purpose we include a brush with every Chip2Go. 

To do so put the machine next to the edge of a table and power it up. Remove any 
tags that may still be in the machine. 
Wet the brush slightly with some water or -in case of very greasy/oily dirt- some 
rubbing alcohol. The brush however must not be soaking wet in ordert o prevent any 
liquid from getting inside the machine. 
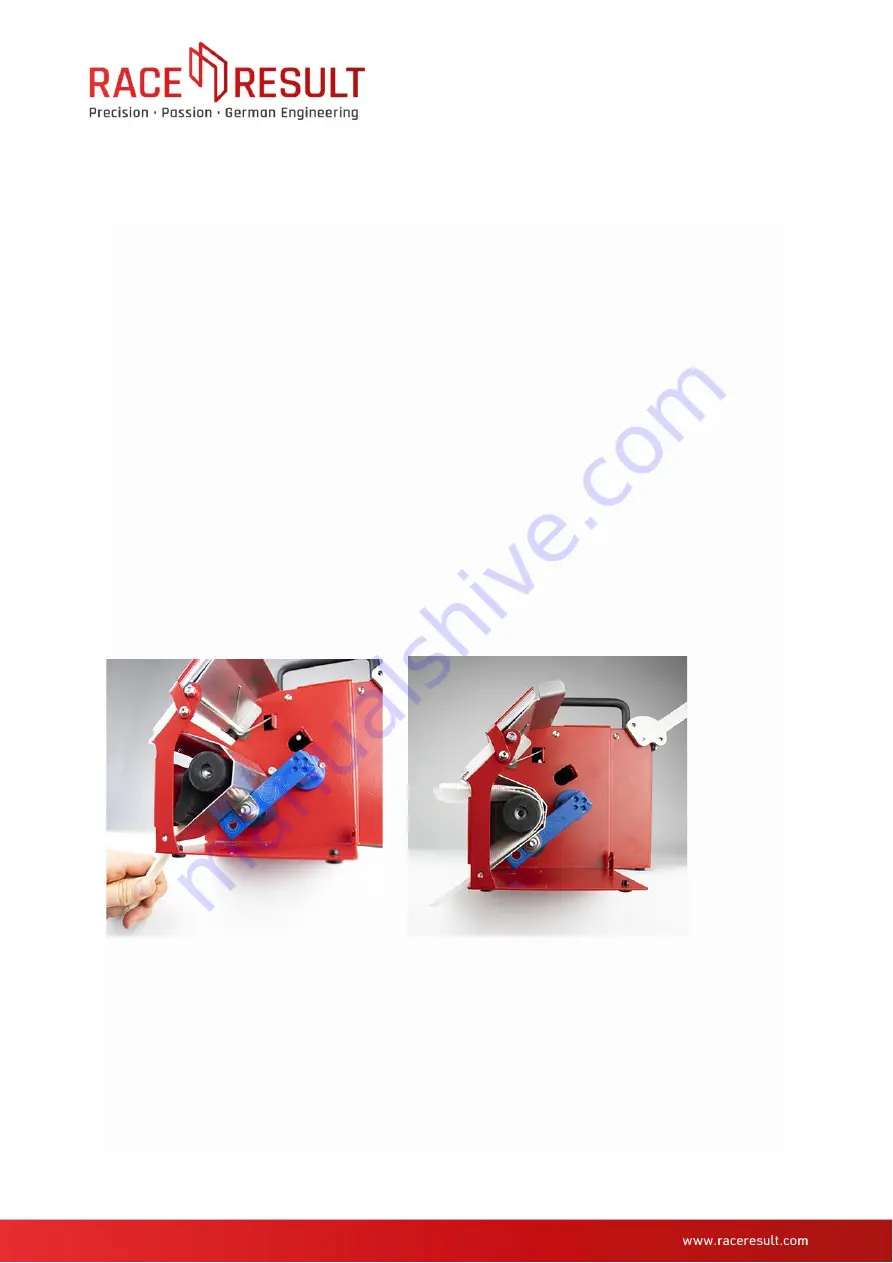
Insert the brush into the lower slot as shown in the picture below. Putting it into the 
upper slot might cause it to be pulled into the machine and damaged in the next step. 


Press the „feed“ button on the touchscreen so the rollers start spinning. Push the 
brush against the rollers and slightly scrub left and right. Repeat the procedure a 
couple of times depending on the amount of dirt and clean the brush in between. 


The machine does not need to be disassembled. The picture is just to show how the 
brush is to be inserted. 

If you need to use the machine immediately after cleaning you can let a paper towel 
drive through the machine several times to dry the rollers. Do not try to hold the 
paper towel with your hands since this might cause the towel to rip an get stuck in the 
machine. 


Summary of Contents for Chip2Go

Page 1: ...ese and will program either a single tags or two identical tags according to the roll System Setup Screw in the power cable to the rear of the unit and the Chip2Go will power on automatically Chip2Go...

Page 2: ...rcode Scanner Configuration When using the barcode scanner for the first time it is necessary to scan the included QR code in order to set the scanner s configuration to correctly work with Chip2Go ma...

Page 3: ...supported this also includes the mount to attach to the unit To use an external input press Switch Mode and select external scanner keypad Simply enter the desired number with the keypad and press en...

Page 4: ...an be entered in different ways different methods should be separated by a new line Simple number entry e g 1 Number range e g 1 100 Comma separated numbers e g 1 2 3 To use the chip file simply inser...

Page 5: ...to Update When running firmware is 0 9 9 or newer the stick with the update must be inserted prior to boot and the machine will ask you whether to update or not After installing the update your Chip2...

Page 6: ...liquid from getting inside the machine Insert the brush into the lower slot as shown in the picture below Putting it into the upper slot might cause it to be pulled into the machine and damaged in the...

Page 7: ...be determined by turning the equipment off and on the user is encouraged to try to correct the interference by one or more of the following measures Reorient or relocate the receiving antenna Increase...

Reviews: