

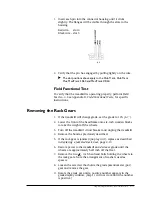


16. Calibrate the grade potentiometer (see
Calibration Procedures
at end of chapter).
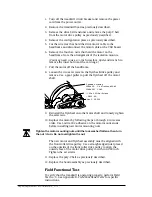
17. Test the treadmill grade. Verify that:
a. it operates over the full range of 0-15%.
b. there is no binding when it moves up or down.
c. the grade motor chain is aligned correctly. A popping
sound in the chain indicates that it is misaligned.
Field Functional Test
To verify that the treadmill is operating properly, perform Field
Test No. 4. See Appendix D,
Field Functional Tests,
for specific
instructions.
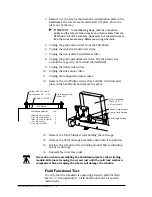
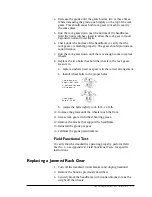
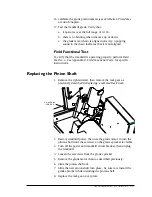
Replacing the Pinion Shaft
1. Remove the right siderail, then remove the rack gear as
previously described in
Replacing a Jammed Rack Gear
.
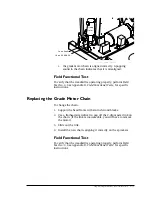
2. Restore treadmill power, then use the grade motor to turn the
pinion shaft until the setscrew on the grade sprocket is visible.
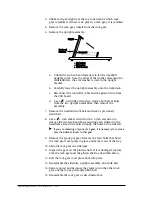
3. Turn off the power and treadmill circuit breaker, then unplug
the treadmill.
4. Loosen the setscrews from the grade sprocket.
5. Remove the grade motor chain as described previously.
6. Slide the pinion shaft out.
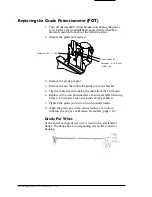
7. Slide the new pinion shaft into place: be sure to reinstall the
grade sprocket while installing the pinion shaft.
8. Replace the rack gear cover plate.
Pinion Shaft
(13044-001)
Repair/Replacement and Calibration 4-21
Summary of Contents for ClubTrack
Page 3: ......
Page 102: ......
Page 103: ......
Page 104: ......
Page 105: ......
Page 106: ......
Page 107: ......
Page 108: ......
Page 109: ......
Page 110: ......
Page 111: ......
Page 112: ......
Page 113: ......
Page 114: ......
Page 115: ......
Page 116: ......
Page 117: ......
Page 118: ......
Page 119: ......
Page 120: ......
Page 121: ......
Page 122: ......
Page 123: ......
Page 124: ......
Page 125: ......
Page 126: ......
Page 127: ......
Page 128: ......
Page 129: ......
Page 130: ......
Page 131: ......
Page 132: ......
Page 133: ......
Page 134: ......
Page 135: ......
Page 136: ......
Page 137: ......
Page 138: ......
Page 139: ......
Page 140: ......
Page 141: ......
Page 142: ......
Page 143: ......
Page 144: ......
Page 145: ......
Page 146: ......


